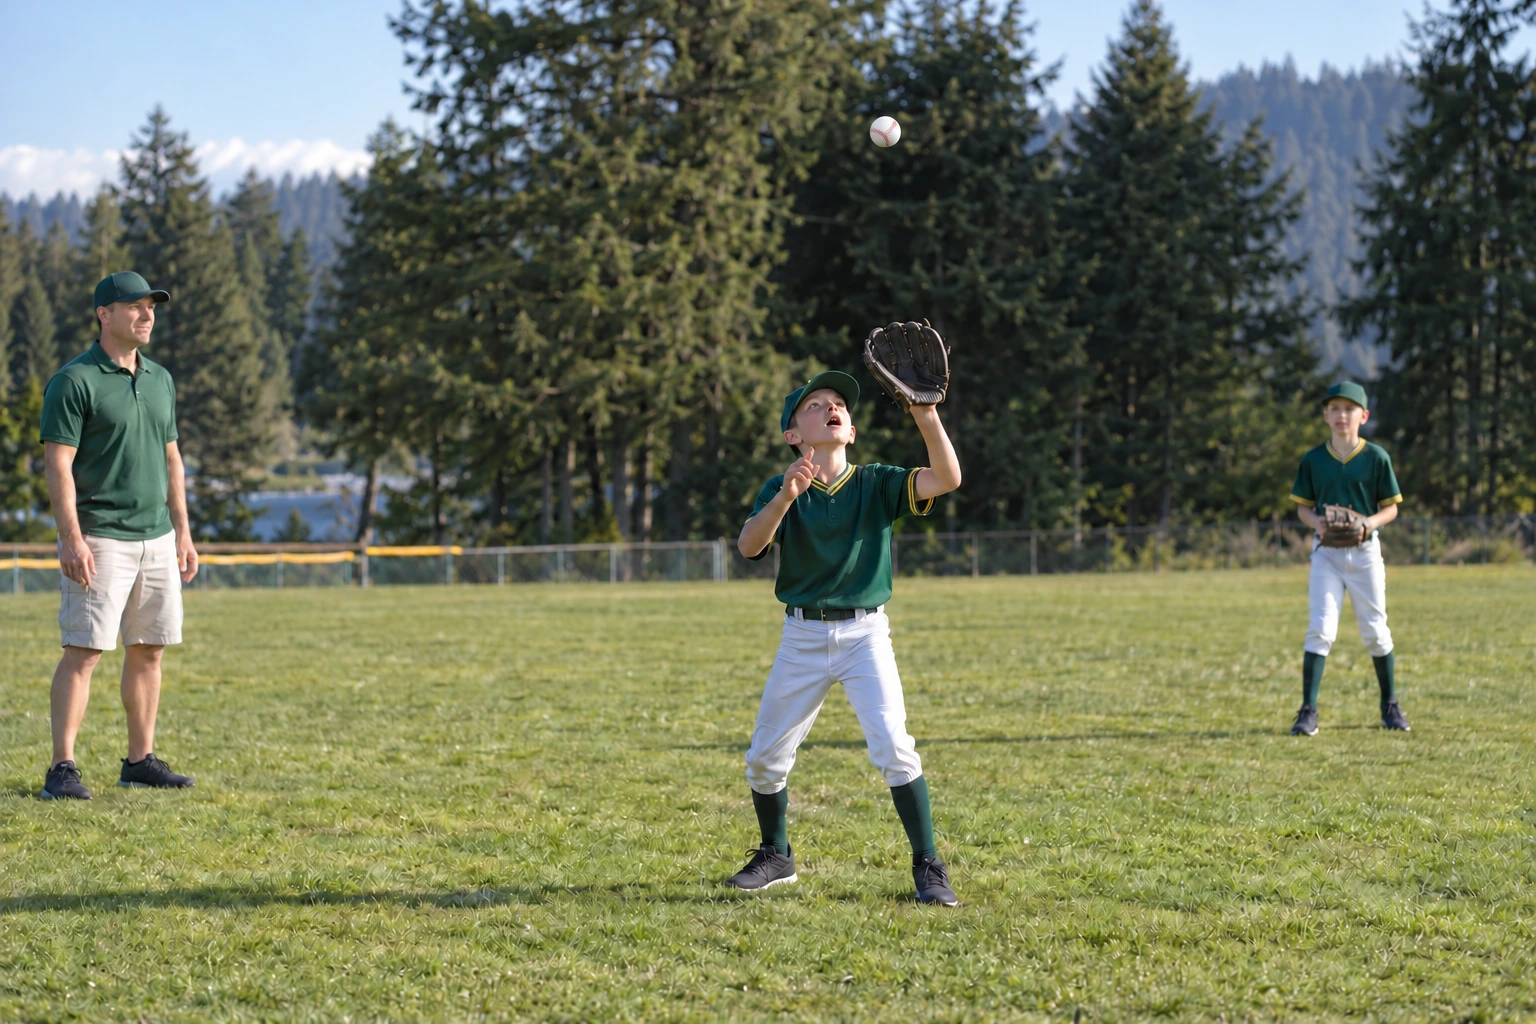
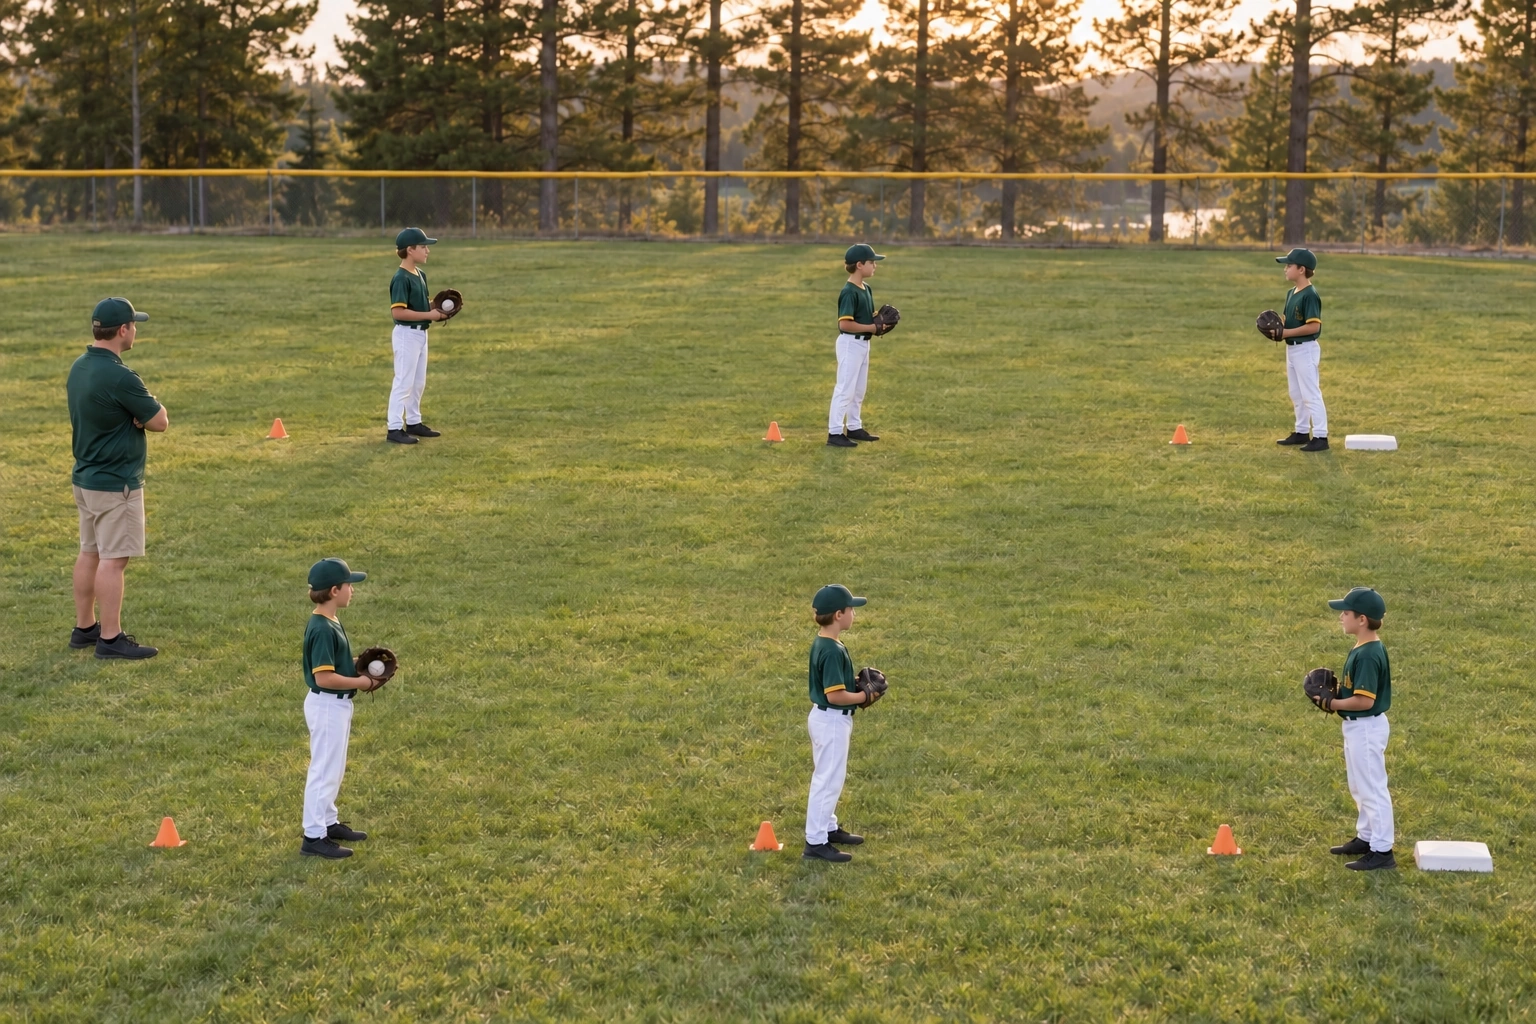
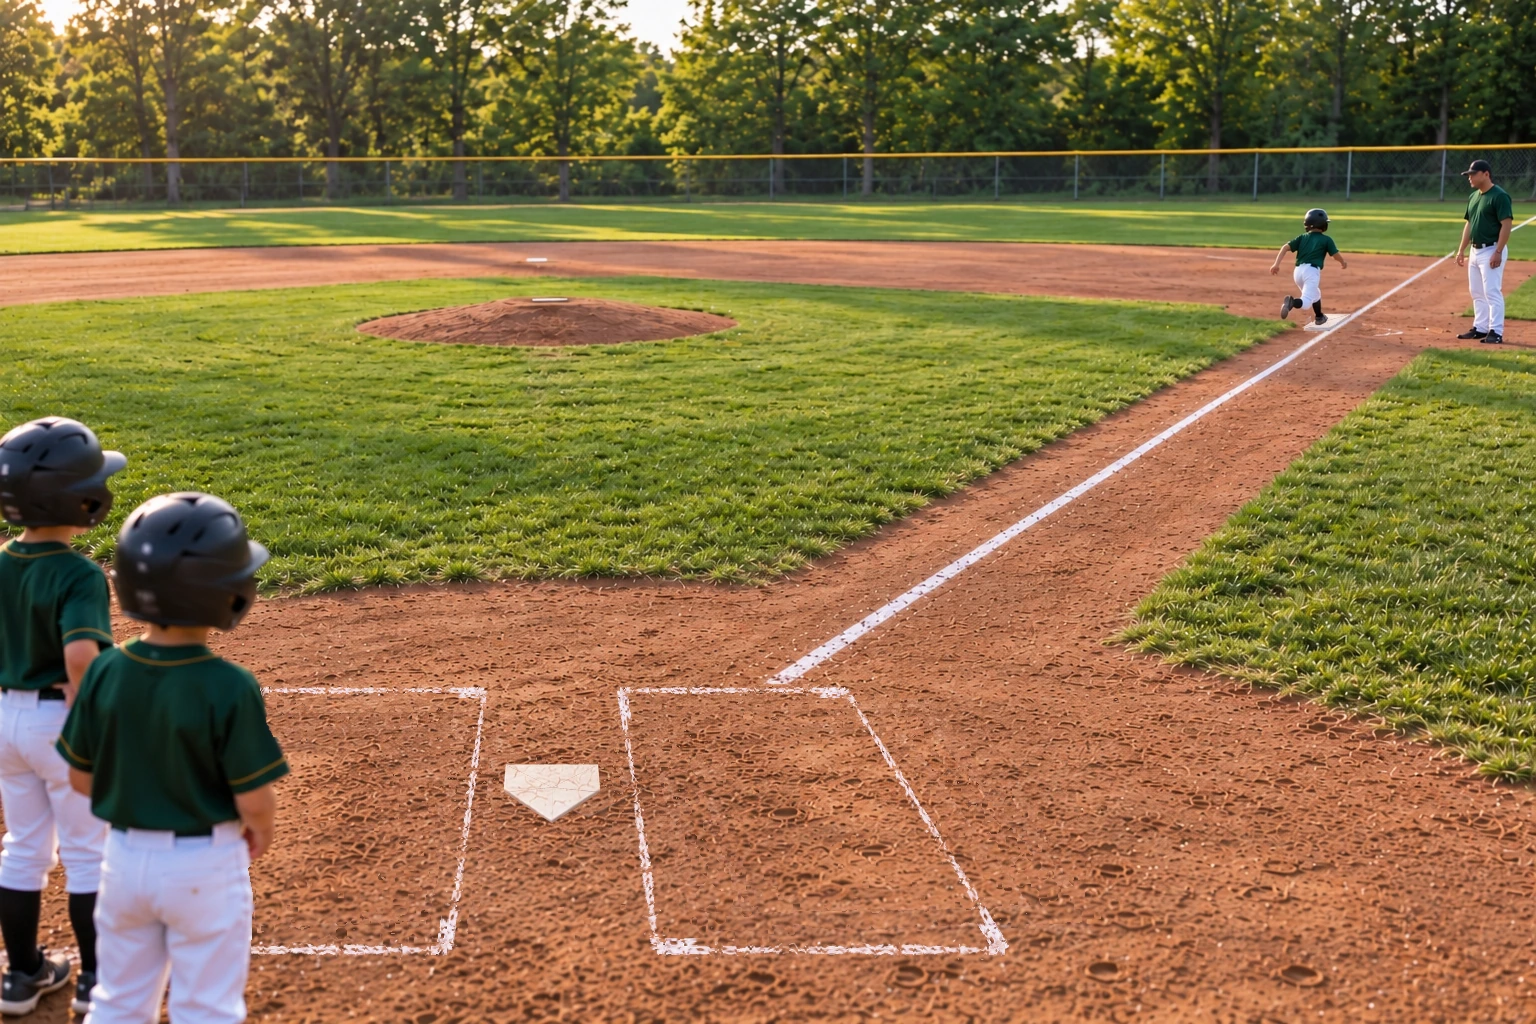
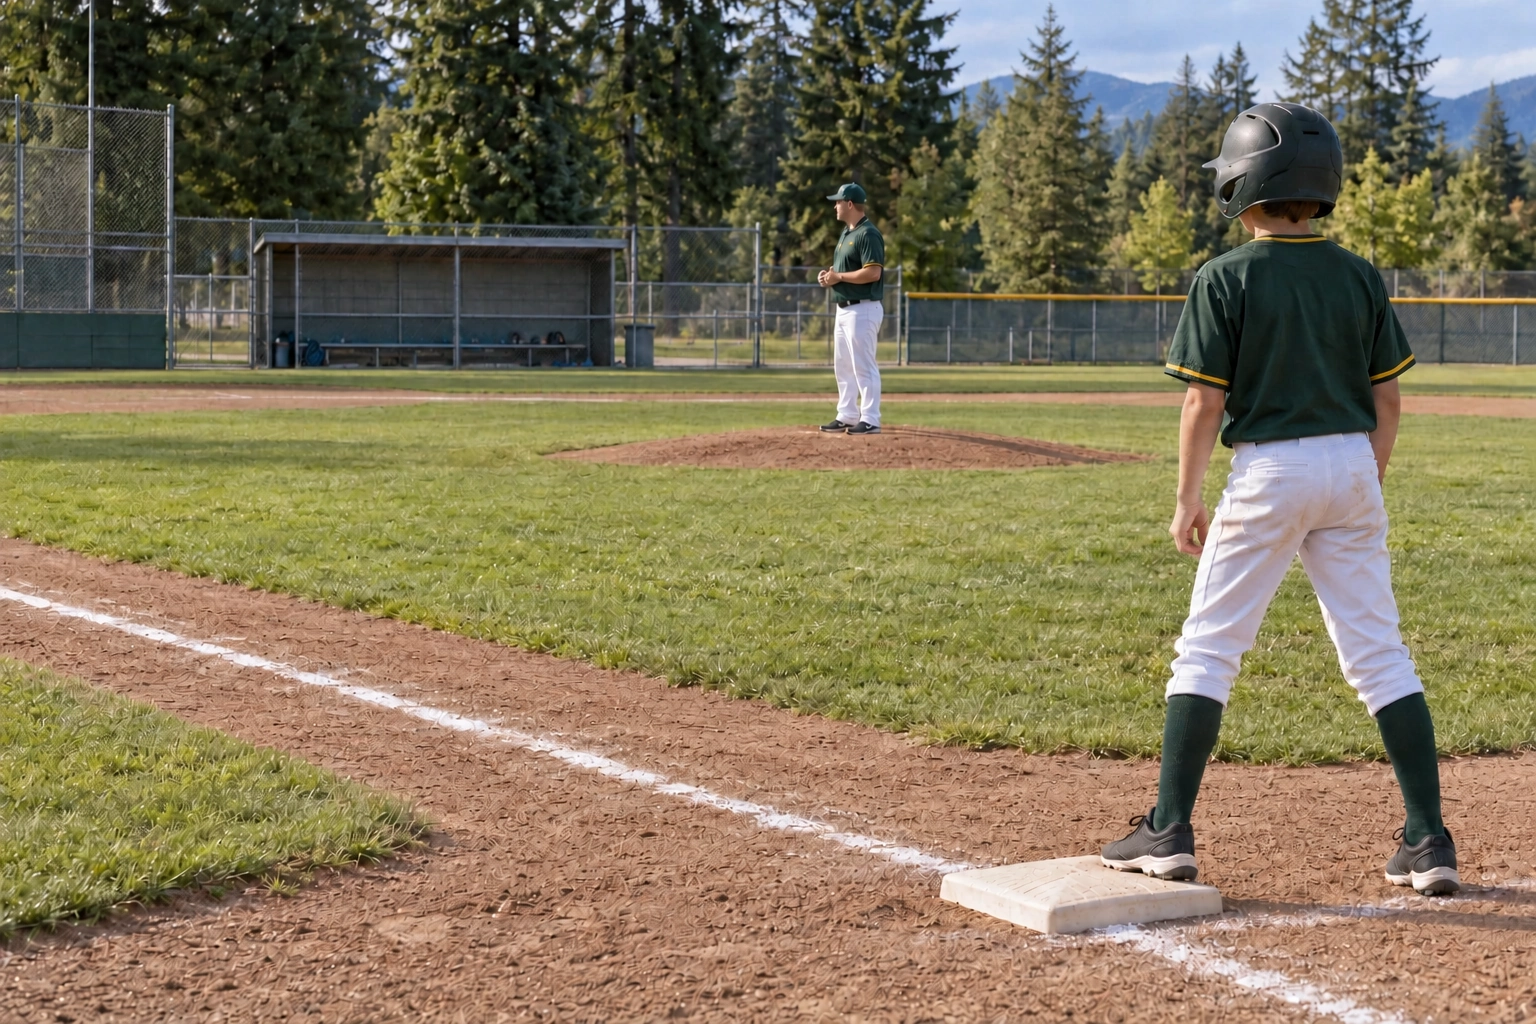
Content revision 395b38e1e61ea01acab1 · compiled October 14, 2026.
Public reference only. No account, answers you saved, notes, private plans or review results are stored here. References may require a connection. Follow the current official rules and complete drill setup; this pack does not establish readiness or permission.
Lesson reference
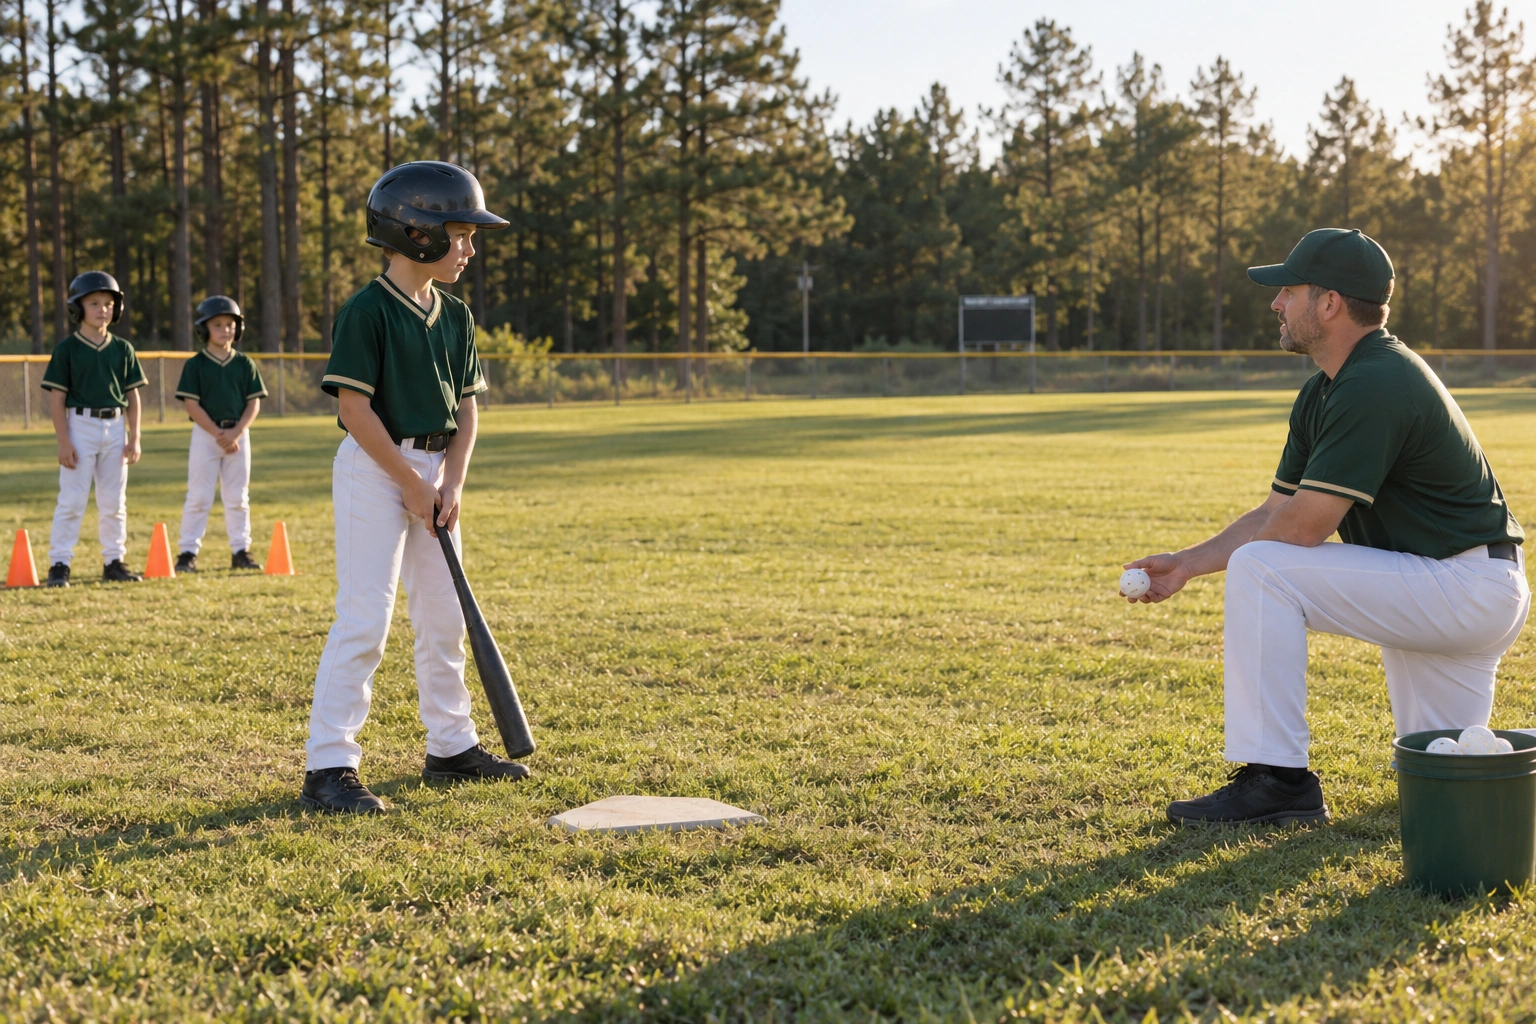
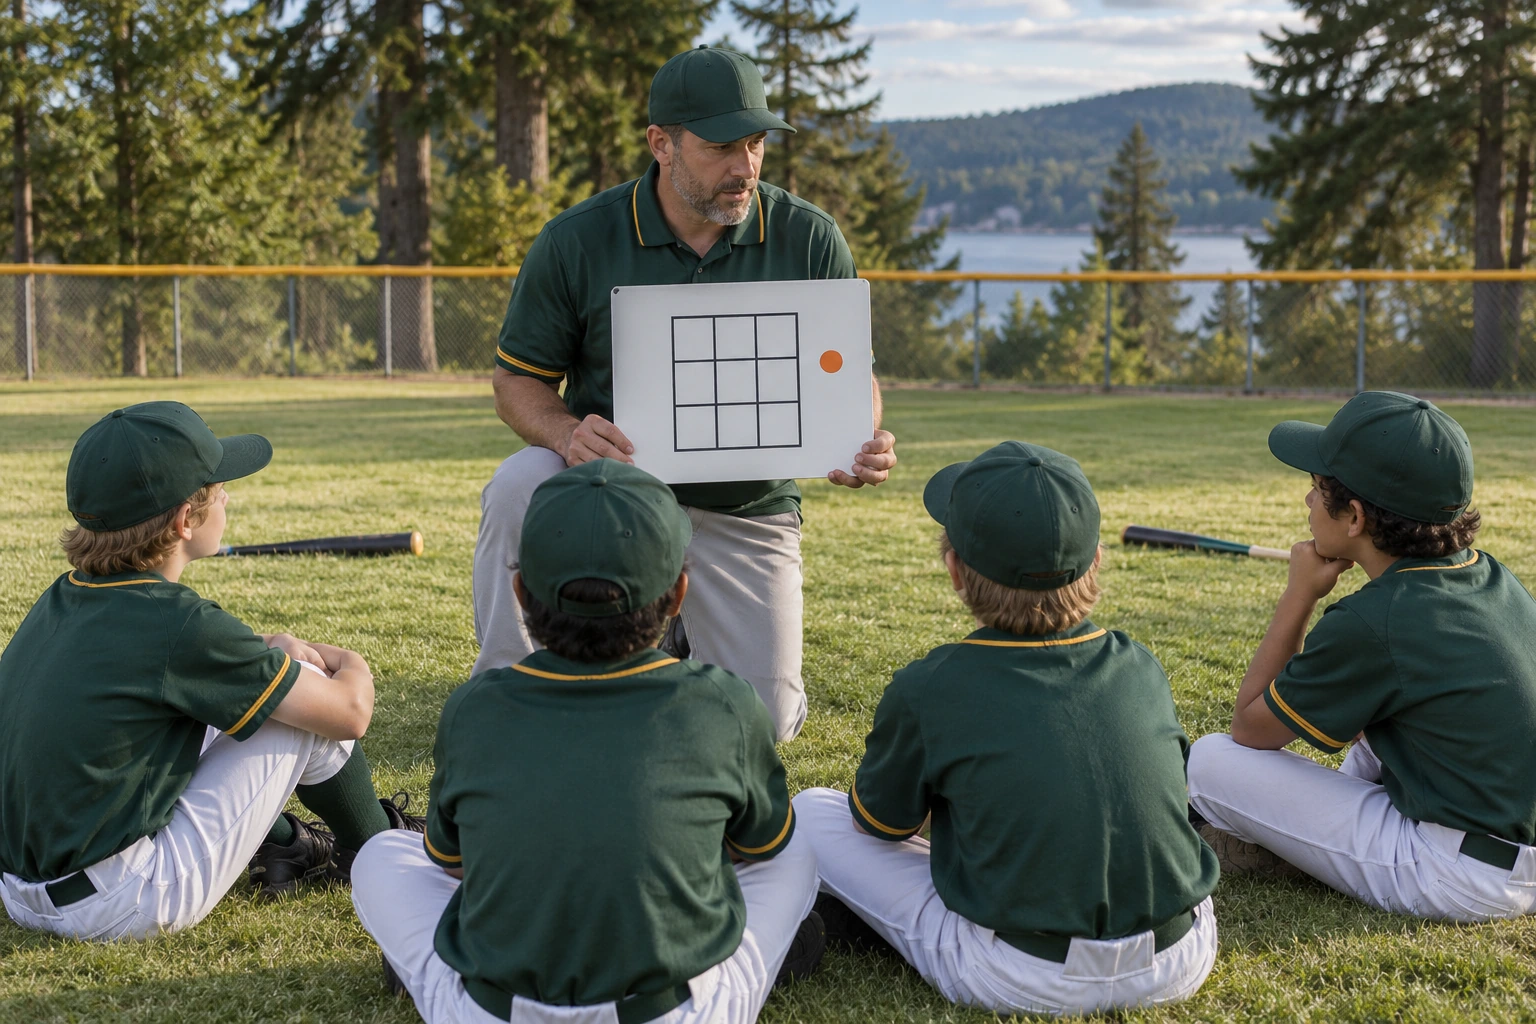
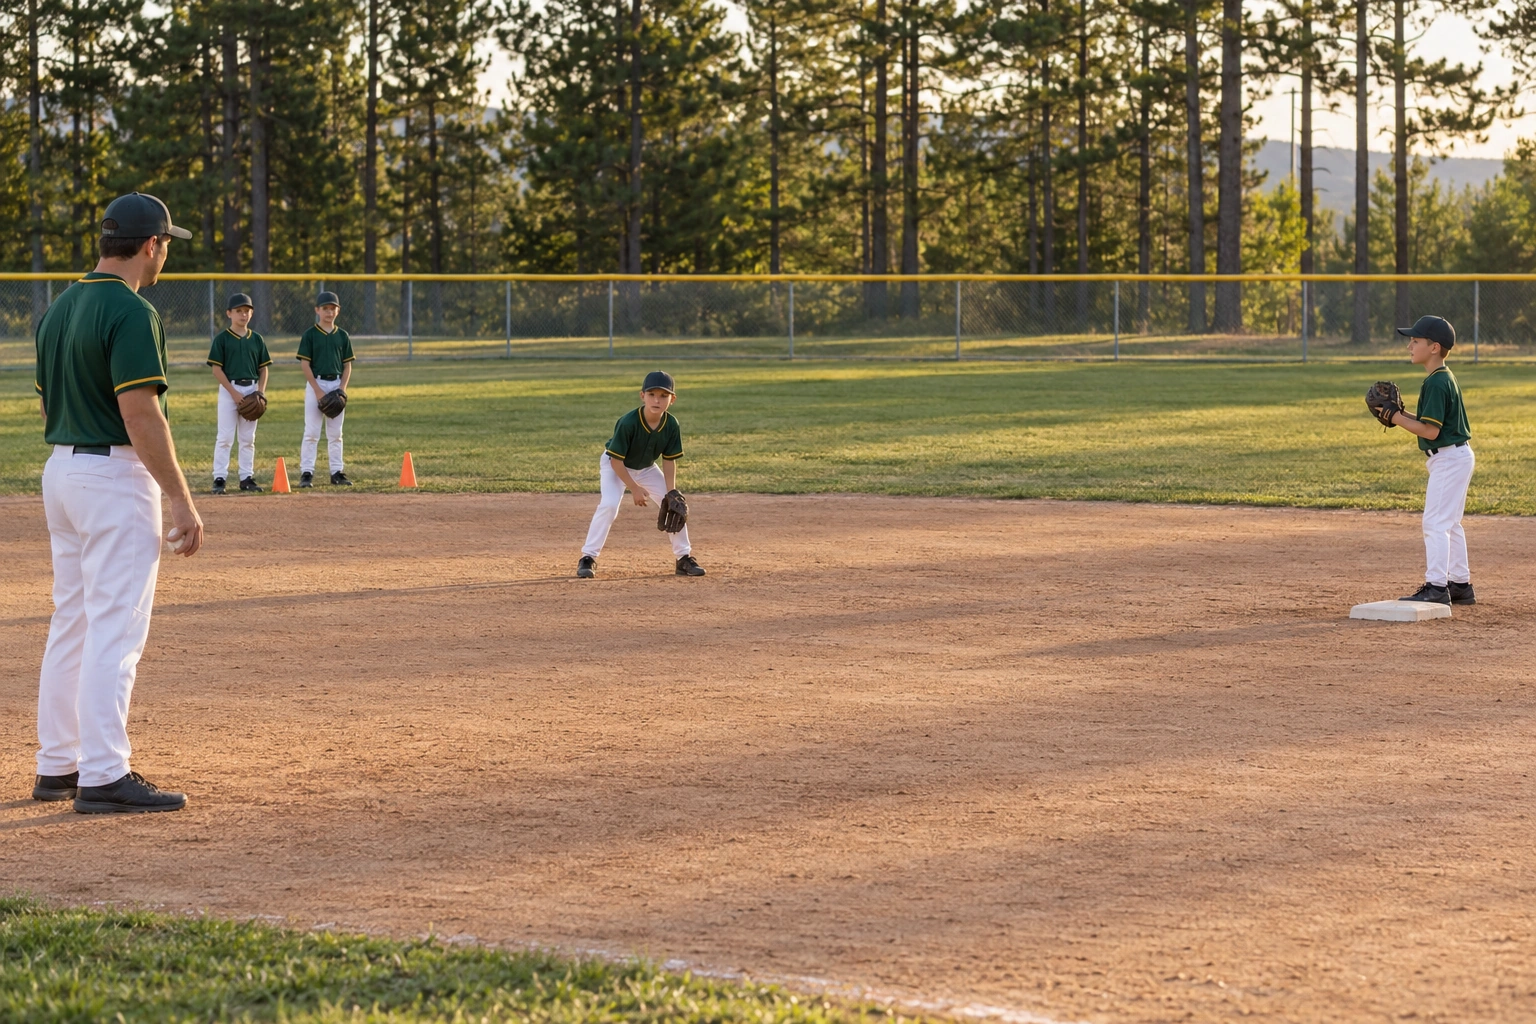
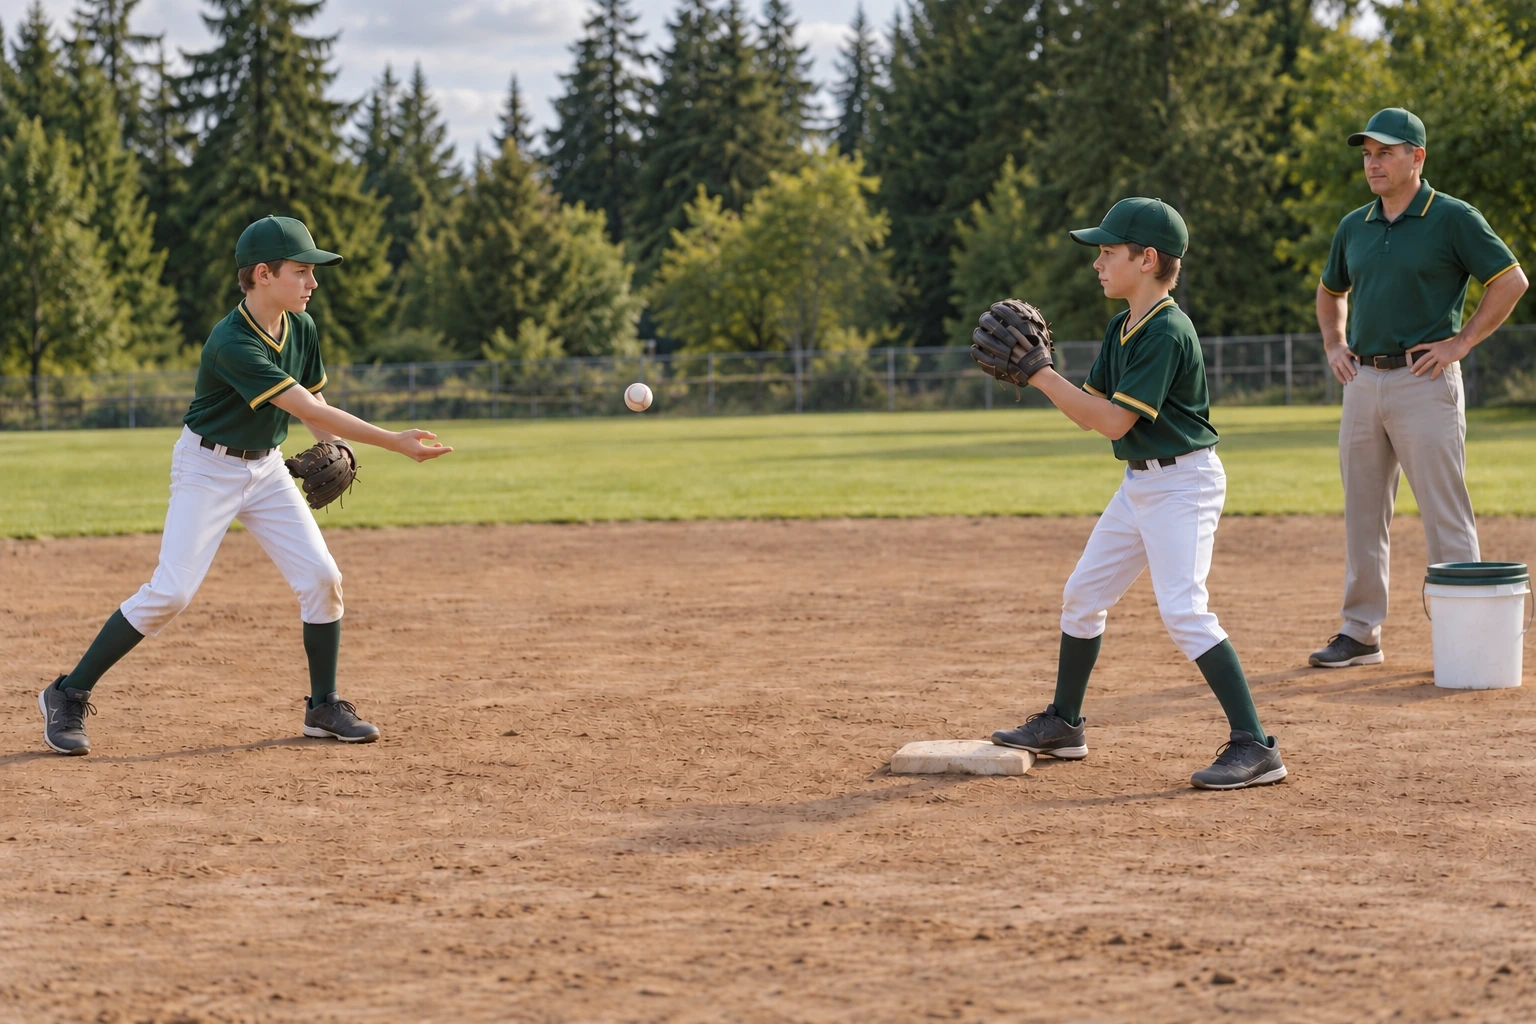
Hitting Mechanics & Plate Approach
title: The Swing Chain Foundations
blurb: Stance, hand placement, load, and the controlled stride.
lead: A good swing is a chain reaction: every link depends on the one before it. If the stance, grip, load, or stride is off, every link after it has to compensate, and the barrel pays for it at contact. Get the setup right and the rest of the swing has a chance to work on its own.
systemHead: The setup chain
system: Build it in order: an athletic, balanced stance (feet about shoulder-width, knees soft, weight on the balls of the feet); a relaxed grip with the hands set near the back shoulder; a small, controlled load that gathers weight onto the inside of the back leg; and a short, soft stride that lands closed with the head still over the middle of the body.
Stance
Feet about shoulder-width, knees flexed, athletic and balanced, ready to move, not stiff.
Grip & hands
Relaxed grip, line up the knocking knuckles, hands set near the back shoulder.
Load
A small gather back onto the inside of the back leg: coil in place, don't sway off the back side.
Stride
Short and soft, landing on the inside of the front foot with the front side closed.
Head & eyes
Stay quiet and level: track the ball with both eyes, head still over the center of the body.
Smaller is better: a quiet load and a short stride keep the head still and the eyes on the ball.
Stride to hit, don't stride to land: the front foot should touch down soft and early, before you decide to swing.
Keep the weight balanced and on the inside of the back leg during the load; you should be able to stop and hold your stride.
Relax the grip: tension in the hands and forearms slows the barrel down.
Swaying or drifting back during the load instead of coiling in place: the head moves and timing falls apart.
A long, late stride that pushes the head forward and starts the swing off-balance.
Gripping the bat in a death grip, which tightens the whole upper body.
Setting up stiff and flat-footed with locked knees.
alt: Stance styles genuinely vary: open, square, and closed setups all produce good hitters, and so do leg kicks, toe-taps, and quiet no-strides. None of those is 'correct.' What every good setup shares is balance, a quiet head, and getting the front foot down on time. Pick a load and stride a player can repeat under pressure, and judge it by whether the head stays still, not by how it looks.
q: What is the main job of the load and stride in the swing?
To gather and time the body so the head stays still and the swing starts on balance
To generate as much movement as possible before the pitch
To shift all the weight onto the front foot before contact
To decide whether the pitch is a ball or a strike
a: The load and stride exist to gather energy and time the pitch while keeping the head quiet and the body balanced. They aren't about big movement: the more a hitter moves, the harder it is to keep the eyes level and start the swing on time. A short load and a soft, early stride set up everything that follows.
q: A hitter keeps lunging forward and losing his balance toward the pitcher. What is the most likely setup cause?
His grip is too relaxed
A stance so narrow that the hitter takes a short step to keep the head centered
He is choking up too far
A long, late stride that drifts the head and weight forward
a: Lunging almost always traces back to the stride and load: a long or late stride pushes the head and weight toward the pitcher before contact, so the hitter is out on the front foot with no balance left to swing from. Shortening the stride and getting the front foot down earlier usually fixes it.
title: Launch Position & Rotational Acceleration
blurb: The slot, hip-shoulder separation, and driving from the ground up.
lead: Once the front foot lands, the hitter is in launch position, coiled, balanced, and ready to fire. From there, power doesn't come from the arms; it comes from the ground up. The legs and hips start the rotation, the torso follows, and the hands come last, whipping the barrel through with everything behind it.
systemHead: Sequencing from the ground up
system: At launch the front foot is planted, the hands are back in the slot near the back shoulder, and the hips and shoulders are still separated: the hips can start to open while the hands stay back, and that stretch is hip-shoulder separation. The chain then fires in order: ground, hips, torso, hands. Each segment slows down to pass its speed to the next, and that hand-off is what whips the barrel.
Front foot / legs
Plant and brace: the front leg becomes a firm post to rotate against, driving from the ground up.
Hips
Fire first. The hips begin to open while the hands stay back, creating separation.
Hands / slot
Stay back in the slot a beat longer; let the lower half pull the hands, don't push with the arms.
Torso & barrel
Rotates after the hips, then unloads the hands so the barrel whips through last and fastest.
Power is built from the ground up: legs and hips lead, hands follow. The arms are the last link, not the first.
Feel the stretch: hips opening while the hands stay back is the rubber band that stores power.
Brace the front leg; rotating against a firm front side is what lets the barrel accelerate.
Let the lower half pull the hands through; the swing should feel connected, not arm-y.
Starting the swing with the hands or shoulders, so the arms drag the bat with no lower-half power ('all arms').
Spinning the hips and shoulders together with no separation, losing the stored stretch.
Lunging onto a soft front leg instead of bracing against a firm one.
Flying open with the front shoulder early, which pulls the head off the ball.
alt: How much separation and lower-half drive to teach at this age is debated. Some coaches push big hip-shoulder separation and aggressive leg drive; others argue that 10–12 year olds are still developing coordination and are better served by 'stay balanced and rotate' than by chasing a pro-style move they can't control yet. Both camps agree on the order: ground up, hands last. Teach the sequence first; add the bigger moves only once a hitter can stay on balance.
q: Where does the power in a good swing start?
Starting the bat with a wrist snap while the legs and hips mainly hold the hitter steady
In the front shoulder
From the ground up: legs and hips lead, hands follow last
From swinging as hard as possible with the arms
a: Real bat speed is built from the ground up. The legs and hips start the rotation, the torso follows, and the hands fire last: each link passing speed to the next until the barrel whips through. Hitters who start with the hands or arms have no lower half behind the swing and lose most of their power.
q: What is 'hip-shoulder separation,' and why does it matter?
Keeping the hips and shoulders perfectly still until contact
Separating the top and bottom hands on the bat
Stepping the front foot far away from the back foot
The hips beginning to open while the hands and shoulders stay back, storing energy like a stretched rubber band
a: Separation is the gap created when the lower half starts to rotate while the hands and upper body stay back for a beat. That stretch stores energy (like winding a rubber band) and releasing it is a big part of bat speed. If the hips and shoulders spin together, there's no stretch to release.
title: The Contact Point & Extension
blurb: Barrel path, inside-out hands, avoiding casting and rolling over.
lead: All the setup and rotation exist to deliver the barrel to one place: the contact point, out in front of the plate. The best hitters keep their hands inside the ball, meet it with the barrel on a slight upward path, and then extend through it, driving the ball rather than slapping at it. Two habits wreck this: casting the barrel out early, and rolling the top hand over at contact. Rolling the top hand early closes the barrel and often creates a weak grounder toward the pull side.
systemHead: Path, contact, and finish
system: The hands lead the barrel down into the zone and stay inside the ball (closer to the body than the ball is). Contact happens out in front, a little further out front on inside pitches, a little deeper on outside pitches. Through contact the hitter extends both arms toward the pitch, then lets the bat finish high over the shoulder. The barrel should be on a slightly upward path that matches the pitch, not a downward chop and not a big uppercut.
Barrel path
Slightly upward to match the pitch, not a downward chop or a big uppercut.
Hands inside the ball
Keep the hands closer to the body than the ball; let the barrel come through last.
Contact point
Out in front of the plate, further out front on inside pitches, deeper on outside pitches.
Extension
Drive both arms through the ball after contact, then finish high over the shoulder.
Hit the ball out front: contact should happen in front of the plate, where the barrel is still accelerating.
Stay inside the ball: hands lead, barrel follows, so you can handle inside pitches and still cover away.
Think 'palm up, palm down' at contact: the top hand stays behind the bat through the ball before any roll.
Extend through the ball toward the pitcher, then let the finish happen. Don't try to muscle the wrists.
Casting: throwing the barrel out and away from the body early, which makes the swing long and easy to beat inside.
Rolling the top hand over at contact, producing weak rollover grounders to the pull side.
Chopping straight down at the ball or swinging up under it instead of matching the pitch's slight angle.
Reaching for outside pitches instead of letting them travel and going the other way.
alt: 'Swing down' vs. 'swing up' is one of the oldest arguments in hitting. The older cue was to chop down for backspin and line drives; modern bat-tracking shows good hitters swing slightly up to match the downward path of the pitch. For 10–12s, chasing 'launch angle' can turn into uppercutting and pop-ups. A safe middle: teach a level-to-slightly-up path and a line-drive target, and let solid contact (not launch angle) be the goal.
q: What does it mean to keep your 'hands inside the ball'?
Holding the bat with both hands touching
Keeping your hands above your head during the load
Choking up on the bat
Keeping the hands closer to your body than the ball is, so the barrel comes through last
a: Staying inside the ball means the hands travel a tighter path closer to the body while the barrel stays back and comes through last. It keeps the swing short, lets a hitter turn on inside pitches, and still covers the outside corner. Casting (throwing the barrel out early) does the opposite and makes the swing long and easy to beat.
q: A hitter keeps hitting weak ground balls to the pull side. What is the most common cause?
Swinging late on an outside pitch and sending it toward the opposite-field side
Choking up too much
Rolling the top hand over at contact
Standing too far from the plate
a: Rolling the top hand over at or before contact turns the barrel down and across the ball, producing weak, rolled-over grounders to the pull side. Keeping the top hand behind the bat through contact ('palm up, palm down') and driving through the ball before any wrist roll fixes it.
title: The Two-Strike Battle
blurb: Choke up, widen the base, protect the plate, expand the zone.
lead: With two strikes, the job changes. The hitter is no longer hunting the perfect pitch to drive: the goal is to compete, protect the plate, and put the ball in play. That means shortening the swing, widening the base for balance, choking up a little, and expanding the mental strike zone to foul off or fight off anything close.
systemHead: Two-strike adjustments
system: Choke up slightly to control the barrel, widen the base and shorten the stride for balance, and shorten the swing into a quick, compact move. Mentally, expand the zone: anything close gets fouled off or put in play rather than taken. The mindset is 'battle': make the pitcher earn it. One rule note: with two strikes, a bunt that goes foul is a strikeout, so the bunt comes off the table here.
Hands / grip
Choke up slightly for quicker barrel control.
Base & stride
Widen the stance and shorten the stride for balance and a shorter swing.
Swing
Shorten it: quick and compact, geared to put the ball in play, not to drive it.
Mental zone
Expand it: protect the plate and foul off or fight off anything close to the strike zone.
Shorten up and battle: the two-strike goal is to put the ball in play and make the defense work, not to do damage.
Choke up a little and widen the base: a shorter, more controlled swing beats a longer one with two strikes.
Expand the zone: with two strikes you protect against anything close, even pitches just off the plate.
Foul off the tough ones and wait for a mistake: a long two-strike at-bat wears the pitcher down.
Keeping the same big swing and approach with two strikes as with no strikes.
Taking a close pitch with two strikes and getting rung up looking.
Trying to drive or pull a two-strike pitch instead of just putting it in play.
Bunting with two strikes: a foul bunt with two strikes is a strikeout, so this gives away the at-bat.
alt: How far to choke up and how much to shorten the swing is a personal adjustment, not a rule: some strong hitters barely change anything, while others make a big move to a clearly shorter stroke. There's a trade-off: the more a hitter shortens up, the more contact they make but the less they can drive the ball. Let each player find a two-strike approach they trust, and judge it by strikeouts and contact, not by how different it looks from their normal swing.
q: What is the main goal of a hitter's approach with two strikes?
Keep the full power swing and try to drive the first close pitch before strike three arrives
Shorten up, protect the plate, and put the ball in play
Take pitches and hope for a walk
Bunt to avoid striking out
a: With two strikes the goal shifts from doing damage to competing: shorten the swing, choke up, widen the base, expand the zone, and put the ball in play. Making the defense field it, or fouling off tough pitches until you get a mistake, is a win. Trying to drive every two-strike pitch leads to strikeouts.
q: With two strikes, a batter squares to bunt and pushes the bunt foul. What is the result?
The batter is out: a foul bunt with two strikes is strike three
Treat it as an ordinary foul ball and let the batter try another bunt with two strikes
The batter is awarded first base
It counts as a ball
a: A bunt attempt that goes foul with two strikes is a strikeout: unlike a normal foul ball, it does not just leave the count at two strikes. That's exactly why bunting is off the table with two strikes: it hands the at-bat away on a foul. (As always, confirm the exact rule wording against the current rulebook.)
title: Situational Hitting & Small Ball
blurb: Hitting behind a runner, the sacrifice bunt, and the base-hit push bunt.
lead: Good teams win innings without big hits by doing the little things: moving runners over, laying down a sacrifice when it matters, and dropping a bunt for a base hit when the defense gives it. Situational hitting means knowing what the moment needs before you step in, and being able to execute it on demand.
systemHead: Moving runners and bunting
system: Hitting behind the runner means going with an outside pitch to the right side (for a right-handed hitter) so a runner on second can advance to third on a ground ball. A sacrifice bunt trades an out to move a runner up: square early, hold the bat angled at the top of the zone, give with the hands to deaden the ball, and aim it down a line. A push (or drag) bunt is for a base hit: bunted firmly into a gap, often toward the right side, to catch the defense off guard. SLVLL AAA/Majors local ground rule 3 calls the batter out with no warning if the batter first fakes a bunt and then takes a full swing on that pitch. Little League Majors does not permit an on-deck batter; wait safely until it is your turn.
Hit behind the runner
Go the other way (right side for a righty) on a grounder to push a runner from second to third.
Sacrifice bunt
Square early, bat at the top of the zone, give with the hands, aim down a line: trade the out for the base.
Push / drag bunt
Bunt firmly for a base hit into a gap when the corners are playing back.
Read the defense
Know where the corners are playing and whether the situation calls for a sacrifice or a hit.
Know the situation before you step in: outs, runners, and the score decide whether you're moving a runner, sacrificing, or swinging away.
On a sacrifice, get the bat out early and on top of the ball: a bunt popped into the air is the worst outcome.
Catch the ball with the bat: give with the hands to deaden it so it dies in fair territory.
Aim sacrifice bunts down a line (toward first or third) to make the defense choose a longer throw.
Bunting from under the ball and popping it up for an easy out or a double play.
Squaring around too late, so the bunt is rushed and pulled foul or fouled back.
Trying to pull an outside pitch when the job is to hit behind the runner the other way.
Forgetting that a foul bunt with two strikes is a strikeout, never sacrifice bunt with two strikes.
Faking a bunt and then taking a full swing: SLVLL calls the batter out without a warning.
alt: Whether to give up outs at all is debated. Run-expectancy data suggests the sacrifice bunt often costs a team more runs than it gains, so many modern coaches bunt sparingly. At the youth level the calculus differs: defenses make more errors, so putting the ball in play with a bunt or a productive grounder can be high value, and the skill itself teaches bat control. Treat the sacrifice as a situational tool (late and close, a weaker hitter up, a run needed), not an automatic call.
q: Runner on second, no outs, and the team needs to move him to third. For a right-handed hitter, what's the productive contact?
A ground ball to the right side (the opposite field), advancing the runner to third
Pull a grounder toward third and hope the fielder throws to first instead of holding the runner
A fly ball to center field
A line drive back at the pitcher
a: A ground ball to the right side moves the runner from second to third even if the hitter is thrown out, because the runner advances behind the play. For a righty that usually means going the other way with an outside pitch. Pulling the ball to the left side keeps the runner at second: the shortstop and third baseman are right there in front of him.
q: What is the most important thing on a sacrifice bunt?
Bunting it as hard as possible
Getting the bat out early, staying on top of the ball, and keeping the bunt on the ground in fair territory
Squaring late so the defense is surprised
Aiming it straight back at the pitcher
a: A sacrifice succeeds when the bunt stays on the ground and forces a defender to field it, so squaring early, keeping the bat on top of the ball, and giving with the hands to deaden it are what matter. A popped-up bunt is the worst outcome (easy out, maybe a double play), and a bunt straight to the pitcher is the easiest play to make on the lead runner.
title: Plate Discipline & The Mental Plan
blurb: Count management, and hunting a 'cookie' early vs. protecting late.
lead: Two hitters can have the same swing and get completely different results because one has a plan and the other doesn't. Plate discipline is knowing the count, knowing what you're looking for, and swinging at strikes you can drive while laying off pitches you can't. The plan changes with the count: hunt your pitch early, protect late.
systemHead: Counts and the at-bat plan
system: In hitter's counts (like 1-0, 2-0, 3-1) the pitcher has to throw a strike, so the hitter can be selective and hunt a specific 'cookie' (a pitch in his zone he can drive) and take anything else. In pitcher's counts (0-2, 1-2) the hitter protects: expand the zone, shorten up, and battle. Even counts and the first pitch sit in between: be ready to hit a mistake but disciplined enough to take a borderline pitch. Every at-bat should start with a plan, for example: 'I'm looking for a fastball middle-in.'
Hitter's counts (1-0, 2-0, 3-1)
Be selective: hunt a specific pitch in your zone and take anything else.
Even / first pitch
Be ready for a hittable mistake, but disciplined enough to take a borderline pitch.
Pitcher's counts (0-2, 1-2)
Protect: expand the zone, shorten up, and put the ball in play.
Every at-bat
Step in with a plan (a pitch and a location you're hunting) and adjust as the count changes.
Have a plan before you step in: know the pitch and the spot you're hunting.
Use the count: when the pitcher has to throw a strike, get selective and wait for your pitch.
Swing at strikes you can drive, not just strikes: a corner pitch you can't handle is a take in a hitter's count.
Don't help the pitcher: chasing pitches out of the zone turns a hitter's count into a pitcher's count.
Swinging at the first hittable-looking pitch regardless of count or location.
Chasing pitches out of the zone, especially low and away, and getting behind in the count.
Taking a fat strike early while 'waiting,' then having to defend with two strikes.
Stepping in with no plan and reacting pitch to pitch.
alt: How aggressive to be early in the count is genuinely debated. 'Be patient and take pitches' builds discipline and draws walks, but it can also let good pitches go by and bury hitters in two-strike holes. 'Be aggressive in the zone' attacks the best pitch a hitter may see all at-bat, but it can drift into chasing. The useful middle isn't patient vs. aggressive; it's selectively aggressive: hunt a pitch you can drive and be disciplined enough to take everything else.
q: In a hitter's count like 2-0 or 3-1, what's the smart approach?
Take every pitch and wait for a walk, even when the pitcher serves the target pitch in your planned zone
Be selective: hunt a specific pitch you can drive and take anything else
Swing at anything close to the zone
Bunt to catch the defense off guard
a: In a hitter's count the pitcher has to come to the zone, so the hitter holds the advantage. The smart move is to be selectively aggressive: look for one pitch in a spot you can drive and take everything else. Swinging at anything close hands the advantage back; taking automatically wastes the best pitch you may see all at-bat.
q: What does it mean to be 'selectively aggressive' at the plate?
Swing hard at every pitch near the plate, treating any close pitch as good enough to drive regardless of count or location
Take pitches until you have two strikes
Look to attack a pitch you can drive while being disciplined enough to lay off pitches you can't
Only swing at the first pitch
a: Selectively aggressive means a hitter is ready and looking to swing, but only at a pitch in a spot he can drive. It blends aggression (attack your pitch) with discipline (lay off the rest). It's the approach that avoids both extremes: passively taking good pitches and chasing bad ones.
What is the main job of the load and stride in the swing? — explanation
To gather and time the body so the head stays still and the swing starts on balance. The load and stride exist to gather energy and time the pitch while keeping the head quiet and the body balanced. They aren't about big movement: the more a hitter moves, the harder it is to keep the eyes level and start the swing on time. A short load and a soft, early stride set up everything that follows.
A hitter keeps lunging forward and losing his balance toward the pitcher. What is the most likely setup cause? — explanation
A long, late stride that drifts the head and weight forward. Lunging almost always traces back to the stride and load: a long or late stride pushes the head and weight toward the pitcher before contact, so the hitter is out on the front foot with no balance left to swing from. Shortening the stride and getting the front foot down earlier usually fixes it.
Where does the power in a good swing start? — explanation
From the ground up: legs and hips lead, hands follow last. Real bat speed is built from the ground up. The legs and hips start the rotation, the torso follows, and the hands fire last: each link passing speed to the next until the barrel whips through. Hitters who start with the hands or arms have no lower half behind the swing and lose most of their power.
What is 'hip-shoulder separation,' and why does it matter? — explanation
The hips beginning to open while the hands and shoulders stay back, storing energy like a stretched rubber band. Separation is the gap created when the lower half starts to rotate while the hands and upper body stay back for a beat. That stretch stores energy (like winding a rubber band) and releasing it is a big part of bat speed. If the hips and shoulders spin together, there's no stretch to release.
What does it mean to keep your 'hands inside the ball'? — explanation
Keeping the hands closer to your body than the ball is, so the barrel comes through last. Staying inside the ball means the hands travel a tighter path closer to the body while the barrel stays back and comes through last. It keeps the swing short, lets a hitter turn on inside pitches, and still covers the outside corner. Casting (throwing the barrel out early) does the opposite and makes the swing long and easy to beat.
A hitter keeps hitting weak ground balls to the pull side. What is the most common cause? — explanation
Rolling the top hand over at contact. Rolling the top hand over at or before contact turns the barrel down and across the ball, producing weak, rolled-over grounders to the pull side. Keeping the top hand behind the bat through contact ('palm up, palm down') and driving through the ball before any wrist roll fixes it.
What is the main goal of a hitter's approach with two strikes? — explanation
Shorten up, protect the plate, and put the ball in play. With two strikes the goal shifts from doing damage to competing: shorten the swing, choke up, widen the base, expand the zone, and put the ball in play. Making the defense field it, or fouling off tough pitches until you get a mistake, is a win. Trying to drive every two-strike pitch leads to strikeouts.
With two strikes, a batter squares to bunt and pushes the bunt foul. What is the result? — explanation
The batter is out: a foul bunt with two strikes is strike three. A bunt attempt that goes foul with two strikes is a strikeout: unlike a normal foul ball, it does not just leave the count at two strikes. That's exactly why bunting is off the table with two strikes: it hands the at-bat away on a foul. (As always, confirm the exact rule wording against the current rulebook.)
Runner on second, no outs, and the team needs to move him to third. For a right-handed hitter, what's the productive contact? — explanation
A ground ball to the right side (the opposite field), advancing the runner to third. A ground ball to the right side moves the runner from second to third even if the hitter is thrown out, because the runner advances behind the play. For a righty that usually means going the other way with an outside pitch. Pulling the ball to the left side keeps the runner at second: the shortstop and third baseman are right there in front of him.
What is the most important thing on a sacrifice bunt? — explanation
Getting the bat out early, staying on top of the ball, and keeping the bunt on the ground in fair territory. A sacrifice succeeds when the bunt stays on the ground and forces a defender to field it, so squaring early, keeping the bat on top of the ball, and giving with the hands to deaden it are what matter. A popped-up bunt is the worst outcome (easy out, maybe a double play), and a bunt straight to the pitcher is the easiest play to make on the lead runner.
In a hitter's count like 2-0 or 3-1, what's the smart approach? — explanation
Be selective: hunt a specific pitch you can drive and take anything else. In a hitter's count the pitcher has to come to the zone, so the hitter holds the advantage. The smart move is to be selectively aggressive: look for one pitch in a spot you can drive and take everything else. Swinging at anything close hands the advantage back; taking automatically wastes the best pitch you may see all at-bat.
What does it mean to be 'selectively aggressive' at the plate? — explanation
Look to attack a pitch you can drive while being disciplined enough to lay off pitches you can't. Selectively aggressive means a hitter is ready and looking to swing, but only at a pitch in a spot he can drive. It blends aggression (attack your pitch) with discipline (lay off the rest). It's the approach that avoids both extremes: passively taking good pitches and chasing bad ones.
blurb: Position numbers and the verbal calls every play depends on.
lead: Every situational play falls apart without talk. Before any team can turn two, line up a cutoff, or run a clean rundown, all nine players need one shared language and the habit of saying the situation out loud before every pitch. This is the foundation the rest of the guide is built on. On a shared fly ball, the fielder with the higher team priority calls it; the lower-priority fielder answers, yields and moves clear. This team gives outfielders coming in priority over infielders going back, with center field highest.
systemHead: The numbers (1–9)
system: Positions are numbered for scorekeeping and for calling plays: 1 = Pitcher, 2 = Catcher, 3 = First Base, 4 = Second Base, 5 = Third Base, 6 = Shortstop, 7 = Left Field, 8 = Center Field, 9 = Right Field. A "6-4-3" double play means shortstop to second baseman to first baseman.
Pitcher (1)
Knows the count and the play before delivering; backs up the next throw.
Catcher (2)
Field general. Directs bunt coverage, cutoffs, and tag/force calls from behind the plate.
Middle IF (4 & 6)
Exchange a pre-pitch sign for who covers second; relay the situation to the corners.
All fielders
Say the outs and 'where I go with the ball' out loud before every pitch.
Call early and call loud, a late call is a dropped ball.
Claim a fly with the team's agreed 'I got it!' call three times; teammates answer 'Take it!' and clear.
Standard calls: 'I got it!' (x3) to claim a fly; 'Cut!' on relays; 'Tag him!' vs 'Bag!' on force decisions; 'Two!' to turn a double play; 'Back!' / 'Going!' on runners.
Point and talk, your eyes and voice should agree.
Silence on a routine pop-up so it drops between two players.
Two players calling the same ball; nobody yields.
Calling the ball a half-second too late to peel off safely.
alt: Some programs use 'Mine!' instead of 'I got it!' because under crowd noise 'I got it / you got it' can be misheard. Either works, the point is to pick ONE word for your team and rep it. Likewise, some coaches let the closest fielder call the ball while others give one player (often the shortstop or center fielder) blanket authority. Standardize it; don't leave it to chance.
q: With one out and a runner on first, what should every infielder tell themselves before the pitch?
Where the other team's best hitter usually hits it
Wait until the hitter puts the ball in play, then decide which base needs a throw, because planning early could leave you out of position
The number of outs and where I'll go with the ball if it comes to me
Only what the coach yells from the dugout
a: The number of outs and where the ball goes, for example: 'One out, double-play depth, turn two if I can; if I can't, take the sure out at first.' Saying it pre-pitch means no hesitation when the ball is hit.
q: Two fielders converge on a pop-up and both call for it. Who yields, and what do they do?
The lower-priority fielder yields, yells 'Take it!', and clears out of the way
Both fielders should keep charging and let the one who arrives first take the catch, even if neither yields to the call
The higher-priority fielder backs off to be safe
They both stop and let it drop
a: The lower-priority fielder yields immediately, shouts 'Take it!' (or 'You!'), and peels out of the way to avoid a collision, then looks for the next job (cover a base or back up).
title: Fly Balls & Pop-Up Priority
blurb: Priority order and the infield fly rule.
lead: More easy outs are lost on miscommunicated pop-ups than on hard plays. When two or more fielders can reach a ball in the air, everyone must instantly know who takes it and who gets out of the way. A fixed priority order plus loud calls prevents both collisions and the 'everybody's ball' drop.
systemHead: Priority order (highest to lowest), and the infield fly rule
system: Center fielder > corner outfielders (LF/RF) > shortstop / second baseman > third baseman / first baseman > catcher / pitcher. Two rules cover almost everything: an OUTFIELDER coming forward beats an INFIELDER drifting back, and the CENTER FIELDER beats everyone. INFIELD FLY RULE: with runners on first and second (or the bases loaded) and fewer than two outs, a fair pop-up an infielder can catch with ordinary effort is an infield fly. The umpire calls it and the batter is OUT, caught or not. Line drives and bunts never count. The runners are no longer forced: if the ball is caught they must tag up before running; if it drops they may run at their own risk.
Center Field (8)
Highest priority; can call off any outfielder or infielder.
Corner OF (7 & 9)
Take priority over any infielder going back; call off the middle infielders.
Shortstop (6)
Usually has middle-infield priority; goes out hard but listens for the OF call.
Corners / C / P
Lowest priority; clear out, then cover a base or back up the catch.
The caller yells 'Ball!' or 'I got it!' three times; everyone else echoes 'Take it!' and peels off.
Outfielders must be loud and early, they are running toward the infield's blind spot.
On the catch, the fielders who peeled off immediately find the next play: cover the base, back up the throw.
An infielder camps under a ball an outfielder should take.
Nobody calls and it drops between three players.
Everyone calls at once, no one yields.
alt: Some coaches simplify by giving the shortstop blanket priority over the entire infield, while others let whichever middle infielder is closest make the call. The blanket-priority system removes hesitation but can pull your best fielder out of position; the closest-fielder system keeps alignment but needs sharper communication. Pick one and drill it, the failure mode is mixing the two.
q: A pop fly drifts into shallow left field between the shortstop and the left fielder. Who has priority?
The shortstop takes it because he called before the left fielder, even though he is drifting back and the outfielder is coming in
The left fielder, an outfielder coming in beats an infielder going back
The third baseman, since it's on his side
Whoever happens to be closer
a: The left fielder. An outfielder coming forward takes priority over an infielder drifting back, because catching the ball moving in is far easier and safer than reaching back over the shoulder.
q: Runners on first and second, one out, the batter lifts a routine pop-up to the second baseman. What is the result?
Nothing special, play it like any pop-up
The runners must advance because the batter is out on the infield fly and their original bases are no longer protected
It's a dead ball and the batter hits again
Infield fly, the batter is automatically out
a: Infield Fly Rule: with runners on first and second (or bases loaded) and fewer than two outs, on a fair fly an infielder can catch with ordinary effort, the umpire calls the batter OUT automatically. The batter is out whether the ball is caught or not. Runners are NOT forced: if the ball is caught they must tag up before advancing; if it drops they may advance at their own risk. Catch it cleanly anyway.
title: Cutoffs & Relays
blurb: Cut men, relay men, and lining up the throw.
lead: On any ball to the outfield with runners moving, the defense's job is to get the ball to the right base accurately and on time, and to keep trailing runners from advancing on the throw. The cutoff (or relay) man is the hinge: he lines up the throw, and on a single word he either lets it travel or cuts it and redirects.
systemHead: A clean default system
system: Throw to HOME: the first baseman is the cut man, lined up about 30–45 feet in front of the plate between the outfielder and the catcher; the pitcher backs up home. Throw to THIRD: the shortstop is the cut man while the third baseman holds the bag for the tag. RELAY on a ball to the wall: shortstop goes out on balls to left / left-center; second baseman goes out on balls to right / right-center; the other middle infielder covers second.
First Base (3)
Cut man on throws to home; lines up the throw, listens for 'Cut!'.
Shortstop (6)
Cut man on throws to third; relay man on balls to LF/LCF.
Second Base (4)
Relay man on balls to RF/RCF; covers second when SS goes out.
Third Base (5)
Holds third for the tag on a throw from the outfield.
Pitcher (1)
Backs up home or third, whichever base the throw is going to.
Throw THROUGH the cut man, chest-high, low enough that he can cut it if needed.
The cut man faces the outfielder with both hands up as a target and lines his body to the target base.
The catcher makes the cut call early and loud; the covering infielder echoes it because the thrower cannot see the trail runner.
On a relay, get out there, catch it, and turn glove-side, one relay, quick release.
Airmailing the cutoff man so no one can redirect the throw.
No cut man lined up, the throw sails to a base nobody is covering.
Relay man standing flat-footed or drifting instead of charging out to shorten the throw.
alt: Cutoff assignments vary widely between programs. Some teach the third baseman as cut man to home on balls to left field; some keep a pitcher as a trailing safety. None is 'wrong.' What matters far more than which system you pick is that all nine players know the same system cold. Choose one, diagram it, and rep it until it's automatic.
q: Base hit to right-center, the runner is rounding third to score. Who is the cut man, and who backs up the plate?
First baseman is the cut man; the pitcher backs up home
Shortstop is the cut man; the catcher backs up home
Second baseman is the cut man; the third baseman backs up home
Third baseman is the cut man; the first baseman backs up home
a: The first baseman is the cut man. He sets up roughly 30–45 feet in front of home plate, lined up between the outfielder and the catcher, hands up as a target. The pitcher sprints to back up home plate in case of an overthrow.
q: A ball rattles in the left-field corner for a possible double. Which middle infielder relays, and who covers second?
Second baseman goes out for the left-field relay and the shortstop covers second, because that keeps the shortstop closer to the base
Shortstop relays; the second baseman covers second
Third baseman relays; the shortstop covers second
The pitcher relays; the second baseman covers second
a: On a ball to left or left-center, the shortstop goes out as the relay man to shorten the throw, and the second baseman covers second base.
title: Defending the Steal (2nd & 3rd)
blurb: Coverage at second, tags, and the catcher's release.
lead: When a runner takes off, the catcher and middle infielders have to execute a quick, accurate throw and a clean tag, all in about three seconds. Coverage has to be settled BEFORE the pitch so the correct infielder is at the bag and the pitcher knows who's covering.
systemHead: Who covers second
system: Coverage is set by a pre-pitch sign between the shortstop and second baseman so the pitcher also knows. The common default: the SHORTSTOP covers on a right-handed batter and the SECOND BASEMAN covers on a left-handed batter. On a steal of THIRD, the third baseman covers and the catcher's quick release (not arm strength) is what beats the runner.
Catcher (2)
Receive, transfer to the ear, and throw with a quick release; accuracy over velocity.
Shortstop (6)
Default cover on a RH batter at second; applies a low sweep tag in front of the bag.
Second Base (4)
Default cover on a LH batter at second; the other middle IF backs up the throw.
Third Base (5)
Covers on a steal of third; gives a target on the outfield edge of the bag.
Pitcher (1)
Delivers a normal pitch. In Majors the runner can't leave until the pitch reaches the batter, so a slide step gains nothing.
Tag DOWN, catch the throw and lay the glove in front of the bag so the runner slides into it.
The covering fielder straddles or clears the front edge of the bag, don't stand on top of it and get spiked.
Give the catcher a target on the outfield side of the base.
Catcher's footwork and release time ('pop time') beat a strong-but-slow arm every time.
Both middle infielders cover (or neither) because there was no pre-pitch sign.
Catcher double-clutches and the runner is in standing up.
Tagging high, or standing on the bag and taking a spike.
alt: The RH-batter / SS-covers default is the most commonly taught, but it is genuinely debated. Some coaches assign coverage by the hitter's pull tendency, others by the count, and some always have the shortstop cover. The reliable answer is not a fixed rule but the SIGN SYSTEM: the two middle infielders agree before the pitch and tip the pitcher, so they never both vacate or both cover.
q: Right-handed batter, runner stealing second. Under the common default, who covers, and why use a pre-pitch sign?
Second baseman covers; no sign is needed
Third baseman covers; the sign tells the catcher where to throw
Shortstop covers; the sign tells the pitcher and keeps them from both leaving the bag
Whoever is closer covers; the sign is just tradition
a: The shortstop covers on a right-handed batter under the common default. The SS and 2B exchange a sign before the pitch so the pitcher knows who is covering, for a comebacker, a throw behind the runner after the pitch, or a ball up the middle, and so they don't both leave the bag uncovered or both run to it.
q: How should the covering fielder apply the tag at second base?
Catch it and lay a low sweep tag down in front of the bag
Stand directly on top of second and reach up to meet the runner, keeping both feet planted so the tag cannot miss
Tag the runner high, near the chest
Block the base with both feet
a: Straddle or clear the front edge of the bag, catch the throw, and lay a low, firm sweep tag down in front of the base so the runner slides into the glove. Don't reach high and don't stand on top of the base.
title: Controlling the Running Game
blurb: Anchoring runners to the legal break, catcher backpicks, and covering the bag.
lead: In Majors there are no pickoff moves. The runner has no pre-pitch lead to protect, so there is no pre-pitch battle between pitcher and runner to be won. Under Rule 7.13 the runner must stay in contact with the base until the pitched ball reaches the batter, and balks are not called in this division. Controlling the running game here means everything that happens from the legal break onward: a catcher who can throw, bases that are covered, and a defense that does not give away the extra 60 feet.
systemHead: The main plays
system: BEFORE THE PITCH: nothing to defend. The runner is required to stay in contact, so the pitcher works the hitter and the infield sets its coverage. AFTER THE PITCH: the catcher's BACKPICK, a snap throw behind a runner who has legally left and drifted, is the throw that punishes a lazy secondary at first, second, or third. ON THE RETURN THROW: get the ball back to the pitcher promptly with a fielder alert, because the delayed steal lives in a sloppy lob. ON ANY THROW: a fielder must already be covering the bag before the ball leaves the hand.
Pitcher (1)
No pickoff move to make; take the return throw cleanly and be ready to cover or take a feed in a rundown.
Catcher (2)
Owns the backpick: read the runner's secondary after the pitch and snap the throw only when a fielder is covering.
First Base (3)
Plays normal depth, since there is no leading runner to hold on; breaks to the bag on a catcher backpick.
Shortstop (6) / Second (4)
Cover second on a steal or a catcher backpick by a pre-arranged sign, and stay alert on the return throw.
Third Base (5)
Drifts back toward the bag after the pitch in case the catcher comes behind the runner.
Teach the anchor, not a hold: the runner cannot leave early, so the defense's work starts when the pitched ball reaches the batter.
Balks are not called in the Major Division, because there is no leading runner for a pitcher to mislead.
A backpick is the CATCHER's play after the pitch, not a pitcher's move; do not coach it as one.
Never throw behind a runner without a fielder already at the bag, a backpick to an empty base is a free 60 feet.
Get the ball back to the pitcher crisply, because a lazy lob is exactly what the delayed steal is waiting for.
Drilling a Majors pitcher on a move to first for a runner who is not permitted to lead in the first place.
No one covering on a catcher's backpick.
Lobbing the return throw to the pitcher while a runner is still standing off the base.
Forgetting the runner can be tagged once he has legally left, because the ball stays live after the pitch.
alt: At Intermediate (50/70), Juniors, Seniors, and PONY divisions whose adopted option permits them, true leadoffs are legal and balks are called, so the conventional pickoff game belongs there: the pitcher's move to first, holding the runner on, and the timed pickoff plays at second. None of that carries down into the Major Division, where the runner never takes a lead at all. Check your local rules for anything stricter, and remember the cost-benefit on any throw behind a runner: it also raises the chance of a throwing error that advances him.
q: A Majors coach wants his pitcher to work on a move to first to keep the runner close. What do you tell him?
Teach the standard right-hander's move to first
There is nothing to keep close: the runner cannot lead, so control of the running game comes from the catcher after the pitch
Have him fake a throw to first every pitch
Teach him to spin and throw without stepping
a: In Majors there are no pickoff moves. The runner has no pre-pitch lead to protect, because Rule 7.13 keeps him in contact with the base until the pitched ball reaches the batter, and balks are not called for the same reason. There is nothing for a pitcher's move to shorten. The running game is controlled after the pitch instead: a catcher who can throw behind a drifting runner, fielders who cover the bag, and a crisp return throw to the pitcher.
q: A Majors runner on first takes his secondary shuffle and drifts a step too far after the pitch. Which play punishes him?
The pitcher steps off and throws to first
A catcher's backpick, a snap throw to first with the first baseman covering
A balk call against the pitcher
Nothing: the runner is protected once the pitch is thrown
a: The catcher's backpick. Once the pitched ball has reached the batter the runner may legally leave, but he is also live and can be tagged out off the base, so a catcher who snaps a throw behind him with a fielder covering first turns a lazy secondary into an out. This is a catcher's play after the pitch, not a pitcher's move, and it is the reason a runner has to be able to get back.
title: Turning the Double Play
blurb: Depths, common turns, and safe pivot footwork.
lead: With a runner on first and a ground ball, the double play is the defense's best friend, two outs on one swing. It depends on positioning, a clean feed, and quick, safe footwork at second. The golden rule: never trade two outs for none.
systemHead: Depths & common turns
system: Play DOUBLE-PLAY DEPTH: middle infielders a step or two in and toward the bag. Common turns: 6-4-3 (SS to 2B to 1B), 4-6-3 (2B to SS to 1B), 5-4-3 (3B to 2B to 1B), 3-6-3 or 3-6-1, and 1-6-3 on a comebacker. Feed underhand within ~15 feet, a firm chest-high throw if farther, and a backhand flip from deep in the hole.
Fielding IF
Field it clean first, then deliver an accurate feed led to the bag, secure before fancy.
Pivot man (4 or 6)
Time the arrival to the bag, touch it, clear to the outfield side, throw on the move.
First Base (3)
Gives a target and stretches for the relay to complete the second out.
Pitcher (1)
Covers first on a 3-6-1; backs up the throw to first.
Get ONE sure out first, a botched turn that nets zero is far worse than one clean out.
'See it, secure it', field the feed before thinking about the throw.
The pivot man times his approach so he catches the feed as he reaches the bag, then clears the runner.
Lead the bag with the feed (throw to where the pivot man is going, not where he is).
Rushing the feed and bobbling it, now you have nobody.
Pivot man camped on the bag early: flat-footed, exposed to the slide, no momentum to first.
Sailing the relay over the first baseman.
alt: With developing arms and footwork at this age, forcing every double play can backfire. Many experienced Majors coaches teach the pivot man to 'tag and throw only if it's there,' and otherwise simply take the sure out at first. Know your personnel: a clean single out beats a rushed, error-prone turn.
q: Grounder in the shortstop's normal range, runner on first, fewer than two outs. Name the standard double play.
6-4-3: shortstop to second baseman to first baseman
4-6-3: the second baseman fields the shortstop-side grounder, feeds the shortstop at second, and he throws to first
5-4-3: third baseman to second baseman to first baseman
1-6-3: pitcher to shortstop to first baseman
a: A 6-4-3: the shortstop fields the ball and feeds the second baseman covering the bag, who touches second for the force out and throws to first base to complete the double play.
q: Why should the pivot man avoid standing on the bag waiting for the feed?
It is a rule violation to take a feed while standing on the base, so the pivot man must stay off the bag even before the throw arrives
The runner can't be tagged if the fielder is on the bag
He'd be flat-footed, exposed to the slide, with no momentum toward first
It makes the throw to first too easy
a: Arriving early leaves him flat-footed and exposed to the sliding runner, and it kills his momentum toward first. He should time his approach so he catches the feed as he reaches and crosses the bag, clears to the outfield side, and throws on the move.
title: Rundowns (Pickles)
blurb: Minimizing throws and finishing the pickle.
lead: A runner caught between bases should be an easy out, but rundowns are botched constantly because of too many throws and poor backup. The whole skill comes down to a few disciplined principles that turn chaos into a routine tag.
systemHead: The principles
system: Minimize throws, aim to finish it in ONE. Run the runner hard back toward the base he came from (the lower-value base) so that if he escapes, he hasn't advanced. The fielder with the ball sprints at the runner at full speed, ball held up, to force a commitment, then throws firmly to the OPEN (glove) side only when the receiving fielder calls for it. After throwing, peel out of the lane and circle back to back up.
Fielder with ball
Sprint at the runner, ball up, commit him, then throw on the call, no pump fakes.
Receiving fielder
Move toward the runner, give a target, call 'Now!' for the throw, apply the tag.
Trailers (both ends)
Rotate in behind each end so there is always a fielder backing up the next throw.
Nearby base
Cover the base the runner is being driven back to.
Force the runner to commit BEFORE you throw, a throw at an undecided runner is a throw away.
Throw to the open side, chest-high; keep the ball out of the runner's body and head path.
No pump-faking, it causes overthrows and gives the runner time.
After every throw, peel off and get back in line to back up.
Too many throws, every throw is a chance to err.
Throwing across the runner's body or over his head.
Faking repeatedly and never throwing, letting the runner reach the base.
No one backing up, so an overthrow becomes an extra base.
alt: The 'drive him to the lower base' rule has an exception: when there's a trail runner you also want to retire, a coach may intentionally run the lead runner toward the higher base to set up a second out. That's an advanced wrinkle, for most Majors situations, keep it simple and drive the runner back to the base he came from in as few throws as possible.
q: A runner is hung up between first and second. Which way do you try to run him, and why?
Run the trapped runner toward second so the defense gains territory before making the tag or throwing again
Back toward first (the lower base) so he gains nothing if he escapes
Whichever way he's already facing
Toward home to confuse him
a: Back toward first, the lower base, when possible, so that if he escapes the tag he hasn't gained anything. Run him hard to force a commitment, and try to finish it in a single throw.
q: How many throws should a clean rundown take, and what does the fielder do right after throwing?
Keep throwing until the runner tires out, then stand where you threw from so you can receive the next return throw
Set a three-throw minimum to wear the runner down
Aim for one throw, then follow the throw toward the next fielder instead of peeling off to back up
Ideally one; after throwing, peel off and circle back to back up
a: Ideally just one. The instant he releases, the fielder peels out of the runner's path and circles back to back up the next throw, so there is always a fielder behind the play.
title: Bunt Defense
blurb: Charging, coverage, and the catcher's call.
lead: A sacrifice bunt is a coordinated play with a runner on first (or first and second). The defense's job is to field it cleanly, get the sure out, and take the lead runner ONLY if it's clearly there. The catcher runs the whole thing with his voice.
systemHead: Coverage
system: The corners (first and third base) charge hard; the pitcher fields balls up the middle; the second baseman covers first; the shortstop covers second. The CATCHER is the field general, he fields balls at the plate and CALLS the base ('One!' / 'Two!' / 'Three!'). With runners on first and second, the higher-risk 'wheel play' has the shortstop cover third while the third baseman charges.
Catcher (2)
Reads the play, fields balls at the plate, and CALLS which base to throw to.
Corners (3 & 5)
Charge hard, field with the glove down, crow-hop and throw.
Pitcher (1)
Fields balls bunted up the middle / in front of the mound.
Second Base (4)
Covers first base.
Shortstop (6)
Covers second base (covers third on the wheel play).
Default to the SURE out at first, only go for the lead runner if you have it cleanly and the catcher calls it.
Field the ball with the glove (two hands); don't barehand a moving ball you can glove.
Crow-hop to throw, don't fling it off-balance.
The catcher's voice rules; fielders throw where he tells them.
Nobody calls the base, so the fielder hesitates and gets no one.
Everyone charges and first base is left uncovered.
Going for a late force at second/third and getting nobody instead of the easy out at first.
alt: The 'wheel play' (third baseman charges, shortstop rotates to cover third) is designed to get the lead runner at third with runners on first and second, but it's high-risk: a missed read leaves third uncovered. Many Majors teams default to simply taking the out at first unless they've repped the wheel thoroughly. The conservative play wins more games at this level than the aggressive one.
q: Runner on first, a sac bunt rolls slowly between the mound and the third-base line. Who fields it, covers first, and calls it?
The third baseman or pitcher fields it; the second baseman covers first; the catcher calls the base
The shortstop fields it; the first baseman covers first; the pitcher calls the base
The catcher fields everything; the pitcher calls the base
The first baseman fields it; the shortstop covers first; nobody calls
a: Depending on the exact ball, the third baseman or the pitcher fields it. The second baseman covers first. The catcher reads the play and calls the base, usually 'One!' for the sure out at first, since the lead runner is normally too far gone to get at second.
q: When should the defense try for the lead runner instead of the out at first?
Every time, to be aggressive
Whenever there's a runner on base
Only when it's fielded cleanly and early, the bag is covered, and the catcher calls it
Never, always take the out at first
a: Only when the fielder reaches the bunt cleanly and early, the covering fielder is already at the bag, and the catcher calls the lead base. If there is any doubt at all, take the sure out at first.
title: First-and-Third Defense
blurb: Reading the double steal and choosing your play.
lead: Runners on first and third is the classic pressure situation: the offense often sends the runner from first to draw a throw and let the runner on third score. The defense has to decide (before the pitch) how much it's willing to risk to get the out versus protect the run.
systemHead: Your options (choose pre-pitch)
system: (1) Throw THROUGH to second for the tag and accept the risk that the run scores. (2) LOOK-and-throw: the catcher steps/looks toward third to freeze the runner, then throws to second. (3) CUT play: a middle infielder or the pitcher cuts the throw in front of second and reads the runner on third, throw home if he breaks. (4) FAKE / snap throw back to third or to the pitcher to catch the runner leaning. At this age, and especially early in the game, the simplest choice usually works best: throw through to second (or run the runner down) and accept that the run may score. Save the look and cut plays for late, close games.
Catcher (2)
Executes the chosen option; on a cut play, throws on a line the cut man can intercept.
Cut man (1, 4, or 6)
Positioned in front of second; reads the runner on third and decides throw home or tag at second.
Shortstop / Second
One covers second for the tag; the other can be the cut/read man.
Third Base (5)
Holds third; ready for a snap throw if the runner there gets careless.
DECIDE before the pitch based on score and outs, don't improvise into a giveaway run.
Big lead or early game: throw through (or run him down) and take the out; one run won't hurt you.
Game on the line: run the look or cut play to defend the run from third.
Keep it simple, complicated plays at this age invite errors that cost you both the out and the run.
No pre-pitch plan, so the throw goes blindly and the run scores for a meaningless out at second.
The cut man forgets to watch the runner on third.
Over-faking and getting neither runner.
alt: At Majors, the runner on third jumps on the throw frequently, and elaborate cut/look plays produce errors. A strong case can be made for the simplest response, throw through to second (or run the runner down) and accept an early run, saving the cut and look plays for late, close situations. Match the complexity to your team's reps.
q: First inning, runners on first and third, the runner on first takes off. Simplest, lowest-risk response for a youth defense?
Always keep the ball and chase the runner at third, because stopping that possible run matters more than taking an out at second
Throw through to second for the out (or run him down) and accept a possible run
Throw home immediately
Fake to second and throw to first
a: Throw through to second and take the out (or run the runner down), accepting that the run from third may score. Early in the game the sure out and simplicity usually beat a complicated cut play that invites throwing errors.
q: In a 'cut' play, who reads the runner on third, and what's the decision?
A middle infielder or pitcher cuts the throw; throw home if R3 broke, otherwise tag at second
The catcher decides after the throw lands
The first baseman reads it and throws home
An outfielder reads the runner on third
a: A middle infielder or the pitcher positioned in front of second cuts the catcher's throw and watches the runner on third: if that runner broke for home, he throws home; if the runner held, he completes the tag at second.
title: Backing Up Bases & Throws
blurb: Who backs up which base on every throw.
lead: Every throw can be overthrown, and at the youth level many are. The teams that give up the fewest extra bases are the ones where SOMEONE is always behind the throw. Backing up is pure effort, it requires no special talent, just the habit of moving on every ball.
systemHead: Who backs up what
system: PITCHER: on extra-base hits and relays, backs up third or home, whichever base the throw is heading to, deep and in line. OUTFIELDERS: back each other up on every ball, and back up infield throws on their side (right field backs up first, center backs up second, left backs up third). INFIELDERS: back up throws to the bases on their side. CATCHER: with nobody on, backs up first base on a routine grounder.
Pitcher (1)
Sprints to back up third OR home on outfield throws and relays; gets deep and in line.
Outfielders (7,8,9)
Back up each other and the infield throws on their side of the field.
Infielders
Back up throws to the bases on their side of the infield.
Catcher (2)
Backs up first base on a bases-empty ground ball in case of an overthrow.
No throw without a backup, make it a team rule.
Get DEEP enough (10–15+ feet behind the base) so an overthrow doesn't get past you too.
Line up with the throw, not just the base, read the angle.
Move on every pitch and every ball; backing up is hustle, not skill.
Standing flat and watching the play instead of moving to back up.
Backing up too shallow, so the overthrow still gets by.
Pitcher freezing because he doesn't know which base to back up.
alt: Which base the pitcher backs up is a judgment call when the throw could go to either third or home. He should read the lead runner and trail the likely throw. Some coaches simplify it to a rule, 'back up home unless the play is clearly at third', to remove hesitation. Either way, the pitcher must commit and get deep; a pitcher drifting between two bases backs up neither.
q: No outs, nobody on, routine ground ball to shortstop. Which defender comes from the plate area to back up first base?
The pitcher, he always backs up first
The right fielder, it's his side of the field
The catcher, he has no play at the plate, so he hustles behind first
Nobody needs to back up a routine grounder
a: The catcher comes from the plate area to get behind first on a bases-empty grounder. The right fielder also backs up first from the outfield side under this lesson's plan; both cover a possible wild throw from different starting positions.
q: A ball is hit to the wall with a runner trying to score from first. Where should the pitcher go?
Back up the base the throw is going to, home (or third), deep and in line
Run to home plate and take the tag in front of the catcher, leaving the area behind the plate uncovered if the throw gets past
Run to second base for the relay
Stay on the mound
a: He sprints to back up the base the throw is heading to, home plate (or third, depending on the lead runner), getting deep and lining up with the relay so an overthrow doesn't get past him.
title: Infield Depth & Positioning
blurb: Normal, DP depth, infield in, and guarding the lines.
lead: Where the infield plays (how deep and how shaded) changes with the score, the number of outs, and the runners on base. Good defenses adjust every pitch and say the alignment out loud. The wrong depth at the wrong time gives away runs or easy hits.
systemHead: The main alignments
system: NORMAL: a couple steps off the grass. DOUBLE-PLAY DEPTH: middle infielders in and toward the bag. INFIELD IN (on the grass): late innings, fewer than two outs, winning/tying run on third, cut the run at the plate, at the cost of range. HALFWAY: a compromise. CORNERS IN for a likely bunt. NO-DOUBLES / GUARD THE LINES: outfield deep and corners near the lines to protect a late lead.
Middle IF (4 & 6)
Set the depth for the situation; communicate DP depth or 'in' every pitch.
Corners (3 & 5)
Creep in for the bunt with a runner on; guard the lines late with a lead.
Outfield (7,8,9)
Play deep on 'no-doubles'; normal otherwise; shade by hitter.
Whole infield
On 'infield in,' all four commit to cutting the run at the plate.
Communicate the alignment every single pitch, everyone moves together.
'Infield in' is all-or-nothing: commit to it, knowing more grounders will sneak through.
With two outs, just get the out at first, don't play in.
Shade for the hitter and the runner's speed.
Playing in too early when a run isn't urgent, giving up easy base hits.
Corners forgetting the bunt with a runner on first.
Not adjusting depth for a fast runner or a strong hitter.
alt: The 'halfway' depth is genuinely debated. Critics argue you end up doing neither job well, too deep to reliably cut the run, too shallow to turn two, while supporters use it situationally. There's no single right answer; decide your team's defaults, signal them clearly, and don't leave players guessing pitch to pitch.
q: Last inning, tie game, winning run on third, one out. How does the infield play, and what's the trade-off?
Keep the infield deep for a possible double play, because normal depth covers the plate just as effectively without losing range
Normal depth; there's no trade-off
Guard the lines; the trade-off is missing bunts
Infield in to cut the run at the plate; the trade-off is less range
a: Infield in (on the grass) to cut the run at the plate. The trade-off is reduced range, more ground balls sneak through for hits, but you accept that to keep the winning run from scoring on a routine grounder.
q: Two outs, runner on third, close game. Should the infield play in?
No, with two outs, just get the out at first; play normal depth
Yes, bring the infield close to the plate because the runner on third is the only threat, even though a routine groundout at first ends the inning
Yes, play in to stop the steal of home
Play halfway to be safe
a: No. With two outs you simply record the out at first (or the nearest force), so play at normal depth. The runner on third can't score if you get the third out on the grounder, and playing in would needlessly surrender range and easy hits.
title: Force vs. Tag Plays
blurb: When to touch the bag and when to tag the runner.
lead: Knowing whether you must TAG the runner or can simply touch the BASE is one of the biggest sources of youth defensive mistakes. Every fielder needs to know, before the pitch, exactly where the force is, and to remember that a runner's force disappears the instant a runner behind him (or the batter) is put out.
systemHead: The rule
system: A FORCE happens when the batter becomes a runner and a runner has to move up because every base behind him is filled; he has no choice but to advance. On a force, you only have to TOUCH the base with the ball before the runner gets there. The force comes off the moment a runner behind him, or the batter-runner, is put out: from then on you must TAG him. Getting the lead runner out does NOT remove the force on the runners behind him. Example: runner on second only, ground ball: first base was empty, so there is NO force at third, and you must tag the runner trying to advance.
Every fielder
Knows pre-pitch exactly where the force is and where a tag is required.
Receiving IF
On a force, touch the bag; with no force, apply the tag to the runner.
Catcher (2)
On a force at home (bases loaded), tags the PLATE, not the runner.
Pitcher / corners
Adjust after the first out, the force may have just been removed.
Say it out loud pre-pitch: 'Force at second and first' or 'No force at third, tag him.'
On a force at home, tag the plate; don't waste time tagging the runner.
After one out is recorded, re-check whether the force is still on for the next runner.
Simple test: look behind the runner. If every base behind him is filled and nobody behind him has been put out yet, it's a force; if not, tag him.
Tagging a base when a tag of the runner was required, runner safe.
Chasing a tag when a quick base-touch force was available, slower, lets others advance.
Forgetting the force came off after an out and standing on a bag while the runner is safe.
alt: Removed-force and timing/appeal situations get subtle, for example, the order in which outs are recorded can change whether a run counts. Those edge cases matter at higher levels; for Majors, keep the working rule simple ('is every base behind him filled, with no out on a runner behind him?') and clean up the unusual cases in practice rather than expecting players to compute them live.
q: Runner on second only, grounder to third. Is there a force at third, and what must the third baseman do with a runner advancing?
Yes, there's a force at third; just touch the bag
No force at third; he must tag the runner (or throw to first for the batter-runner)
No force, but he can still touch the bag for the out
Force at third only if there are two outs
a: No, there is no force at third with only a runner on second, because that runner isn't forced to vacate. The third baseman must TAG the advancing runner, or throw to first to retire the batter-runner, where touching the base is enough.
q: Bases loaded, grounder to the shortstop. What's the force situation and the cleanest out?
Tag each runner individually because a grounder removes the force at the bases once every runner starts moving
Force only at first; tag the others
Force at every base; cleanest is to touch second (no tag needed)
Force only at home
a: There's a force at every base, including home. The cleanest play is usually the force at second (or home, then first for two), just touch the bag, no tag needed, because every runner is forced to advance.
With one out and a runner on first, what should every infielder tell themselves before the pitch? — explanation
The number of outs and where I'll go with the ball if it comes to me. The number of outs and where the ball goes, for example: 'One out, double-play depth, turn two if I can; if I can't, take the sure out at first.' Saying it pre-pitch means no hesitation when the ball is hit.
Two fielders converge on a pop-up and both call for it. Who yields, and what do they do? — explanation
The lower-priority fielder yields, yells 'Take it!', and clears out of the way. The lower-priority fielder yields immediately, shouts 'Take it!' (or 'You!'), and peels out of the way to avoid a collision, then looks for the next job (cover a base or back up).
A pop fly drifts into shallow left field between the shortstop and the left fielder. Who has priority? — explanation
The left fielder, an outfielder coming in beats an infielder going back. The left fielder. An outfielder coming forward takes priority over an infielder drifting back, because catching the ball moving in is far easier and safer than reaching back over the shoulder.
Runners on first and second, one out, the batter lifts a routine pop-up to the second baseman. What is the result? — explanation
Infield fly, the batter is automatically out. Infield Fly Rule: with runners on first and second (or bases loaded) and fewer than two outs, on a fair fly an infielder can catch with ordinary effort, the umpire calls the batter OUT automatically. The batter is out whether the ball is caught or not. Runners are NOT forced: if the ball is caught they must tag up before advancing; if it drops they may advance at their own risk. Catch it cleanly anyway.
Base hit to right-center, the runner is rounding third to score. Who is the cut man, and who backs up the plate? — explanation
First baseman is the cut man; the pitcher backs up home. The first baseman is the cut man. He sets up roughly 30–45 feet in front of home plate, lined up between the outfielder and the catcher, hands up as a target. The pitcher sprints to back up home plate in case of an overthrow.
A ball rattles in the left-field corner for a possible double. Which middle infielder relays, and who covers second? — explanation
Shortstop relays; the second baseman covers second. On a ball to left or left-center, the shortstop goes out as the relay man to shorten the throw, and the second baseman covers second base.
Right-handed batter, runner stealing second. Under the common default, who covers, and why use a pre-pitch sign? — explanation
Shortstop covers; the sign tells the pitcher and keeps them from both leaving the bag. The shortstop covers on a right-handed batter under the common default. The SS and 2B exchange a sign before the pitch so the pitcher knows who is covering, for a comebacker, a throw behind the runner after the pitch, or a ball up the middle, and so they don't both leave the bag uncovered or both run to it.
How should the covering fielder apply the tag at second base? — explanation
Catch it and lay a low sweep tag down in front of the bag. Straddle or clear the front edge of the bag, catch the throw, and lay a low, firm sweep tag down in front of the base so the runner slides into the glove. Don't reach high and don't stand on top of the base.
A Majors coach wants his pitcher to work on a move to first to keep the runner close. What do you tell him? — explanation
There is nothing to keep close: the runner cannot lead, so control of the running game comes from the catcher after the pitch. In Majors there are no pickoff moves. The runner has no pre-pitch lead to protect, because Rule 7.13 keeps him in contact with the base until the pitched ball reaches the batter, and balks are not called for the same reason. There is nothing for a pitcher's move to shorten. The running game is controlled after the pitch instead: a catcher who can throw behind a drifting runner, fielders who cover the bag, and a crisp return throw to the pitcher.
A Majors runner on first takes his secondary shuffle and drifts a step too far after the pitch. Which play punishes him? — explanation
A catcher's backpick, a snap throw to first with the first baseman covering. The catcher's backpick. Once the pitched ball has reached the batter the runner may legally leave, but he is also live and can be tagged out off the base, so a catcher who snaps a throw behind him with a fielder covering first turns a lazy secondary into an out. This is a catcher's play after the pitch, not a pitcher's move, and it is the reason a runner has to be able to get back.
Grounder in the shortstop's normal range, runner on first, fewer than two outs. Name the standard double play. — explanation
6-4-3: shortstop to second baseman to first baseman. A 6-4-3: the shortstop fields the ball and feeds the second baseman covering the bag, who touches second for the force out and throws to first base to complete the double play.
Why should the pivot man avoid standing on the bag waiting for the feed? — explanation
He'd be flat-footed, exposed to the slide, with no momentum toward first. Arriving early leaves him flat-footed and exposed to the sliding runner, and it kills his momentum toward first. He should time his approach so he catches the feed as he reaches and crosses the bag, clears to the outfield side, and throws on the move.
A runner is hung up between first and second. Which way do you try to run him, and why? — explanation
Back toward first (the lower base) so he gains nothing if he escapes. Back toward first, the lower base, when possible, so that if he escapes the tag he hasn't gained anything. Run him hard to force a commitment, and try to finish it in a single throw.
How many throws should a clean rundown take, and what does the fielder do right after throwing? — explanation
Ideally one; after throwing, peel off and circle back to back up. Ideally just one. The instant he releases, the fielder peels out of the runner's path and circles back to back up the next throw, so there is always a fielder behind the play.
Runner on first, a sac bunt rolls slowly between the mound and the third-base line. Who fields it, covers first, and calls it? — explanation
The third baseman or pitcher fields it; the second baseman covers first; the catcher calls the base. Depending on the exact ball, the third baseman or the pitcher fields it. The second baseman covers first. The catcher reads the play and calls the base, usually 'One!' for the sure out at first, since the lead runner is normally too far gone to get at second.
When should the defense try for the lead runner instead of the out at first? — explanation
Only when it's fielded cleanly and early, the bag is covered, and the catcher calls it. Only when the fielder reaches the bunt cleanly and early, the covering fielder is already at the bag, and the catcher calls the lead base. If there is any doubt at all, take the sure out at first.
First inning, runners on first and third, the runner on first takes off. Simplest, lowest-risk response for a youth defense? — explanation
Throw through to second for the out (or run him down) and accept a possible run. Throw through to second and take the out (or run the runner down), accepting that the run from third may score. Early in the game the sure out and simplicity usually beat a complicated cut play that invites throwing errors.
In a 'cut' play, who reads the runner on third, and what's the decision? — explanation
A middle infielder or pitcher cuts the throw; throw home if R3 broke, otherwise tag at second. A middle infielder or the pitcher positioned in front of second cuts the catcher's throw and watches the runner on third: if that runner broke for home, he throws home; if the runner held, he completes the tag at second.
No outs, nobody on, routine ground ball to shortstop. Which defender comes from the plate area to back up first base? — explanation
The catcher, he has no play at the plate, so he hustles behind first. The catcher comes from the plate area to get behind first on a bases-empty grounder. The right fielder also backs up first from the outfield side under this lesson's plan; both cover a possible wild throw from different starting positions.
A ball is hit to the wall with a runner trying to score from first. Where should the pitcher go? — explanation
Back up the base the throw is going to, home (or third), deep and in line. He sprints to back up the base the throw is heading to, home plate (or third, depending on the lead runner), getting deep and lining up with the relay so an overthrow doesn't get past him.
Last inning, tie game, winning run on third, one out. How does the infield play, and what's the trade-off? — explanation
Infield in to cut the run at the plate; the trade-off is less range. Infield in (on the grass) to cut the run at the plate. The trade-off is reduced range, more ground balls sneak through for hits, but you accept that to keep the winning run from scoring on a routine grounder.
Two outs, runner on third, close game. Should the infield play in? — explanation
No, with two outs, just get the out at first; play normal depth. No. With two outs you simply record the out at first (or the nearest force), so play at normal depth. The runner on third can't score if you get the third out on the grounder, and playing in would needlessly surrender range and easy hits.
Runner on second only, grounder to third. Is there a force at third, and what must the third baseman do with a runner advancing? — explanation
No force at third; he must tag the runner (or throw to first for the batter-runner). No, there is no force at third with only a runner on second, because that runner isn't forced to vacate. The third baseman must TAG the advancing runner, or throw to first to retire the batter-runner, where touching the base is enough.
Bases loaded, grounder to the shortstop. What's the force situation and the cleanest out? — explanation
Force at every base; cleanest is to touch second (no tag needed). There's a force at every base, including home. The cleanest play is usually the force at second (or home, then first for two), just touch the bag, no tag needed, because every runner is forced to advance.
blurb: Stance, catching out front, and presenting borderline pitches.
Element
What it looks like
lead: Receiving is the skill a catcher repeats most: a hundred-plus times a game. A quiet, athletic catch that presents a borderline pitch as a strike (“sticking” it) steals extra strikes for the pitcher, and a still, confident target builds the pitcher's trust. The goal is honest, clean presentation, not yanking balls into the zone.
systemHead: The receiving system
system: From a relaxed primary stance (signs / nobody on), the catcher gives a low, steady target, then catches the ball OUT FRONT where the umpire can see it. On borderline pitches, the catcher “sticks” the pitch (receiving it firmly and holding it a beat) and uses a subtle thumb/glove angle to work the corners (keeping the thumb under on a low pitch so the pocket meets the ball quietly). Everything stays quiet: soft hands, calm body, no stabbing.
Primary stance
Relaxed and athletic, weight balanced, glove relaxed out in front: used when no runners are on.
The target
Low and still; give the pitcher one clear spot and hold it until he commits.
Catch it out front
Receive the ball in front of your body where the umpire's view is clear, not deep against your chest.
“Stick” the border pitch
On a corner pitch, receive firmly and hold it a beat so the umpire gets a clean look.
Thumb / glove angle
Subtly turn the glove (thumb under on low pitches) to catch the ball moving toward the zone, never away.
Beat the ball to the spot: get the glove there early so the catch is quiet, not a reach.
Receive moving toward the middle of the zone, never letting the glove drift out of it.
Soft, quiet hands: a still glove that “sticks” looks like a strike; a stab looks like a ball.
Set up early and give a clear, low target every pitch.
Stabbing or jerking the glove: umpires read it as a ball and you lose the strike.
Catching the ball deep, against the chest, where the umpire can't see it land in the zone.
Yanking an obvious ball back over the plate: it backfires with umpires who penalize the pull.
Setting the target late, so the pitcher has no spot to aim at.
alt: How hard to coach “framing” at this age is genuinely debated. Some coaches prioritize simply catching everything cleanly and blocking over “stealing” strikes, and aggressive pulling can lose calls with umpires who penalize obvious deception. With developing Majors pitchers, receiving for confidence and not crossing up the pitcher often matters more than borderline theft. Teach honest, quiet presentation, and adjust to how your local umpires call it.
q: A pitch nips the bottom of the zone on the corner. What's the best receiving action?
Receive it high and sweep the glove down across the zone so the umpire sees a firm stop at the lower edge
Receive it with the thumb under and “stick” it quietly in the zone
Yank it up into the middle of the zone
Catch it back against your chest
a: Turn the thumb under so the glove meets the low pitch and “sticks” it firmly and quietly in the bottom of the zone, holding it a beat. Stabbing or yanking the pitch reads as a ball; a calm, controlled catch presents it as a strike.
q: Where should a catcher try to receive the ball relative to the body?
Out front, where the umpire can clearly see it
Receive it close to the chest protector so a missed catch stays nearby, even though the glove is harder for the umpire to see
As far to the side as possible
It doesn't matter where you catch it
a: Out front, in the umpire's clear line of sight. Catching the ball deep against the body hides the location and makes a strike look like a ball; receiving out front lets the umpire see the pitch finish in the zone.
title: Blocking & The Dirt-Ball Wall
blurb: Secondary stance, dropping to block, and keeping the ball in front.
Element
What it looks like
lead: With runners on base, the catcher's job on a ball in the dirt is to keep it IN FRONT, not necessarily to catch it. A reliable blocker helps the pitcher trust the changeup even with a runner on third. Blocking is built on a secondary stance and the habit of reacting DOWN.
systemHead: The blocking system
system: From a secondary (runners-on) stance (weight up, ready to move) the catcher reacts to a dirt ball by dropping instantly to both knees, filling the gap between the legs with the glove, rounding the shoulders forward, tucking the chin to protect the throat, and angling the chest DOWN so the ball deadens and drops in front of the plate. On a ball to the side, the catcher drops and angles the body back toward the plate so the deflection stays in front.
Secondary stance
Weight slightly forward, hands ready, body loaded to move: used with runners on base.
Drop to block
React DOWN to both knees instantly; don't reach to catch a ball in the dirt.
Glove placement
Glove fills the gap between the knees (the “five-hole”), fingers down.
Chest & shoulders
Round the shoulders and angle the chest DOWN so the ball deadens and stays in front.
Chin & bare hand
Tuck the chin to the chest; keep the bare hand protected behind the glove or behind the back.
Lateral blocks
On a ball to the side, slide and angle the body back toward the plate to keep the carom in front.
React DOWN, not out: a block is a controlled fall, not a catch attempt.
“Smother” the ball: beat it with your body and let the chest absorb it.
Angle the chest so the ball drops straight down in front, not out where a runner can advance.
After the block, find the ball, pop up, and be ready to throw: the play isn't over.
Trying to pick or catch every ball in the dirt instead of blocking it.
Dropping straight down with the chest up, so the ball caroms off and rolls away.
Sliding sideways on a lateral ball without angling the body back: the ball squirts to the screen.
Leaving the bare hand exposed in front and taking a bruise.
alt: The classic secondary squat versus modern one-knee setups is a real debate at this level. One-knee stances help catchers receive and present low strikes and are easier on the body, but they can slow lateral blocking and pop-up jumps. There's no single right answer for 10–12: pick a setup the catcher can both receive AND block from, and be honest about the trade-off. Bare-hand protection (behind the back vs. behind the glove) also varies by coach.
q: Runner on second, the pitch bounces in the dirt directly in front of the plate. Best action?
Stay on your feet and scoop it in one motion, so you can stand and throw before the runner advances
Step back and let it go to the screen
Drop to both knees and block it in front, chest angled down
Backhand it to the side
a: Drop to both knees, fill the gap with the glove, and block the ball in front with the chest angled down. With a runner on second, keeping the ball in front (not catching it) is what stops the runner from advancing to third.
q: How should the chest and shoulders be angled on a block?
Chest up toward the sky to see the ball
Turned fully sideways
Leaning backward away from the ball
Squared and angled DOWN toward the plate
a: Round the shoulders and angle the chest DOWN toward the plate so the ball deadens and drops in front of you. A chest that's flat or angled up lets the ball ricochet away, giving runners a free base.
title: Pop-Time Mechanics & The Run Game
blurb: Transfer, footwork, and throwing out base stealers.
Element
What it looks like
lead: Throwing out a base stealer is footwork, transfer, and accuracy, not just a big arm. “Pop time” measures glove-pop to glove-pop, and at the youth level the catchers who control the run game are the ones with the quickest, cleanest transfer and the most accurate throw, not necessarily the strongest.
systemHead: The throwing system
system: On a steal, the catcher receives the pitch already moving into the throw: a clean transfer brings the ball to the throwing-side ear while the feet replace and point the throwing-side foot at the target (“jab-replace” or “rock-and-fire”). The throw goes on a low line: chest-to-knee height over the bag. On a steal of third, the catcher clears a right-handed batter by stepping up and to the side; a left-handed batter leaves the lane to third open.
The transfer
Snap the ball from glove to throwing hand at the ear: short and clean, no wasted motion.
Footwork to 2B
Replace the feet so the throwing-side foot points at second; get the front shoulder to the target.
Throwing to 3B
On a RH batter, step up and slightly toward the mound to clear him; on a LH batter the lane is open.
Trajectory & target
Throw on a low line, chest-to-knee height over the bag, so the tag comes straight down.
Clearing the batter
Read the batter's handedness pre-pitch so you already know your release angle.
A quick, clean transfer beats a strong-but-slow arm every time: release time wins.
Throw on a line, low: a high throw sails into center field.
Get the front foot and shoulder pointed at the bag; throw with your whole body, not just the arm.
Accuracy first: a catchable, on-the-bag throw turns into an out; a rocket off-line does not.
Double-clutching or a long, looping transfer: the runner is in standing up.
Throwing the ball high so it sails over the tag into the outfield.
A big crow-hop or windup that wastes the split-second you have.
Aiming the throw instead of trusting reps: tentative throws sail or bounce.
alt: Footwork systems genuinely vary: jab step, replace step, and rock-and-throw are all taught, and none is universally “correct.” Pop-time numbers (you'll hear ~2.0 seconds cited) are advanced high-school/college benchmarks; for Majors they're a coaching guide, not a cutoff, and shouldn't drive playing-time decisions. Prioritize a quick release and accuracy: arm strength develops naturally with age and growth.
q: What most reliably throws out a base stealer at the Majors level?
A quick, clean transfer plus an accurate, on-the-bag throw
The single strongest arm on the team
Use the longest possible crow-hop to build arm speed before throwing, even if it adds time to the transfer
Throwing the instant the ball arrives, regardless of grip
a: A quick, clean transfer and an accurate throw. “Pop time” is footwork and release, not raw arm strength: a catchable throw right on the bag beats a powerful throw that sails off-line, especially at this age.
q: Where should the throw to second base arrive for the easiest tag?
High and to the outfield side so the fielder has room to reach back and sweep the glove toward the runner
Low: chest-to-knee height, right over the bag
On a short hop well in front of the bag
Wherever the fielder is standing
a: On a low line, around chest-to-knee height directly over the bag, so the fielder catches it and drops the tag straight down. A high throw forces the tag up and lets the runner slide in underneath.
title: Plays at the Plate & Tagging Rules
blurb: Positioning, the sweep tag, and the Little League blocking rule.
Action / Rule
What to do
lead: A play at the plate is a catch under pressure PLUS a rule you must know cold: in Little League the catcher may NOT block the plate without the ball. Get the rule wrong and a clean tag becomes obstruction: the run scores anyway. Get it right and you catch first, then tag.
systemHead: The system (and the rule)
system: Until the catcher has the ball, give the runner a lane to the plate: set up in front of the plate on the infield side, not on the plate and not on the base line. Blocking the plate or base path WITHOUT possession is obstruction, even while you are reaching for the throw, and the runner is awarded the base. Once the catcher has the ball, the catcher may move into the path and apply a low sweep tag, securing the ball with two hands. There is NO “must-slide” rule, but a runner must slide or attempt to get around a fielder who already has the ball and is waiting to tag. In Majors a runner who slides head first while advancing is out, so slide feet first. Deliberate, malicious contact can get a runner ejected. With the bases loaded it is a FORCE at home: just touch the plate.
Pre-catch positioning
Give the runner a lane: stay in front of the plate, off the base line. Blocking it without the ball is obstruction.
Receiving the throw
Catch the ball FIRST. Field a short hop or read the long hop; secure it before you think about the tag.
The sweep tag
Once you have the ball, move into the path and sweep a low tag down, two hands protecting the ball.
Force at home (bases loaded)
It's a force: touch the PLATE, no tag of the runner needed (then look to throw for two).
Protecting the ball
Expect contact; keep the ball in the throwing hand, buried in the glove: don't reach and expose it.
Runner's obligation
No must-slide rule, but the runner must slide or avoid a fielder who already has the ball and is waiting.
Catch first, tag second: an out you can't hold isn't an out.
Give the runner the plate until the ball is in your glove; then take the path away.
Sweep the tag low and quick, and squeeze the ball with two hands through the contact.
On a force at home, just touch the plate: it's faster than chasing a tag, and you may get two.
Setting up on or blocking the plate before you have the ball: that's obstruction; the runner is awarded home.
Reaching for a swipe tag and losing the ball on contact: no out, run scores.
Tagging the runner on a bases-loaded force when simply touching the plate is faster.
Catching the throw deep or off to the side so the tag is late.
alt: This differs sharply from older “block-the-plate” coaching and from how the pros once played it: collision rules were tightened across baseball after high-profile injuries. Enforcement varies by umpire. In Little League there is no must-slide rule, and no league may change the rule that a runner must slide or try to get around a fielder who has the ball and is waiting. Force-timing edge cases (which run counts when) get subtle at higher levels.
q: The runner is rounding third and the throw is on its way: you don't have the ball yet. Where do you set up?
Stand across the plate before the throw arrives so the runner has to go around you to reach home
Block the entire base path early to be safe
Give the runner a lane and stay off the plate until you catch it
Kneel in the middle of the plate
a: Give the runner a lane and stay off the plate until the ball is in your glove. In Little League, blocking the plate or path without possession of the ball is obstruction: the runner is ruled safe and awarded home regardless of the tag.
q: Bases loaded, ground ball, the throw comes home for the out. Do you tag the runner or the plate?
Tag the runner: always tag at the plate
Tag the runner, then the plate, to be sure
Let the runner cross, then appeal
Touch the plate: it's a force at home
a: Touch the plate. With the bases loaded the runner is forced to advance, so it's a force out at home: just touch the plate with the ball, no tag of the runner required. It's faster and lets you turn a possible double play.
title: Field Command, Bunts, & Pop-ups
blurb: The mask, foul pop-ups, fielding bunts, and directing throws.
Element
What to do
lead: The catcher quarterbacks everything in front of the plate (bunts, swinging dribblers, and foul pop-ups) and directs every throw because the catcher sees the whole field. Field command is loud, decisive, and built on knowing where the ball drifts and where the play is before the ball is in hand.
systemHead: The command system
system: On a pop-up, the catcher FINDS the ball first, then tosses the mask clear of the feet (away from where he's tracking). Foul pop-ups carry backspin that drifts them back toward the infield, so the catcher plays them with his back to the infield. On bunts, the catcher comes out hard, circles the ball when possible to get the feet online, fields with two hands or scoop-and-throws, and loudly calls the base. On overthrows and rundowns, the catcher directs traffic.
Mask removal
FIND the ball, then toss the mask clear of your feet: never fling it blindly and trip on it.
Tracking foul pop-ups
They drift back toward the infield (backspin), so turn your back to the infield and let the ball come to you.
Fielding bunts
Come out hard, circle to get your feet pointed at the target, field with two hands when there's time.
Calling the play
Be the loudest voice: “One! One!” / “Two!” / “Three!” / “Got it!”, you can see the whole field.
Directing throws
On cutoffs, relays, and rundowns, point and call: “Cut-4!”, “Home! Home!”, “Run him back!”
Locate the ball FIRST, then discard the mask: clear of your feet so you don't stumble on it.
On foul pops, remember the backspin pulls the ball toward the infield; keep your back to the field.
On a bunt, get your feet around so you're throwing online: don't throw across your body.
You have the best view on the field: talk on every play, early and loud.
Flinging the mask before finding the ball, then tripping on it under the pop-up.
Turning the wrong way on a foul pop and fighting the backspin as the ball drifts away.
Fielding a bunt flat-footed and throwing across the body: the throw sails.
Going silent when you have the clearest view of the whole play.
alt: First locate a high pop. After that, some coaches teach removing the mask promptly and others keep it on longer; the timing depends on the catcher's gear and comfort, but the mask must be cleared safely before moving to the ball. Who owns bunt-coverage calls (the catcher vs. the corner infielders vs. the bench) also varies by program. Standardize ONE system for your team and rep it; the failure mode is two players assuming different rules.
q: A high foul pop goes up near the plate. Which way does it drift, and how should you position?
Back toward the infield: keep your back to the infield
Toward the stands: face the backstop
Straight down: it doesn't drift
Toward the dugout on the pitcher's side
a: Backspin carries a foul pop back toward the infield, so turn your back to the infield and let the ball drift to you. Catchers who face the backstop end up reaching back over their head as the ball sails away from them.
q: When should the catcher take the mask off on a pop-up?
Immediately, then look for the ball
Find the ball first, then toss the mask clear of your feet
Keep the mask on the whole time
Hand it to the umpire first
a: Locate the ball first, THEN remove the mask and toss it well clear of your feet. Flinging it early (before you know where the ball is) risks tripping over your own mask while tracking the pop-up.
title: Game Management & Pitch Calling
blurb: Reading hitters, sequencing, counts, tempo, and arm care.
Element
What to do
lead: The catcher manages the pitcher and the game: reading the hitter, mixing pitches and locations, working the count, controlling tempo, and keeping the pitcher calm. At Majors, much of this is shared with the coaching staff, but the catcher is the one on the field setting rhythm and protecting the battery.
systemHead: The management system
system: Read the hitter's setup (depth in the box, hands, stride, and what he did on previous swings) and attack the weakness: in/out, up/down, and changing speeds. Pitch to the count: get strike one, expand just off the zone when ahead, and compete without giving in when behind. Control tempo (quick when the pitcher is rolling, slow it down with a mound visit when he's rattled) and always work within pitch-count and arm-care limits.
Reading the hitter
Note box depth, hand position, stride, and previous swings: hunt the weakness.
Sequencing & mixing
Change eye level and speeds; remember what got this hitter out last time.
Working the count
Get strike one; when ahead, expand just off the plate; when behind, compete: don't groove one.
Tempo & rhythm
Quick tempo when the pitcher is locked in; slow it down when he's rushing or rattled.
Mound & arm care
Calm the pitcher with simple words; track pitch counts and rest with the coach (Reg. VI / Pitch Smart).
Strike one changes the at-bat: prioritize getting ahead.
Change speeds and eye level; a good change-up off a fastball is worth more than another fastball.
When the pitcher is rattled, call time, slow the tempo, and give one simple reset cue.
Protect young arms: work within pitch-count limits and lean on location over spin.
Predictable patterns (fastball every first pitch) that hitters time up.
Calling for the pitcher's worst pitch in a high-leverage count.
Speeding up the tempo when the pitcher is already rushing and missing.
Ignoring pitch-count and rest limits to chase outs: arm care comes first.
alt: How much an 11–12 catcher should call the game versus the coach calling pitches is genuinely debated: many programs call pitches from the bench at this age to manage development, sequencing, and arm safety. For league ages 10-12, Pitch Smart advises avoiding breaking balls. Work with the pitcher and coach on fastballs, changeups, location and speed changes instead of calling a curveball or slider. Pitch-count and rest rules (Regulation VI) are league-enforced: verify the current limits for your division.
q: Your pitcher just gave up two hits and is rushing his delivery. Best management move?
Tell him to throw harder
Call for all fastballs to speed things up
Call time, slow the tempo, and give one simple reset cue
Let the pitcher work quickly through the next hitter and wait for the pitch count or score to force a mound visit
a: Call time and slow the tempo, then give one simple, calming cue (a target, a breath, “low strike”). A rattled pitcher who's rushing needs the catcher to reset the rhythm: speeding up or piling on fastballs usually makes it worse.
q: You're ahead 0–2 on a hitter. What's the general approach with the next pitch?
Groove a fastball down the middle
Throw the pitcher's weakest pitch for variety
Aim for the exact center of the plate
Expand just off the zone and make him chase: don't give in
a: Expand just off the plate and try to make the hitter chase: you're ahead, so you don't owe him a strike to hit. Grooving a get-me-over fastball 0–2 wastes the count's advantage and is exactly the pitch good hitters punish.
A pitch nips the bottom of the zone on the corner. What's the best receiving action? — explanation
Receive it with the thumb under and “stick” it quietly in the zone. Turn the thumb under so the glove meets the low pitch and “sticks” it firmly and quietly in the bottom of the zone, holding it a beat. Stabbing or yanking the pitch reads as a ball; a calm, controlled catch presents it as a strike.
Where should a catcher try to receive the ball relative to the body? — explanation
Out front, where the umpire can clearly see it. Out front, in the umpire's clear line of sight. Catching the ball deep against the body hides the location and makes a strike look like a ball; receiving out front lets the umpire see the pitch finish in the zone.
Runner on second, the pitch bounces in the dirt directly in front of the plate. Best action? — explanation
Drop to both knees and block it in front, chest angled down. Drop to both knees, fill the gap with the glove, and block the ball in front with the chest angled down. With a runner on second, keeping the ball in front (not catching it) is what stops the runner from advancing to third.
How should the chest and shoulders be angled on a block? — explanation
Squared and angled DOWN toward the plate. Round the shoulders and angle the chest DOWN toward the plate so the ball deadens and drops in front of you. A chest that's flat or angled up lets the ball ricochet away, giving runners a free base.
What most reliably throws out a base stealer at the Majors level? — explanation
A quick, clean transfer plus an accurate, on-the-bag throw. A quick, clean transfer and an accurate throw. “Pop time” is footwork and release, not raw arm strength: a catchable throw right on the bag beats a powerful throw that sails off-line, especially at this age.
Where should the throw to second base arrive for the easiest tag? — explanation
Low: chest-to-knee height, right over the bag. On a low line, around chest-to-knee height directly over the bag, so the fielder catches it and drops the tag straight down. A high throw forces the tag up and lets the runner slide in underneath.
The runner is rounding third and the throw is on its way: you don't have the ball yet. Where do you set up? — explanation
Give the runner a lane and stay off the plate until you catch it. Give the runner a lane and stay off the plate until the ball is in your glove. In Little League, blocking the plate or path without possession of the ball is obstruction: the runner is ruled safe and awarded home regardless of the tag.
Bases loaded, ground ball, the throw comes home for the out. Do you tag the runner or the plate? — explanation
Touch the plate: it's a force at home. Touch the plate. With the bases loaded the runner is forced to advance, so it's a force out at home: just touch the plate with the ball, no tag of the runner required. It's faster and lets you turn a possible double play.
A high foul pop goes up near the plate. Which way does it drift, and how should you position? — explanation
Back toward the infield: keep your back to the infield. Backspin carries a foul pop back toward the infield, so turn your back to the infield and let the ball drift to you. Catchers who face the backstop end up reaching back over their head as the ball sails away from them.
When should the catcher take the mask off on a pop-up? — explanation
Find the ball first, then toss the mask clear of your feet. Locate the ball first, THEN remove the mask and toss it well clear of your feet. Flinging it early (before you know where the ball is) risks tripping over your own mask while tracking the pop-up.
Your pitcher just gave up two hits and is rushing his delivery. Best management move? — explanation
Call time, slow the tempo, and give one simple reset cue. Call time and slow the tempo, then give one simple, calming cue (a target, a breath, “low strike”). A rattled pitcher who's rushing needs the catcher to reset the rhythm: speeding up or piling on fastballs usually makes it worse.
You're ahead 0–2 on a hitter. What's the general approach with the next pitch? — explanation
Expand just off the zone and make him chase: don't give in. Expand just off the plate and try to make the hitter chase: you're ahead, so you don't owe him a strike to hit. Grooving a get-me-over fastball 0–2 wastes the count's advantage and is exactly the pitch good hitters punish.
blurb: SS relay with 2B covering second, 3B anchoring and 1B trailing as safety.
lead: A ball driven into the left-center gap is extra-base trouble: the outfielder has a long throw across the field and the runners are flying. The defense uses a shortstop relay for a reachable outfield target while the second baseman covers second for the trail runner. Done right, a sure triple becomes a close play, or even an out.
systemHead: The one-relay setup
system: On a ball to the left-center gap, the SHORTSTOP sprints out as the lead relay man, lining up between the ball and the base the throw is heading to. The SECOND BASEMAN covers second base behind the relay so a trailing runner cannot take it without a play. The THIRD BASEMAN anchors third for the tag, the FIRST BASEMAN trails the play toward home as the safety cut, and the PITCHER backs up third or home depending on the lead runner.
Left / Center Field (7,8)
Run the ball down, crow-hop, and throw THROUGH the lead relay man chest-high.
Shortstop (6)
Lead relay man: go out hard, hands up, catch glove-side, turn and throw in one motion.
Second Base (4)
Cover second behind the shortstop relay; give the trail runner a guarded base.
Third Base (5)
Anchors third for the tag; gives a target on the outfield edge of the bag.
First Base (3)
Trails the play toward home as the safety cut; the catcher directs him.
Pitcher (1)
Backs up third or home (whichever base the throw is going to) deep and in line.
The relay man goes ALL the way out: the shorter the outfielder's throw, the more accurate it is.
Catch glove-side and turn glove-side for the quickest release: catch on the move, don't camp.
The second baseman covers second while the shortstop goes out for the relay.
The catcher makes the cut call loud and early; the receiving fielder echoes it so the relay man hears.
Relay man stops short, leaving the outfielder a long, inaccurate throw.
No player covers second, so a trail runner takes it without a play.
Relay man catches flat-footed and double-clutches instead of catching on the move.
alt: This lesson uses one shortstop relay with the second baseman covering second. Some Majors teams instead rehearse a tandem (double-cut) relay with the second baseman behind the shortstop; that requires another player to cover second. Neither system works if players mix assignments. Pick one, diagram every base cover and practice it.
q: A ball splits the left-center gap for extra bases. Who goes out as the lead relay man, and where does the second baseman go?
The second baseman is the lead relay; the shortstop covers second
The third baseman is the lead relay; the second baseman covers third
The shortstop is the relay; the second baseman covers second for the trail runner
The left fielder relays it himself to the infield
a: The shortstop sprints out as the lead relay man on balls to left and left-center. The second baseman covers second behind the shortstop relay so a trailing runner cannot advance there unchallenged.
q: Why does the relay man run all the way out toward the outfielder instead of waiting near the infield?
To get away from the runners
To shorten the outfielder's throw, which makes it far more accurate
Because the rules require it
To show the outfielder the relay glove early, even if staying near the infield leaves the outfielder with a much longer throw
a: A shorter throw from the outfielder is a more accurate throw. By going all the way out and giving a big target, the relay man turns one long, error-prone heave into two shorter, controlled throws, and he can catch on the move and redirect quickly.
title: Deep Right-Field Corner Relay
blurb: 2B as primary relay, SS covering second, 1B as cut-man to home.
lead: A ball ripped into the right-field corner is the mirror image of the gap relay: only now the right side of the infield runs the show. The second baseman becomes the relay man, the shortstop slides over to cover second, and the first baseman sets up as the cut man to home. The job is the same: shorten the throw and keep the trail runner from advancing.
systemHead: Right-side coverage
system: On a ball to the right-field corner or right-center gap, the SECOND BASEMAN goes out as the relay man, and the SHORTSTOP rotates over to COVER SECOND BASE behind him. If the throw is coming to the plate, the FIRST BASEMAN lines up about 30–45 feet in front of home as the cut man, between the relay and the catcher. The THIRD BASEMAN holds third for a tag, and the PITCHER backs up home (or third).
Right / Center Field (9,8)
Run the ball down, crow-hop, and throw through the relay man on a line.
Second Base (4)
Relay man on right-side balls: go out, give a target, catch and turn glove-side.
Shortstop (6)
Rotates to COVER SECOND base behind the relay man.
First Base (3)
Cut man to home: ~30–45 ft in front of the plate, lined up with the catcher.
Third Base (5)
Holds third for the tag if the lead runner stops there.
Pitcher (1)
Backs up home (or third) deep and in line behind the play.
The cut man to home faces the relay with both hands up and lines his body to the plate.
Throw THROUGH the cut man chest-high: low enough that he can intercept it if needed.
The catcher calls 'Cut!' to intercept; without that call the throw travels through. After a cut, the catcher names the next base.
The shortstop must remember to cover second: the relay man just vacated it.
Shortstop forgets to cover second and a trail runner walks into the bag.
Cut man sets up too deep or off-line, so he can't redirect the throw.
Outfielder airmails the relay man, removing the cut option entirely.
alt: Who cuts throws to home is taught differently across programs: many use the FIRST baseman on balls from right and center but the THIRD baseman on balls from left, and some keep a pitcher as a trailing safety. None is universally 'correct.' What matters far more than the specific assignment is that all nine players know the same system and the cut call is loud and early.
q: A double down the right-field line, runner trying to score. In the system taught here, who is the relay man and who is the cut man to home?
Second baseman relays; first baseman cuts to home
Shortstop relays from the right-field corner while third baseman lines up home, because both can see the runner coming around third
First baseman relays; catcher cuts to home
Right fielder throws straight home with no cut
a: On right-side balls the second baseman goes out as the relay man, and the first baseman sets up ~30–45 feet in front of the plate as the cut man to home. The shortstop covers second behind the relay, and the pitcher backs up home.
q: When the second baseman goes out to relay a ball in the right-field corner, who covers second base?
Nobody: it's left open
The shortstop rotates over to cover second
The first baseman leaves the cut position and covers second while the shortstop follows the relay toward the outfield
The pitcher covers second
a: The shortstop rotates over to cover second base. The relay man (2B) has vacated it, so the SS fills the bag to stop a trail runner from advancing into second uncontested.
title: The “No-Doubles” Deep Fly
blurb: Outfield tracking, drop-steps, and boundary management late in the game.
lead: Late in a game with a lead to protect, the defense changes its goal: it will happily give up a single to make sure nothing gets over an outfielder's head for a double or triple. Outfielders play deeper, protect their assigned gaps and lines, and first gain depth on any fly that might travel over them. The math is simple: a runner on first is far less dangerous than a runner in scoring position.
systemHead: No-doubles depth & the drop-step
system: Outfielders play several steps DEEPER while covering their assigned gaps; corner outfielders favor the lines without abandoning the gap. On a fly that may travel over the fielder, use a DROP-STEP to gain depth, then run to the likely landing spot. Once a short fly is clearly short, charge it under control. The corner infielders (and corner outfielders) guard the lines to take away the extra-base hit down the line.
Outfielders (7,8,9)
Play deep, preserve gap coverage, and drop-step on any fly that could pass overhead. Keep everything in front.
Corner OF (7,9)
Favor the line while keeping the assigned gap covered; concede a safe single before a risky extra-base attempt.
Corner IF (3,5)
Guard the lines late to take away the extra-base hit.
Whole outfield
Communicate depth every pitch; everyone shifts together.
Gain depth first on a fly that might carry over you; charge a clear short fly under control.
Keep the ball in front; protect both your assigned gap and line against extra bases.
Catch routine flies moving toward the infield so your momentum is already going the right way.
Talk loud on every ball: deep alignment opens more 'tweener' gaps to cover.
Drifting in on a fly, then getting beaten deep for the double you were trying to prevent.
Playing normal depth late with a lead and giving up the gap.
Corners cheating off the line and surrendering a double down the line.
alt: No-doubles is a situational call, not a default: playing deep all game surrenders cheap singles and lets runners reach in the first place. Some coaches argue against extreme no-doubles depth even late, preferring normal depth plus disciplined line-guarding, since most damage at this age comes from misplayed routine balls, not gap shots. Use it to protect a late lead, not as a season-long alignment.
q: Last inning, protecting a two-run lead. A fly might carry over the outfielder. What is the first move, and why?
A step toward the plate first to make a quick out, trusting a deeper teammate to cover any ball that carries over his head
A drop-step back, because nothing can be allowed over his head
Stand still and read it
Break toward the line every time
a: A drop-step back. In a no-doubles alignment, gain depth on a fly that may carry over you so it stays in front. Once the ball is clearly short, charge it under control; a safe single is preferable to an avoidable double.
q: What tradeoff does a no-doubles alignment make?
A short single may fall, but fewer balls get over an outfielder for extra bases
Infielders move in for a play at home against a runner at third while outfielders keep normal depth
Outfielders guard only the foul lines and allow balls into both gaps
Every outfielder charges shallow flies so no batter reaches first
a: A single. The whole point of no-doubles is to trade a cheap single (a runner on first) for protection against extra-base hits that put runners in scoring position late in a close game.
title: Texas Leaguers & Shallow Bloopers
blurb: Priority and communication between converging infielders and outfielders.
lead: A soft fly that drops into the no-man's-land just beyond the infield (a 'Texas Leaguer') is one of the most miscommunicated balls in baseball. An infielder drifts back with his eyes up while an outfielder charges in. Without a loud, early call, they either collide or both pull up and let it fall. A fixed priority order settles it before it becomes a problem.
systemHead: Priority on the bloop
system: The same rule that governs pop-ups governs the bloop: an OUTFIELDER coming forward beats an INFIELDER going back, and the CENTER FIELDER beats everyone. The outfielder has the easier, safer play because he is moving in with the ball in front of him. He must call it LOUD and EARLY ('I got it! I got it! I got it!') and the infielder peels off the instant he hears it and answers 'Take it!'
Center Field (8)
Highest priority; can call off any infielder or corner outfielder.
Corner OF (7,9)
Take priority over any infielder drifting back; call it loud and early.
Middle IF (4,6)
Go back hard but LISTEN; yield the instant the outfielder calls.
Corners (3,5)
Lowest priority on the bloop; clear out and find the next job.
The outfielder calls early: he's running into the infield's blind spot.
The infielder turns and finds the ball over his shoulder; if the OF calls, peel off immediately.
Use the team's agreed 'I got it!' call three times and practice the teammate's 'Take it!' response.
Whoever yields covers the next base or backs up the catch.
Infielder camps under a ball the outfielder should take, then gets run into.
Both players call at once and neither yields.
Nobody calls and it drops between three players for a cheap hit.
alt: Some staffs give the outfielder blanket authority on anything he can reach in front of him to remove all doubt; others let the infielder keep a ball that's clearly shallow and easy. The blanket-outfielder rule is safer for collisions but can pull an outfielder a long way in on a ball the second baseman had easily. As with all priority systems, the danger is inconsistency: choose one and drill it.
q: A soft fly is falling between the second baseman drifting back and the right fielder charging in. Who should take it?
The second baseman should take it because he called first, even though he is drifting back and the right fielder sees it coming in
Whoever is closer
The right fielder: an outfielder coming in beats an infielder going back
Let it drop to be safe
a: The right fielder. An outfielder moving forward has a much easier and safer play than an infielder reaching back over his shoulder, so the outfielder takes priority, and must call it loud and early so the infielder can peel off.
q: The center fielder and the shortstop both track a shallow bloop. Who has priority?
The shortstop has priority because the ball is shallow, even if the center fielder is coming in with a clearer view
They split it
The center fielder: he has top priority on any ball he can reach
The nearest corner infielder
a: The center fielder. He carries the highest priority on the field and can call off anyone (infielder or corner outfielder) on any ball he can reach with ordinary effort.
title: Fences & Warning Tracks
blurb: Tracking long flies to the fence, wall-checking, and throwing from the track.
lead: A ball hit to the wall asks an outfielder to do two hard things at once: track a long fly at a dead sprint and know where the fence is without taking his eye off the ball. Get the footwork and the wall-check right and a triple off the wall becomes a single with the runner held; get it wrong and it's an inside-the-park disaster.
systemHead: Track, check, and throw
system: On a deep fly, the outfielder TURNS and SPRINTS to the spot the ball is coming down: he does not backpedal or drift, which is slow and dangerous. As he nears the fence he uses his throwing-side hand to feel for the wall (a 'wall-check') so he knows where it is without looking. On a ball off the wall he plays the carom, crow-hops, and throws to the RELAY man, rather than an avoidable long heave to a base. On a catchable ball he uses the track as his warning to make the grab safely.
Outfielders (7,8,9)
Turn and sprint to the spot; wall-check with the free hand; play the carom and hit the relay.
Shortstop (6)
Relay man on balls to the left side; go out to shorten the throw.
Second Base (4)
Relay man on balls to the right side; go out and give a target.
Nearest OF
Sprints over to back up the play at the wall in case of a missed carom.
Turn and run to the spot: don't backpedal; it's slow and you can fall.
Use the free hand to find the fence so you can keep your eyes on the ball.
Off the wall: field the carom, crow-hop, and hit the relay man: no hero throws.
A second outfielder sprints over to back up the wall play.
Backpedaling on a deep fly, losing speed and risking a fall.
Hitting the fence at full speed because the outfielder never checked for it.
Trying to throw all the way to a base on the fly instead of hitting the relay.
alt: How aggressively a young outfielder should attack the wall is a real judgment call: at this age, avoiding injury and keeping the ball in front usually outweighs robbing a home run. Some coaches teach players to pull up and play the carom rather than risk a collision at the fence. Match it to the player: a confident, rangy outfielder can attack; a tentative one should prioritize safety and the relay.
q: A ball is driven deep toward the wall. What's the correct footwork for the outfielder?
Backpedal while facing the infield so he never loses sight of the ball, even as the wall approaches behind him
Drift back slowly with small steps
Wait at the warning track for it to come down
Turn, sprint to the spot, and use a free hand to find the fence
a: Turn and sprint directly to the spot where the ball will come down: backpedaling is slow and risks a fall. As he nears the fence he uses his throwing-side hand to feel for the wall (a 'wall-check') so he can stay locked on the ball without crashing into it.
q: The ball caroms off the wall with runners moving. What should the outfielder do with the throw?
Field the carom, crow-hop, and throw to the relay man
Heave it as far as he can toward the base
Hold the ball and run it in
Throw directly to the nearest base on the fly, because involving the relay player adds an exchange before the tag
a: Field the carom under control, crow-hop, and throw to the relay man: not an avoidable long heave to a base. Hitting the relay turns one long, inaccurate throw into two shorter, controlled ones and keeps trail runners from advancing on an airmailed throw.
title: Grounders Sneaking Through the Infield
blurb: Charging cleanly, blocking with the body, throwing through the cut-man.
lead: Not every ball to the outfield is a fly. A grounder that scoots through the infield puts the outfielder in a fielding role, and how he charges, fields, and throws decides whether the batter stops at first or takes second on a lazy play. Clean footwork and a throw through the cut man keep the damage to a single.
systemHead: Charge, field, and throw through
system: The outfielder CHARGES the grounder under control, getting his body in front of it. On a true bad-hop or skipping ball with a run on the line, he BLOCKS it with his body to keep it in front: a ball that gets past him is two bases. He fields off his glove side, crow-hops, and throws THROUGH the primary cut man chest-high to the right base. If no play is on, he still hits the cut man to keep trail runners honest.
Outfielders (7,8,9)
Charge under control, body in front, field clean (or block), crow-hop and throw through the cut man.
Shortstop / Second (6,4)
One is the cut man lined up for the throw; the other covers the bag.
Third / First (5,3)
Anchor the base for the tag or force; give a target.
Cut man
Lines up between the outfielder and the target base; redirects on the call.
Charge under control: don't sprint past the ball or field it off to the side.
With a run at stake, get the body behind it; a blocked ball in front beats a clean miss.
Throw THROUGH the cut man chest-high so he can redirect it or let it travel.
Field on the glove side and into a crow-hop so the throw is already loaded.
Lazily fielding to the side, letting the batter take second on the throw.
Olé-ing a bad hop instead of blocking it, turning a single into a double.
Throwing over the cut man, removing the redirect option.
alt: Whether to charge hard or play it safe depends on the score and the runner. With a big lead or no play, a controlled approach that simply keeps the ball in front is smarter than a charging barehand that risks a misplay and extra bases. Aggressive charging wins a base back; a misplay gives two away. Read the situation before you attack the ball.
q: A grounder sneaks through the infield with a runner on first. How should the outfielder field and throw it?
Barehand it on the run and throw as hard as possible to any base
Field it off to the side to save a step
Wait for it to stop, then walk it in
Charge under control, get the body in front, and throw through the primary cut man
a: Charge under control with the body in front of the ball, field it cleanly off the glove side into a crow-hop, and throw THROUGH the cut man chest-high to the right base. Getting in front prevents a bad hop from skipping past, which would turn a single into extra bases.
q: It's a skipping bad-hop grounder with the tying run trying to score. What's the outfielder's priority?
Try a one-handed scoop no matter what
Block it with his body to keep it in front, even if he can't field it cleanly
Let it roll to the fence and play the carom
Charge past it and turn around
a: Keep it in front. With a run on the line, blocking a tricky hop with the body (even if he can't field it cleanly) beats an 'olé' attempt that lets the ball get past him for an extra base or a run. A ball in front of you is still only a single.
title: Clean Singles with Runners Moving (The Throw to Third)
blurb: SS as cut-man to third, keeping the throw low, 3B anchoring for the tag.
lead: Single to the outfield, runner on first digging for third: this is the play that decides innings. The throw goes to third with the shortstop as the cut man, kept low and on a line so it can be intercepted if the lead runner is safe and the batter-runner is trying to sneak into second. The third baseman anchors the bag for the tag.
systemHead: The throw to third, kept low
system: On a clean single with a runner on first heading to third, the outfielder hits the cut man on a LOW line. The SHORTSTOP is the cut man, lined up between the outfielder and third base. Keeping the throw LOW lets the SS cut it and throw behind the batter-runner if that runner tries to take second on the throw. The THIRD BASEMAN anchors third and applies the tag. If the lead runner will clearly beat the throw, the SS cuts it and checks the trail runner instead.
Outfielders (7,8,9)
Field the single cleanly, crow-hop, and throw LOW through the cut man toward third.
Shortstop (6)
Cut man to third: lined up between the OF and the bag; cut and redirect on the call.
Third Base (5)
Anchors third for the tag; gives a target and applies a low sweep tag.
Catcher (2)
Reads the play and calls the cut: let it go to third, or cut and stop the trail runner.
Pitcher (1)
Backs up third behind the play in case of an overthrow.
Keep the throw LOW and on a line: a low throw can be cut; a high throw can't.
The SS lines up directly between the outfielder and third base, hands up as a target.
The 3B anchors the bag and tags down; don't chase the throw off the base.
The catcher calls whether to let it go to third or cut and stop the trail runner at second.
A high, sailing throw to third that nobody can cut, letting the batter-runner take second free.
No cut man lined up, so the throw goes to a base nobody can adjust.
Third baseman drifting off the bag instead of anchoring for the tag.
alt: Whether to even throw to third on a single is debatable: many coaches preach 'never make the first or third out at third base' and would rather keep the double play in order and hold the batter-runner at first. Throwing through to third also risks the batter-runner advancing on a missed cut. The low-throw-with-a-cut-man system exists precisely to manage that risk, but the simplest play is often to hit the cut man and concede third while freezing the trail runner. Match the aggression to the game situation.
q: Single to left, runner on first rounding second toward third. Who is the cut man, and why keep the throw low?
The shortstop is the cut man; a low throw can be cut to stop the batter-runner from taking second
The third baseman is the cut man; keep it low to make the tag
The second baseman is the cut man; a low throw is just easier to catch
The pitcher is the cut man; the height doesn't matter
a: The shortstop is the cut man to third, lined up between the outfielder and the bag. Keeping the throw LOW and on a line lets him intercept it and throw behind the batter-runner if that runner tries to take second on the throw: a high, sailing throw can't be cut, which hands the trail runner the extra base.
q: The outfielder sees the lead runner will clearly be safe at third. What should the cut man (shortstop) do?
Let the throw continue to third for a tag attempt, even though the lead runner will be safe and the trail runner can advance
Run the ball back to the pitcher
Throw home
Cut the throw and check the trail runner, keeping the batter-runner at first
a: Cut the throw and check the trail runner. If the lead runner is going to beat the throw to third, there's no reason to let the ball travel: the shortstop intercepts it and keeps the batter-runner from advancing to second on the play.
A ball splits the left-center gap for extra bases. Who goes out as the lead relay man, and where does the second baseman go? — explanation
The shortstop is the relay; the second baseman covers second for the trail runner. The shortstop sprints out as the lead relay man on balls to left and left-center. The second baseman covers second behind the shortstop relay so a trailing runner cannot advance there unchallenged.
Why does the relay man run all the way out toward the outfielder instead of waiting near the infield? — explanation
To shorten the outfielder's throw, which makes it far more accurate. A shorter throw from the outfielder is a more accurate throw. By going all the way out and giving a big target, the relay man turns one long, error-prone heave into two shorter, controlled throws, and he can catch on the move and redirect quickly.
A double down the right-field line, runner trying to score. In the system taught here, who is the relay man and who is the cut man to home? — explanation
Second baseman relays; first baseman cuts to home. On right-side balls the second baseman goes out as the relay man, and the first baseman sets up ~30–45 feet in front of the plate as the cut man to home. The shortstop covers second behind the relay, and the pitcher backs up home.
When the second baseman goes out to relay a ball in the right-field corner, who covers second base? — explanation
The shortstop rotates over to cover second. The shortstop rotates over to cover second base. The relay man (2B) has vacated it, so the SS fills the bag to stop a trail runner from advancing into second uncontested.
Last inning, protecting a two-run lead. A fly might carry over the outfielder. What is the first move, and why? — explanation
A drop-step back, because nothing can be allowed over his head. A drop-step back. In a no-doubles alignment, gain depth on a fly that may carry over you so it stays in front. Once the ball is clearly short, charge it under control; a safe single is preferable to an avoidable double.
What tradeoff does a no-doubles alignment make? — explanation
A short single may fall, but fewer balls get over an outfielder for extra bases. A single. The whole point of no-doubles is to trade a cheap single (a runner on first) for protection against extra-base hits that put runners in scoring position late in a close game.
A soft fly is falling between the second baseman drifting back and the right fielder charging in. Who should take it? — explanation
The right fielder: an outfielder coming in beats an infielder going back. The right fielder. An outfielder moving forward has a much easier and safer play than an infielder reaching back over his shoulder, so the outfielder takes priority, and must call it loud and early so the infielder can peel off.
The center fielder and the shortstop both track a shallow bloop. Who has priority? — explanation
The center fielder: he has top priority on any ball he can reach. The center fielder. He carries the highest priority on the field and can call off anyone (infielder or corner outfielder) on any ball he can reach with ordinary effort.
A ball is driven deep toward the wall. What's the correct footwork for the outfielder? — explanation
Turn, sprint to the spot, and use a free hand to find the fence. Turn and sprint directly to the spot where the ball will come down: backpedaling is slow and risks a fall. As he nears the fence he uses his throwing-side hand to feel for the wall (a 'wall-check') so he can stay locked on the ball without crashing into it.
The ball caroms off the wall with runners moving. What should the outfielder do with the throw? — explanation
Field the carom, crow-hop, and throw to the relay man. Field the carom under control, crow-hop, and throw to the relay man: not an avoidable long heave to a base. Hitting the relay turns one long, inaccurate throw into two shorter, controlled ones and keeps trail runners from advancing on an airmailed throw.
A grounder sneaks through the infield with a runner on first. How should the outfielder field and throw it? — explanation
Charge under control, get the body in front, and throw through the primary cut man. Charge under control with the body in front of the ball, field it cleanly off the glove side into a crow-hop, and throw THROUGH the cut man chest-high to the right base. Getting in front prevents a bad hop from skipping past, which would turn a single into extra bases.
It's a skipping bad-hop grounder with the tying run trying to score. What's the outfielder's priority? — explanation
Block it with his body to keep it in front, even if he can't field it cleanly. Keep it in front. With a run on the line, blocking a tricky hop with the body (even if he can't field it cleanly) beats an 'olé' attempt that lets the ball get past him for an extra base or a run. A ball in front of you is still only a single.
Single to left, runner on first rounding second toward third. Who is the cut man, and why keep the throw low? — explanation
The shortstop is the cut man; a low throw can be cut to stop the batter-runner from taking second. The shortstop is the cut man to third, lined up between the outfielder and the bag. Keeping the throw LOW and on a line lets him intercept it and throw behind the batter-runner if that runner tries to take second on the throw: a high, sailing throw can't be cut, which hands the trail runner the extra base.
The outfielder sees the lead runner will clearly be safe at third. What should the cut man (shortstop) do? — explanation
Cut the throw and check the trail runner, keeping the batter-runner at first. Cut the throw and check the trail runner. If the lead runner is going to beat the throw to third, there's no reason to let the ball travel: the shortstop intercepts it and keeps the batter-runner from advancing to second on the play.
blurb: Indicator, live signs, the take, and hot/cold verification.
icon: sign
lead: Signs let the bench run the offense without tipping the defense. Every player must read the third-base coach the same way, every pitch, or the play falls apart before the ball is even thrown.
systemHead: How a sign sequence works
system: A typical system has an INDICATOR (the sign that makes the next sign live), the actual command signs (steal, bunt, hit-and-run, take), and usually a WIPE-OFF to cancel. Only the sign that comes right after the indicator counts; everything else is decoy. The signs themselves are arbitrary: touching the cap, chest, sleeve, or belt means whatever your team decides it means. The 'take' sign tells the batter not to swing (often to let a runner go or work a count).
Indicator
The sign that turns the very next touch 'live.' Until it appears, nothing is on.
Live command
Steal / bunt / hit-and-run / take: valid only immediately after the indicator.
Wipe-off
A swipe (across the chest or down the arm) that cancels everything just given.
Hitter & runners
Take the sign with a glance, give a small acknowledgment, then step in: don't stare.
Give every sign the same rhythm and tempo, decoys included, so the live one never stands out.
Always confirm receipt: the hitter (and runners) give a small acknowledgment (a helmet touch) so the coach knows it was seen.
Re-give the sign after any timeout, foul ball, or throw behind a runner.
Verify 'hot/cold': everyone must know whether a sign is still live after a foul or a step-off.
Staring at the coach, which tips the defense that a sign is on.
Changing tempo only on the live sign, making it obvious.
Forgetting the indicator and acting on a decoy.
Missing the wipe-off and running into an out the coach tried to cancel.
alt: Some teams skip a full indicator system at this age and use simple, direct signs (a verbal word, or a colored card) because young players miss complex sequences and run into outs. For 10–12, simpler is often better: pick a system your weakest sign-reader can run cleanly, and rep it daily. The 'right' complexity is whatever your team executes reliably under pressure, not the most clever one.
q: In an indicator system, which sign does the hitter actually act on?
Act on the first recognizable sign in the sequence, even when the coach uses an indicator to disguise the actual call
Any sign that touches the cap
Whatever sign is repeated twice
Only the sign given immediately after the indicator
a: Only the sign that comes right after the indicator is live; everything before or after is a decoy. If the indicator never appears in the sequence, nothing is on and the hitter is swinging away on his own.
q: The coach flashes the steal sign, then swipes a hand down across his chest. What just happened?
The swipe confirms the steal again, so the runner should go even if the hitter missed the first signal
That swipe is a wipe-off: the steal is canceled
The runner must steal two bases
The hitter must bunt instead
a: A swipe like that is the team's wipe-off (cancel) sign: it erases whatever was just given. The runner stays put unless a new live sign is flashed. Missing the wipe-off is exactly how runners get thrown out on a play the coach tried to call off.
title: First-and-Third Offensive Playbook
blurb: The break, the delayed steal, the rundown, and protecting the lead run.
icon: runners
lead: With runners on first and third, the offense can pressure a young defense into a mistake that scores the run from third. In Little League Majors there are NO leadoffs (every runner leaves only when the pitch reaches the batter), so these plays are timed off the pitch and built on reading the catcher's throw, not on a pre-pitch lead.
ref: Rule 7.13
text: Base runners shall not leave their bases until the pitched ball has reached the batter. There are no leadoffs in the Major Division; every first-and-third play starts at that moment, not before.
systemHead: The basic options (no leadoff)
system: All of these start the same way: the runner on first (R1) breaks for second the instant the ball reaches the batter: the legal moment to go. The runner on third (R3) then READS the throw. STRAIGHT STEAL: R1 goes hard; if the catcher throws through to second, R3 breaks home. DELAYED STEAL: R1 breaks late, as the catcher lazily lobs the ball back to the pitcher, turning a routine return throw into a play. FORCE THE RUNDOWN: R1 deliberately gets hung up between first and second; while the defense chases him, R3 sprints home. Above all, protect the lead run: don't gift an out at the plate when the run doesn't matter.
Runner on 3rd (R3)
Reads the catcher's throw; breaks home only if it goes through to second or into a rundown.
Runner on 1st (R1)
Leaves on the pitch reaching the batter; steals, breaks late, or hangs up to draw a throw.
Batter
Usually takes the pitch to give the runners a clean read (or swings on a hit-and-run variant).
3B coach
Calls the play type pre-pitch and decides whether R3's run is worth the risk.
Everything starts on the pitch reaching the batter: no early break, or you risk the leaving-early penalty.
R3's job is to READ, not guess: break only when the ball is committed away from him.
Walk through who-goes-when in practice until it's automatic for all three players.
Protect the lead: with a big lead or late in the game, don't hand the defense a free out at home.
R3 breaking too early and getting hung up or thrown out at the plate.
R1 leaving before the ball reaches the batter: Rule 7.13 applies result-dependent remedies after play, not a blanket cancellation.
Running the play when the lead run is too precious to gamble.
Batter swinging and fouling off the runners' read.
alt: First-and-third plays are high-variance. Plenty of Majors coaches rarely run them, arguing the downside (running into a third out, or losing the lead runner) outweighs one run against a defense that may just take the easy out at second anyway. Whether to use them depends on the score, the inning, and how reliably YOUR defense executes the rundown. There is no universal answer: match the aggression to the game state.
q: In Little League Majors, when is the earliest a runner on first may break for second on a steal?
As soon as the pitcher starts his motion
Only once the pitched ball reaches the batter
When the pitcher lifts his front leg
Anytime after taking a short lead
a: There are no leadoffs in Majors (Rule 7.13). A runner may not leave the base until the pitched ball reaches the batter, and leaving early carries a penalty. Every first-and-third play is timed off that moment, not off a lead, because a lead isn't allowed.
q: On a straight first-and-third steal, what tells the runner on third it's time to break for home?
The runner at third breaks as soon as the pitcher moves, before checking whether the catcher throws through to second
The batter swinging and missing
The catcher throwing through to second base
The coach yelling before the pitch
a: R3 reads the catcher. If the catcher commits a throw through to second to try to get R1, R3 breaks home. If the catcher holds the ball or throws back to the pitcher, R3 stays: breaking anyway risks an easy out at the plate.
title: Small Ball & Bunt Execution
blurb: Sacrifice, drag/push, and the safety vs. suicide squeeze.
icon: bunt
lead: Bunting trades an out for a base: moving a runner into scoring position or pushing a run across. Done well it's a weapon; done carelessly it hands the defense a free out or even a double play.
ref: SLVLL AAA/Majors local ground rule 3; national Rule 6.06 is separate
text: In SLVLL Majors, a batter who first fakes a bunt and then takes a full swing on the pitch is out, with no warning. The local rule prevents a dangerous last-moment full swing near charging fielders. Commit to the bunt or take a normal swing without first showing bunt. National Rule 6.06 alone does not establish this local penalty.
systemHead: The bunt menu
system: SACRIFICE BUNT: square early, give up the at-bat to advance the runner; bat angled, top hand soft, deaden the ball down a line. DRAG / PUSH (base-hit bunt): bunt for a hit, revealing it late: drag toward first or push it past the pitcher. SAFETY SQUEEZE: the runner on third holds and reads: he breaks home only AFTER he sees a good bunt on the ground. SUICIDE SQUEEZE: the runner on third breaks for home as the pitch reaches the batter, so the batter MUST get the bat on the ball wherever it's thrown, or the runner is dead at the plate.
Sacrifice
Square early, deaden the ball down a line, trade the out for the base: runner advances.
Drag / Push
Hide it late; drag toward 1B or push past the pitcher to beat it out for a hit.
Safety squeeze
R3 reads first; breaks home only after a good bunt is on the ground.
Suicide squeeze
R3 breaks with the pitch; the batter MUST make contact to protect the runner.
On a sacrifice, just get the bunt down: a foul or a pop-up is worse than a soft out.
Bunt the top half of the ball to keep it on the ground; never offer at a bad pitch on a sacrifice.
On a suicide squeeze, the batter's only job is contact: bat on ball, anywhere it's pitched.
Square the feet and angle the bat to absorb the ball; don't stab or jab at it.
Popping the bunt up: an easy out, sometimes a double play.
Bunting too hard, right back to the pitcher for a force at the lead base.
On a suicide squeeze, missing the pitch entirely and hanging the runner out to dry.
Showing bunt then taking a full swing: SLVLL calls the batter out with no warning under its local rule.
alt: The suicide squeeze is thrilling and high-risk; the safety squeeze gives up that run-now aggression for a far lower chance of disaster. Many Majors coaches strongly prefer the safety squeeze (or skip the squeeze entirely) because it doesn't hinge on a 10–12-year-old making contact on a single do-or-die pitch. Reserve the suicide squeeze for a hitter you trust to make contact and a game state where one run is worth the gamble.
q: On a SUICIDE squeeze, what is the batter's responsibility?
Try to bunt only a strike, because a pitch outside the zone should be taken even after the runner breaks for home
Take the pitch to let the runner steal home
Make contact on the pitch no matter where it's thrown
Swing away to protect the runner
a: On a suicide squeeze the runner from third is already breaking home as the pitch arrives, so the batter MUST get the bat on the ball wherever it's pitched. If he misses, the runner is a dead duck at the plate. On a SAFETY squeeze, by contrast, the runner waits to see a good bunt first.
q: In SLVLL Majors, what happens if a batter fakes a bunt and then takes a full swing on that pitch?
The batter is out with no warning under the SLVLL local rule
It is only an academy preference; play continues without a call
The umpire must warn the batter before calling an out
The batter receives an automatic ball
a: SLVLL ground rule 3 calls the batter out with no warning for a fake bunt followed by a full swing. This is a local rule, separate from national Rule 6.06. Commit to a bunt or use a normal swing without showing bunt first.
title: The Third-Base Coach Decision Matrix
blurb: Stop vs. go, reading arms, and anchoring the bag.
icon: send
lead: The third-base coach is the offense's traffic cop on every ball to the outfield. A great send scores a run; a bad one ends the inning at the plate. The decision happens in under two seconds, so it has to be prepared before the pitch. Under Little League Rules 4.05, 1.16 and 7.09(h), base coaches work from the coach's box (with the permitted play-at-base exception), player base coaches wear helmets, and a coach must not physically assist a runner.
systemHead: Stop vs. Go framework
system: Decide BEFORE the ball is hit: know the score, the outs, the runner's speed, and each outfielder's arm. As the runner approaches, the coach picks up the BALL and the fielder's arm, not the runner. Standard signals: both hands UP = STOP/hold at third; arm WINDMILL = GO/score; pointing DOWN = SLIDE. Decision guide: with no outs, be cautious about a first out at third or home; with one out, weigh the chance of scoring against the value of a runner on base; with two outs, send more readily when the throw is likely late.
Before the pitch
Bank the runner's speed, the outfielders' arms, and the score and outs.
As the ball is fielded
Watch the BALL and the fielder's arm/release, not the runner.
Hold (both hands up)
Stop the runner at third when the throw will beat him.
Send (windmill) + slide
Wave him home; add the slide signal when the throw will be close.
Know each outfielder's arm before the inning: test it in warm-ups.
With no outs, protect against a needless first out at third or home; with one out, weigh the run chance; with two outs, send when the throw is likely late.
Stand where the runner can see you within the coach's box; leave it only when the rule permits for a play at your base.
Sell the decision: a hesitant windmill gets runners thrown out.
Watching the runner instead of the ball and the fielder's arm.
Sending when the throw clearly beats the runner at the plate, regardless of outs.
Forgetting the score and sending a meaningless run into a rally-killing out.
Late or unclear signals that freeze the runner between bases.
alt: 'Never make the first or third out at third base' is a classic rule of thumb, but it's a guideline, not a law. Late in a close game, 60 feet can justify more risk; in a blowout it never does. Some coaches are systematically aggressive to pressure young outfielders' arms and accept the occasional out as the cost of doing business. Calibrate to your runners, the opposing arms, and the moment, not to a slogan.
q: As a runner rounds second on a hit to the outfield, what should the third-base coach be watching?
Watch only the runner's turn and rely on the outfielder's pregame arm grade
Watch the cutoff player but ignore whether the outfielder fielded cleanly
Watch the third-base bag until the runner arrives, then check the throw
The ball and the outfielder's arm/release
a: The coach watches the BALL and the fielder (how cleanly it's handled and the strength and accuracy of the arm) because that, not the runner, determines whether the throw beats him home. The coach already knows the runner's speed from before the pitch.
q: There are two outs. A single rolls to a left fielder with a slow transfer and weak throwing arm as the runner rounds second. How does this change the send decision?
Be more conservative, never send with two outs
It doesn't change anything
Lean toward sending if the throw looks late; with two outs, a good chance to score can justify the risk
Always hold the runner at third
a: With two outs, a runner stranded at second or third scores nothing if the next batter makes an out, so the coach can be more aggressive, especially against a weak arm. The 'don't make the third out at home' caution still applies if the throw clearly beats him, but two outs tilts the call toward sending.
title: The First-Base Coach Responsibilities
blurb: The legal jump, catcher throws, hidden info, and deep flies.
icon: firstbase
lead: The first-base coach is more than a cheerleader: he protects the runner, manages the turn, and feeds him information he can't see. In Little League Majors there are no leadoffs and no balks, so the job centers on the runner's legal jump, getting back after the pitch, and reads on balls in play.
ref: Rule 8.05
text: A balk is NOT called in the Major Division and below. Runners cannot take a pre-pitch lead, so a conventional lead-holding pickoff does not apply; during a live ball, however, a legal throw can retire a runner who is off base. An illegal pitching motion is handled as an 'illegal pitch' under Rule 8.05. In Majors/Minors the penalty is a ball and no automatic runner advance. When an illegal pitch is delivered, let the resulting play continue as a delayed dead ball. The offensive manager may accept the play instead of the penalty, choosing immediately at the end of the play. If the batter reaches first safely and every other runner advances at least one base on the batted ball, hit batter, or otherwise, the play stands without reference to the illegal pitch. A batter hit by a pitch is awarded first without reference to the illegal pitch. Every charged illegal pitch counts toward the pitch count, whether the ball was delivered or not, under Rule 8.05. Rule 8.05(l) and (m) are not enforced in Majors/Minors; quick pitches under (e) and altered motions under (g) draw a ball whether or not runners are on base. Under no circumstances is a balk called in Majors/Minors.
systemHead: The first-base coach's checklist
system: REMIND the runner he can't leave until the pitch reaches the batter (no leadoff). On a catcher's throw behind the runner or a blocked ball controlled by the catcher, call 'Back!'; read an escaped ball and the coach before advancing; on a ball in play, call 'Go!' or 'Round it!' and signal how far to commit. Watch the catcher after every pitch, because the throw behind the runner is his, not the pitcher's. Point out trailing or backing-up fielders the runner can't see. On deep flies with fewer than two outs, tell the runner to tag up (go back and touch) or hold roughly halfway so he isn't doubled off.
Runner control
'Back!' on catcher throws behind the runner and controlled blocks; read escaped balls before deciding to advance; 'Go!' / 'Round it!' on balls in play.
The legal jump
Remind the runner: no leadoff, leave only when the ball reaches the batter.
Hidden info
Point out trailing fielders and backups behind the runner he can't see.
Fly balls
On deep flies with fewer than two outs, call tag-up or hold halfway.
Talk every pitch: outs, situation, and what to do on a passed ball or wild pitch.
After every pitch, watch the catcher's arm, not the pitcher, because that is where the throw behind the runner comes from.
Be loud and EARLY on 'Back!': a late call gets a runner tagged off the base.
In Majors there are no pickoff moves. The runner has no pre-pitch lead to protect, so teach him to time the legal departure and recover after the pitch rather than to wait for a balk that will never be called.
Going silent and leaving the runner to guess.
Calling 'Back!' a beat too late.
Telling players to wait for a balk: balks aren't called in this division.
Letting the runner drift off early and risk the leaving-early penalty.
alt: How much a first-base coach should 'coach' versus let players read the game is genuinely debated. Some argue over-coaching every step makes runners dependent and slow to react; others want maximum information flowing because young players miss things. A reasonable middle: own the safety calls ('Back!', tag-up reminders) yourself, and let the runner make the routine reads so he develops real baserunning instincts.
q: A runner is on first in a Majors game and the pitcher makes a quick move toward first without throwing. The runner wants to know if it's a balk. What do you tell him?
It's a balk: take second base
Steal on the next pitch as a penalty
It's a balk only with two outs
Stay on first; no balk award applies here, though the umpire may call an illegal pitch
a: Balks are not called in the Major Division. An illegal pitching motion is handled as an illegal pitch under Rule 8.05, with a ball and no automatic runner advance. There is no pre-pitch lead for a conventional lead-holding pickoff, but a legal live-ball throw can retire a runner who is off base. Coach the runner to know when departure is legal and to return safely.
q: A fly ball is hit deep with the runner on first and fewer than two outs. What's the first-base coach's primary job?
Tell the runner to tag up (or hold halfway) so he's not doubled off
Send the runner as soon as the ball rises, because waiting to see whether the fly is caught could cost a chance to advance
Tell him to run on contact no matter what
Call time
a: On a catchable deep fly with fewer than two outs, the runner must be ready to retreat and tag, or hold roughly halfway, so he isn't doubled off if it's caught. The coach makes that call because the runner is moving away from the ball and can't always judge the catch.
title: In-Game Communication & Batting Order Rhythm
blurb: Dugout discipline, echoing outs, chatter, and the next hitter.
icon: dugout
lead: Offense isn't only what happens at the plate: it's the bench staying in the game, hitters passing along what they see, and a dugout that keeps the energy up without chaos. Good teams turn nine separate at-bats into one coordinated attack.
ref: Rule 1.08
text: There is NO on-deck batter in the Major Division and below: the next batter may not pick up a bat until it is their turn at bat. The 'next' hitter prepares mentally in the dugout, not in an on-deck circle.
systemHead: Dugout discipline & flow
system: ECHO THE OUTS: every hitter and the whole bench say the count and the outs out loud before each batter. SCOUT THE PITCHER: hitters report back what they saw: velocity, what he throws for strikes, whether he tips his pitches. STANDARDIZE CHATTER: a few agreed encouraging phrases; never ride your own teammate. PASS INFORMATION: a hitter who just batted tells the next few hitters what worked and what to look for.
Whole bench
Echo the count and outs before every batter; stay locked into the game.
Hitters who just batted
Report the pitcher's speed, pitches, and patterns to the next hitters.
Next hitter
Prepares in the dugout (no on-deck circle in Majors), gets timing and a plan ready.
Team chatter
Positive, standardized encouragement, never negative toward a teammate.
Make echoing the outs a non-negotiable team habit: it prevents baserunning blunders.
Build a short scouting report on the pitcher inning by inning and share it down the bench.
Keep chatter positive and specific ('good eye,' 'barrel it'); cut anything that tears a teammate down.
Have each hitter step in with a plan built on what the previous hitters saw.
Losing track of the outs and running into a baserunning mistake.
Hitters sitting down without sharing what they saw at the plate.
Anyone but the batter handling a bat: illegal in this division.
Negative or distracting bench noise that pulls focus.
alt: How structured a youth dugout should be is a real judgment call. Too much enforced chatter feels forced and distracts some kids; too little and the team checks out. Some coaches assign roles (one player tracks the count, another the opposing pitcher's pitch count) so the bench has a job; others keep it loose. Find the level of structure that keeps YOUR specific group engaged without turning the dugout into a classroom.
q: In the Little League Major Division, where does the next hitter get ready while a teammate is batting?
In the on-deck circle, taking practice swings
In the dugout: there is no on-deck batter at this level
Behind the backstop
Next to the first-base coach
a: There is no on-deck position in the Major Division and below; the next batter may not pick up a bat until it is their turn at bat (Rule 1.08). The next hitter prepares mentally in the dugout (timing, plan, and the previous hitters' scouting report) rather than swinging a bat in an on-deck circle.
q: Why do coaches insist the whole bench echo the number of outs before each batter?
So everyone knows the situation and avoids baserunning and tag-up mistakes
To distract the other team
Because the umpire needs the bench to announce the outs before each hitter, which matters more than the runners' own reads
To slow the game down
a: Saying the outs out loud keeps every player and runner on the same page, which prevents the classic blunders: failing to tag up, not running on a force, or jogging on what should be a two-out 'run on contact.' Shared situational awareness is a quiet but huge part of team offense.
In an indicator system, which sign does the hitter actually act on? — explanation
Only the sign given immediately after the indicator. Only the sign that comes right after the indicator is live; everything before or after is a decoy. If the indicator never appears in the sequence, nothing is on and the hitter is swinging away on his own.
The coach flashes the steal sign, then swipes a hand down across his chest. What just happened? — explanation
That swipe is a wipe-off: the steal is canceled. A swipe like that is the team's wipe-off (cancel) sign: it erases whatever was just given. The runner stays put unless a new live sign is flashed. Missing the wipe-off is exactly how runners get thrown out on a play the coach tried to call off.
In Little League Majors, when is the earliest a runner on first may break for second on a steal? — explanation
Only once the pitched ball reaches the batter. There are no leadoffs in Majors (Rule 7.13). A runner may not leave the base until the pitched ball reaches the batter, and leaving early carries a penalty. Every first-and-third play is timed off that moment, not off a lead, because a lead isn't allowed.
On a straight first-and-third steal, what tells the runner on third it's time to break for home? — explanation
The catcher throwing through to second base. R3 reads the catcher. If the catcher commits a throw through to second to try to get R1, R3 breaks home. If the catcher holds the ball or throws back to the pitcher, R3 stays: breaking anyway risks an easy out at the plate.
On a SUICIDE squeeze, what is the batter's responsibility? — explanation
Make contact on the pitch no matter where it's thrown. On a suicide squeeze the runner from third is already breaking home as the pitch arrives, so the batter MUST get the bat on the ball wherever it's pitched. If he misses, the runner is a dead duck at the plate. On a SAFETY squeeze, by contrast, the runner waits to see a good bunt first.
In SLVLL Majors, what happens if a batter fakes a bunt and then takes a full swing on that pitch? — explanation
The batter is out with no warning under the SLVLL local rule. SLVLL ground rule 3 calls the batter out with no warning for a fake bunt followed by a full swing. This is a local rule, separate from national Rule 6.06. Commit to a bunt or use a normal swing without showing bunt first.
As a runner rounds second on a hit to the outfield, what should the third-base coach be watching? — explanation
The ball and the outfielder's arm/release. The coach watches the BALL and the fielder (how cleanly it's handled and the strength and accuracy of the arm) because that, not the runner, determines whether the throw beats him home. The coach already knows the runner's speed from before the pitch.
There are two outs. A single rolls to a left fielder with a slow transfer and weak throwing arm as the runner rounds second. How does this change the send decision? — explanation
Lean toward sending if the throw looks late; with two outs, a good chance to score can justify the risk. With two outs, a runner stranded at second or third scores nothing if the next batter makes an out, so the coach can be more aggressive, especially against a weak arm. The 'don't make the third out at home' caution still applies if the throw clearly beats him, but two outs tilts the call toward sending.
A runner is on first in a Majors game and the pitcher makes a quick move toward first without throwing. The runner wants to know if it's a balk. What do you tell him? — explanation
Stay on first; no balk award applies here, though the umpire may call an illegal pitch. Balks are not called in the Major Division. An illegal pitching motion is handled as an illegal pitch under Rule 8.05, with a ball and no automatic runner advance. There is no pre-pitch lead for a conventional lead-holding pickoff, but a legal live-ball throw can retire a runner who is off base. Coach the runner to know when departure is legal and to return safely.
A fly ball is hit deep with the runner on first and fewer than two outs. What's the first-base coach's primary job? — explanation
Tell the runner to tag up (or hold halfway) so he's not doubled off. On a catchable deep fly with fewer than two outs, the runner must be ready to retreat and tag, or hold roughly halfway, so he isn't doubled off if it's caught. The coach makes that call because the runner is moving away from the ball and can't always judge the catch.
In the Little League Major Division, where does the next hitter get ready while a teammate is batting? — explanation
In the dugout: there is no on-deck batter at this level. There is no on-deck position in the Major Division and below; the next batter may not pick up a bat until it is their turn at bat (Rule 1.08). The next hitter prepares mentally in the dugout (timing, plan, and the previous hitters' scouting report) rather than swinging a bat in an on-deck circle.
Why do coaches insist the whole bench echo the number of outs before each batter? — explanation
So everyone knows the situation and avoids baserunning and tag-up mistakes. Saying the outs out loud keeps every player and runner on the same page, which prevents the classic blunders: failing to tag up, not running on a force, or jogging on what should be a two-out 'run on contact.' Shared situational awareness is a quiet but huge part of team offense.
title: Base Running Foundations & the Home-to-First Sprint
lead: The shortest, most-run race in baseball is also the one most often run at 90%. Win it every time.
overview: Every plate appearance that puts the ball in play becomes a foot race. The default on a ground ball or infield single is to run through first base at full speed in a straight line; you only round the bag when the hit lets you threaten second. Running through is faster than slowing to find the base; immediately after crossing, look to the foul (right) side for an overthrow while breaking down under control. Then turn into foul territory and return straight to the bag without a move toward second.
Player / Role
Responsibility
Batter-Runner
Straight, full-speed sprint; hit the front edge of the bag; run through and break down after.
First-Base Coach
Signals 'through' vs. 'round'; calls overthrows ('come back / go to second').
Third-Base Coach
Reads the outfield early; pre-loads the 'round and look' decision on balls to the gaps.
Dugout Coach
Keeps equipment clear at a safe time; no on-deck position is permitted in Majors.
Run in a straight line through the bag, never bend the path on a 'through' play.
Hit the front of the base; don't stutter-step to find it.
After crossing, peek to the right (foul side) for a ball that got away before turning.
A hard, honest 60 feet every single time builds the habit that wins close games.
Coasting or 'jogging it out' on a routine grounder: bang-bang plays are lost here.
Watching the throw instead of running; eyes down, run hard.
Banana-rounding a clear infield single, which actually slows you to the bag.
Diving or sliding into first base on a straight-ahead play (slower and injury-prone).
Round vs. run-through: some coaches teach an aggressive round (veering ~6-8 ft into foul ground) on every base hit so the runner can 'steal' second on a bobble. Trade-off: a wider arc adds a half-step to reaching first, only worth it when the ball is clearly through the infield.
The overrun-and-turn-left risk: a runner who turns toward second after overrunning can be tagged out if they make an attempt toward second. Teach 'turn into foul territory unless you're going.'
q: A grounder is hit to the shortstop. What's the correct path and finish at first base?
Run a straight line and run through the bag at full speed, then break down
Shorten your strides and slow just before first base so you can hit the bag squarely and still be ready to turn if the throw gets away
Round the bag in a wide arc every time so you can take second
Slide head-first into first base to beat the throw
a: Run a straight line and run through the bag at full speed, hitting the front edge. Running through is faster than rounding. After crossing first, turn into foul territory and return directly to the bag; if you try for second, you can be tagged. Save the rounding arc for balls clearly through the infield.
q: After running through first on an infield single, the runner sees the throw skip past the first baseman. What should they already have done?
Kept their eyes on the dugout watching for the coach's sign
Looked to the foul (right) side after crossing the bag, ready to react to an overthrow
Stop on the bag and wait to see where the throw ends up before looking down the foul side, because standing still makes the next move easier
Turned hard toward second on every play, just in case
a: Glanced to the foul (right) side immediately after crossing, and broken down under control so they can react. If the ball is loose, the first-base coach yells 'go!' and the runner advances, after reading it, not by guessing.
tag: Timing the Break
title: The Legal Break & Secondary Movement (the Majors 'Lead')
lead: You can't take a lead in Majors, so the lead becomes timing. The runner who is moving the instant the ball legally lets them go gains the most ground.
overview: Under Rule 7.13, a runner must stay in contact with the base until the pitched ball reaches the batter. The Majors equivalent of a 'lead' is the on-base timing step: timed footwork so you are loaded and moving forward (but still touching the base) as the pitch is delivered, then you break the instant the ball reaches the batter. The secondary lead here is the controlled shuffle you take after the pitch reaches the batter, leaving you balanced to react to a passed ball, a batted ball, or a steal. Leaving early is never an automatic out in Majors. The umpire drops a flag, the ball stays live and the play finishes; any out made on the play stands. Then Rule 7.13 settles the rest: with the bases loaded, a walk or hit batter still moves every runner up one base and the run scores; on a bunt or a ball that stays in the infield, the runner from third is taken off with no run and no out; in other plays, runners who left early can be sent back.
Runner / Role
Responsibility
Runner at 1B
Stay in contact; load the back (right) foot; break on the ball reaching the batter; secondary shuffle toward 2B.
Runner at 2B
Same legal timing; angle the secondary toward 3B; read the ball off the bat and into the dirt.
Runner at 3B
Conservative secondary down the line in foul ground; prioritize reading dirt balls and tag-ups.
Base Coaches
Verify the runner isn't drifting early; remind 'wait for it to reach the batter'; signal first-touch on tags.
Keep a foot on the bag until the ball reaches the batter: that is the earliest legal departure.
Load toward the next base while one foot stays on the bag; leave only after the ball reaches the batter.
Take a balanced secondary shuffle after the pitch reaches the batter: feet under you, weight ready to go either direction.
If the catcher controls the ball and the pitcher has it back on the rubber, get back to the base.
Leaving the base before the ball reaches the batter: play continues and Rule 7.13 applies result-dependent remedies that can affect all runners; early departure alone is not an automatic out.
Standing flat-footed on the bag with no momentum, surrendering free distance on steals and passed balls.
Drifting so far on the secondary that the runner can't recover on a line drive or a quick return throw.
Crossing over toward the next base on the secondary (looks like, and can become, an early break).
Intermediate (50/70) & up (league age 11-13+): true leadoffs become legal. At those 50/70 leadoff levels, teach a primary lead (typically 3-4 shuffle-steps, weight balanced, no crossover), a secondary lead that builds on the pitch, and recovering on a pickoff. Balks also exist at that level.
Pickoff reads (50/70+): at leadoff levels the runner reads the pitcher's first move and front foot/heel; in Majors there is no pre-pitch lead to read from, so the energy goes into timing the release instead. In Majors there are no pickoff moves. The runner has no pre-pitch lead to protect. After the pitch, a catcher can backpick a drifting runner. Routine and appeal throws also remain legal; do not confuse those with teaching a pre-pitch lead.
q: A coach tells a Majors runner to 'take a big lead off first.' What's the problem, and what should the runner do?
Leadoffs aren't legal in Majors; stay in contact and break when the ball reaches the batter
No problem: take as big a lead as you can, like in the big leagues
Lead off only when the pitcher isn't looking at the runner
Stand still on the base and never move until the ball is hit
a: Leadoffs aren't legal in the Major Division: under Rule 7.13 the runner must stay in contact until the pitched ball reaches the batter. Instead, the runner loads toward the next base while one foot remains on the bag, then breaks when the ball reaches the batter, then takes a balanced secondary shuffle.
q: Bases are loaded. A runner leaves before the pitch reaches the batter, and the batter receives ball four or is hit by the pitch. Under Rule 7.13 example 16, what happens?
The batter loses the walk or hit-by-pitch award
The early runner is automatically out
Each runner advances one base and a run scores
All runners stay on their original bases
a: Rule 7.13 example 16: with bases loaded, a walk or hit-by-pitch advances each runner one base and a run scores despite an early departure. Early departure does not cancel the award. In other situations, let the play finish: outs made on the play stand and safe runners may be returned or repositioned under (a)-(c). Example 15 handles an infield hit or bunt with bases loaded: the runner from third is removed without a run or an out; if a putout opens a base, that runner returns to third. Do not invent an automatic out or an immediate dead ball merely for leaving early.
tag: Reads
title: Reading the Ball Out of the Hand (Dirt-Ball & Passed-Ball Reads)
lead: A ball in the dirt is free distance, but only for the runner who decided to go before the pitch was ever thrown.
overview: Advancing on wild pitches and passed balls is one of the highest-percentage ways to move up in Majors, because there are no leadoffs and defenses are still developing blocking skills. The skill is the pre-pitch decision ('if it's in the dirt, I'm gone') combined with reading the downward angle of the pitch early and reacting off the secondary shuffle. At third base the read is sharper: a ball blocked directly in front of the catcher is a trap.
Runner / Role
Responsibility
Runner at 1B
Pre-decide to advance on any ball that gets past the catcher; read low spin; go off the secondary.
Runner at 2B
Most aggressive: a passed ball usually means 3B; read the bounce direction (away from catcher = go).
Runner at 3B
Read carefully: go only if the ball clearly gets past the catcher, not on one blocked in front of the plate.
Base Coaches
'Dirt!' call to trigger the read; 3B coach controls the send/hold home on a passed ball.
Make the decision before the pitch: 'ball in the dirt, I go' resets every pitch.
Read the pitch's downward angle and spin early rather than waiting to see it bounce.
Use the secondary momentum: the read should turn into a step, not a standing start.
Slide into the advance base; the throw, if any, will be there.
Ball-watching from a flat-footed start, so the runner reacts a full beat late.
Freezing on a ball that clearly skips to the backstop.
From third, breaking home on a ball that the catcher blocks right in front, an easy tag.
Trail runner going while the lead runner holds, creating two runners on one base.
When NOT to go: with two outs and a weaker next batter vs. a stronger one, or when the catcher cleanly blocks the ball in front, the risk outweighs the base. Tie the aggressiveness to score and inning.
Read the catcher, not just the ball: some coaches teach keying on the catcher's body: if the glove drops and shoulders turn, go; if they stay square and centered, hold. This can be more reliable than tracking the bounce for younger runners.
q: What single habit most separates runners who advance on wild pitches from those who don't?
Being the fastest runner on the team
Running on every single pitch no matter where it goes
Waiting to see the ball bounce, then deciding whether to go
Deciding before the pitch ('if it's in the dirt, I'm gone') and moving off a balanced secondary
a: The pre-pitch decision. Because there's no leadoff, the only way to react in time is to have already committed ('if it's in the dirt, I'm gone') and to be moving off a balanced secondary shuffle, not to start thinking once the ball bounces.
q: A runner on third sees a pitch hit the dirt, but it caroms directly in front of the catcher within arm's reach. Should the runner break for home?
Yes: any pitch that touches the dirt should send the runner at third immediately, even when the catcher controls it directly in front of the plate
Yes: the catcher will never recover in time
No: you can never advance on a wild pitch from third base
No: a ball right in front of the catcher is a trap; only go when it clearly gets past them
a: No. A ball blocked directly in front of the plate is the classic trap for a runner on third: the catcher pounces for an easy tag. Break home only when the ball clearly gets past the catcher (to the backstop or well to the side), and tie the call to outs and score.
tag: Base Stealing
title: Base-Stealing Mechanics (Steal on the Pitch)
lead: With no leadoff to read off the pitcher, a Majors steal is won by timing the legal break to the pitch and exploding to top speed in two steps.
overview: Because the runner can't leave until the ball reaches the batter and has no pre-pitch lead to protect, the Majors steal is essentially a timed steal: load while one foot remains on the base, break when the ball reaches the batter, and use a hard crossover first step to reach top speed fast. The decision tree is read the catcher's arm and tendencies (not the pitcher's move), pick up the bag, and finish with a bent-leg pop-up slide. Remember: head-first sliding to advance is an out in the Major Division and below; the ball stays live. Head-first returns to a base are permitted.
Runner / Role
Responsibility
Stealing 2B
Legal break on ball reaching batter; crossover step; straight line; bent-leg slide to the back of the bag.
Stealing 3B
Higher value, shorter throw: needs an even better jump and momentum; read catcher's pop time.
Stealing Home (situational)
Rare; usually a delayed steal on a relaxed defense or a passed ball, coach-initiated only.
Base / 3B Coach
Gives the steal sign; reads catcher arm strength; calls slide direction ('inside / back corner').
Explode on the legal departure point with a crossover step, don't false-step or rock back first.
Run a straight line to the bag; pick up the base, not the throw.
Finish with a bent-leg pop-up slide so you can advance on an overthrow.
Steal of third pays off because the throw is shorter. Only attempt it with a clean jump and full momentum.
Leaving early to 'get a jump': that invokes the result-dependent remedies in Rule 7.13, not an automatic out.
A false step or rocking back before the first stride, killing the jump.
Head-first slide to advance in the Major Division and below: the runner is out, but the ball stays live. Head-first returns are permitted.
Standing up into the bag or watching the throw instead of sliding through.
Intermediate 50/70 and up (leadoff levels): here the steal really is about reading the pitcher's first move, the secondary lead, and the jump, plus delayed steals and reading a balk. Pickoff recovery and leadoff distance belong at Intermediate 50/70 and above, once the runner reaches those divisions.
The delayed steal in Majors: a legal, underused tactic: break as the catcher lobs the ball back to the pitcher or when the defense relaxes after the pitch, rather than on the pitch itself. It exploits inattentive middle infielders without needing a leadoff.
q: How would you correct a Majors runner who asks how to 'read the pitcher's move' so they can steal?
Teach them to watch the pitcher's heel and first move, like the pros do
There's no pre-pitch lead in Majors, so no pickoff move to read off a lead: focus on legal break timing, a crossover first step, and the catcher's arm
Tell them to leave a split second early to steal a jump
Tell them stealing isn't allowed in Majors at all
a: There's no leadoff in Majors, so there's no pickoff move to read off an established lead: the runner can't leave until the ball reaches the batter. In Majors there are no pickoff moves. The runner has no pre-pitch lead to protect, so the steal is timed off the legal departure rather than off any pitcher move. The real reads are the legal break timing, an explosive crossover first step, and the catcher's arm strength and pop time.
q: A runner stealing second dives head-first into the bag and is called out, even though they clearly beat the tag. What happened?
Head-first sliding to advance is an out in Majors; use a bent-leg slide instead
The runner's hand came off the bag for a moment
The umpire made a mistaken call because a runner can slide head-first to advance in Majors whenever the tag arrives late
You're not allowed to steal second base in Little League
a: Rule 7.08(a)(4): head-first sliding to advance into a base is an out in the Major Division and below, and the ball stays live. Head-first returns to a base are permitted. The runner should use a bent-leg pop-up slide, which is also faster to recover from on an overthrow.
tag: Tag-Ups
title: Tagging Up Strategy (Fewer Than Two Outs)
lead: With fewer than two outs and a fly ball, the play is simple to say and hard to do: get back, tag, and read the catch.
overview: On a catchable fly ball with fewer than two outs, runners retreat and tag the base, then advance on the first touch of the ball by the fielder (you may legally leave once it's first touched, even if it's bobbled). The decisions are depth and arm: tag and go on a deep fly; on a shallow fly to a strong arm, hold. On a line drive, freeze: a caught liner can double you off. With two outs, runners don't tag; they run on contact.
Runner / Role
Responsibility
Runner at 3B
On a fly with <2 outs, tag and read depth; go on first touch if the fly is deep enough to score.
Runner at 2B
Tag on a deep fly to advance to 3B; read the outfielder's depth and arm; freeze on liners.
Runner at 1B
Tag only on a very deep fly; otherwise hold to avoid being doubled up.
Third-Base Coach
Reads the catch and calls 'tag / go'; gives the runner clear signals from the coach box.
With fewer than two outs on a catchable fly, get all the way back and tag, don't drift halfway.
You can leave the instant the ball is first touched, even on a bobble, don't wait for the catch to be 'secured.'
On a line drive, freeze until you read it down or caught; a caught liner is a double play waiting to happen.
Match aggressiveness to the outfielder's depth and arm strength, and to the score.
Leaving before first touch on a fly: the runner must retouch and can be doubled off.
Drifting halfway on a deep fly with fewer than two outs, then scrambling back and failing to tag.
Tagging from third on a shallow fly into a strong, charging outfielder's arm.
Running on a line drive that gets caught, a free double play for the defense.
Two outs flips the rule: with two outs, never tag: run hard on contact, because the inning ends on the catch regardless. Teaching the outs first prevents the most common tag-up mistake.
Tag-or-halfway judgment: on a medium-depth fly with one out, some coaches teach 'halfway' (so a deep ball still lets you advance and a shallow caught ball lets you retreat). It hedges a sure tag-up advance for safety, best reserved for borderline depth and strong arms.
q: A runner on third tags and breaks for home the moment the outfielder bobbles the catch, before securing it. The defense argues he left early. Who's right?
The defense is right because the runner must wait until the fielder holds the ball firmly, even if the ball was first touched during a bobble
The defense: you can't tag up on a bobbled ball at all
The runner: you may legally leave on the fielder's first touch, even on a bobble
Neither: tag-ups aren't allowed with a runner on third
a: The runner is right. On a fly ball a runner may legally leave the moment the ball is first touched by a fielder, even if it's bobbled and not yet secured. Waiting for the 'secured' catch actually costs the runner time on a sacrifice fly.
q: One out, runner on second, a sharp line drive is hit to the shortstop's left. What should the runner do?
Run toward third as soon as the line drive leaves the bat, treating it like a grounder even though the shortstop may catch it in the air
Tag up immediately, like it's a fly ball
Sprint to third without looking back
Freeze and read it: a line drive can be caught and double you off
a: Freeze and read it. A line drive can be caught for an out, and a runner who breaks on contact gets doubled off easily. Read whether it's caught or clearly through, then advance, unlike a fly ball (tag) or a ground ball (run), a liner demands a momentary freeze.
tag: Broken Plays
title: Beating the Rundown & Broken Plays
lead: A rundown isn't a death sentence: it's a chance to force a bad throw or buy a base for the runner behind you.
overview: When caught between bases, the goal is to make the defense throw the ball as many times as possible: every throw is a chance for an error, and the longer you survive, the more a trail runner can advance. The runner sprints hard at the fielder holding the ball to force an early throw, changes direction late, and avoids the tag. The classic payoff is the defense throwing it away or both fielders converging while a trail runner takes an extra base. If two runners reach the same base, the preceding runner normally keeps it and the following runner is out if tagged. When a force requires the preceding runner to advance, the following runner is entitled to the base instead and the preceding runner can be tagged out. The rundown question below has no force.
Runner / Role
Responsibility
Lead Runner (in the pickle)
Run hard at the fielder with the ball to force a throw; change direction late; avoid the tag; survive.
Trail Runner
Advance aggressively while the defense is occupied; take the base the lead runner vacated.
Base Coaches
Direct the trail runner to advance; tell the lead runner which base to fight toward; watch for overthrows.
Defense (what you exploit)
Wants to minimize throws and tag quickly: make them do the opposite.
Sprint hard at the glove/fielder holding the ball to force an early, rushed throw.
Survive long enough for a trail runner to advance: every throw is a chance for an error.
Change direction late, not early, so the defender commits before you cut back.
On any overthrow, immediately advance: get up and take the next base.
Giving up and jogging into the tag instead of forcing throws.
Sliding too early or stopping, which lets the fielder simply walk up and tag.
Reversing direction so many times that you tire and get tagged anyway.
Two runners ending up on the same base: the trail runner must know the lead runner owns it.
Give yourself up to protect the run: with a more important run on third, the lead runner can intentionally prolong the rundown (or get tagged) to let that run score, sacrificing the out for the run. Tie this to score and inning.
Same-base rule reminder: in this no-force rundown the original (lead) runner is entitled to the base, so a trail runner who over-advances onto it is the one tagged out. A force can reverse that entitlement. Drill who owns the bag.
q: You're caught in a rundown between first and second, with a teammate on third. What's your primary objective?
Give yourself up quickly so the inning keeps moving
Force the defense to throw the ball as much as possible: sprint at the fielder with the ball, change direction late
Run straight back to first base and stop
Slide right away so you don't get hurt
a: Force the defense to throw the ball as many times as possible: each throw risks an error, and staying alive lets the runner on third (and the trail runner) advance. Achieve it by sprinting hard at the fielder holding the ball to force an early throw, changing direction late, and avoiding the tag.
q: During a rundown with no force play, the trail runner advances and ends up on the same base as the lead runner. The defense tags both. Who's out?
The lead runner, because they were caught first
Both runners are out because a base cannot protect two teammates at once, regardless of which runner reached it first
The trail runner: the lead runner owns the base; advance only as far as is safe
Neither: two runners are allowed to share a base
a: The trail runner is out (the lead runner is entitled to that base; this isn't a force). The lesson: the trail runner should advance only as far as is safe and must know which base the lead runner owns: over-advancing onto an occupied base turns one out into a giveaway.
A grounder is hit to the shortstop. What's the correct path and finish at first base? — explanation
Run a straight line and run through the bag at full speed, then break down. Run a straight line and run through the bag at full speed, hitting the front edge. Running through is faster than rounding. After crossing first, turn into foul territory and return directly to the bag; if you try for second, you can be tagged. Save the rounding arc for balls clearly through the infield.
After running through first on an infield single, the runner sees the throw skip past the first baseman. What should they already have done? — explanation
Looked to the foul (right) side after crossing the bag, ready to react to an overthrow. Glanced to the foul (right) side immediately after crossing, and broken down under control so they can react. If the ball is loose, the first-base coach yells 'go!' and the runner advances, after reading it, not by guessing.
A coach tells a Majors runner to 'take a big lead off first.' What's the problem, and what should the runner do? — explanation
Leadoffs aren't legal in Majors; stay in contact and break when the ball reaches the batter. Leadoffs aren't legal in the Major Division: under Rule 7.13 the runner must stay in contact until the pitched ball reaches the batter. Instead, the runner loads toward the next base while one foot remains on the bag, then breaks when the ball reaches the batter, then takes a balanced secondary shuffle.
Bases are loaded. A runner leaves before the pitch reaches the batter, and the batter receives ball four or is hit by the pitch. Under Rule 7.13 example 16, what happens? — explanation
Each runner advances one base and a run scores. Rule 7.13 example 16: with bases loaded, a walk or hit-by-pitch advances each runner one base and a run scores despite an early departure. Early departure does not cancel the award. In other situations, let the play finish: outs made on the play stand and safe runners may be returned or repositioned under (a)-(c). Example 15 handles an infield hit or bunt with bases loaded: the runner from third is removed without a run or an out; if a putout opens a base, that runner returns to third. Do not invent an automatic out or an immediate dead ball merely for leaving early.
What single habit most separates runners who advance on wild pitches from those who don't? — explanation
Deciding before the pitch ('if it's in the dirt, I'm gone') and moving off a balanced secondary. The pre-pitch decision. Because there's no leadoff, the only way to react in time is to have already committed ('if it's in the dirt, I'm gone') and to be moving off a balanced secondary shuffle, not to start thinking once the ball bounces.
A runner on third sees a pitch hit the dirt, but it caroms directly in front of the catcher within arm's reach. Should the runner break for home? — explanation
No: a ball right in front of the catcher is a trap; only go when it clearly gets past them. No. A ball blocked directly in front of the plate is the classic trap for a runner on third: the catcher pounces for an easy tag. Break home only when the ball clearly gets past the catcher (to the backstop or well to the side), and tie the call to outs and score.
How would you correct a Majors runner who asks how to 'read the pitcher's move' so they can steal? — explanation
There's no pre-pitch lead in Majors, so no pickoff move to read off a lead: focus on legal break timing, a crossover first step, and the catcher's arm. There's no leadoff in Majors, so there's no pickoff move to read off an established lead: the runner can't leave until the ball reaches the batter. In Majors there are no pickoff moves. The runner has no pre-pitch lead to protect, so the steal is timed off the legal departure rather than off any pitcher move. The real reads are the legal break timing, an explosive crossover first step, and the catcher's arm strength and pop time.
A runner stealing second dives head-first into the bag and is called out, even though they clearly beat the tag. What happened? — explanation
Head-first sliding to advance is an out in Majors; use a bent-leg slide instead. Rule 7.08(a)(4): head-first sliding to advance into a base is an out in the Major Division and below, and the ball stays live. Head-first returns to a base are permitted. The runner should use a bent-leg pop-up slide, which is also faster to recover from on an overthrow.
A runner on third tags and breaks for home the moment the outfielder bobbles the catch, before securing it. The defense argues he left early. Who's right? — explanation
The runner: you may legally leave on the fielder's first touch, even on a bobble. The runner is right. On a fly ball a runner may legally leave the moment the ball is first touched by a fielder, even if it's bobbled and not yet secured. Waiting for the 'secured' catch actually costs the runner time on a sacrifice fly.
One out, runner on second, a sharp line drive is hit to the shortstop's left. What should the runner do? — explanation
Freeze and read it: a line drive can be caught and double you off. Freeze and read it. A line drive can be caught for an out, and a runner who breaks on contact gets doubled off easily. Read whether it's caught or clearly through, then advance, unlike a fly ball (tag) or a ground ball (run), a liner demands a momentary freeze.
You're caught in a rundown between first and second, with a teammate on third. What's your primary objective? — explanation
Force the defense to throw the ball as much as possible: sprint at the fielder with the ball, change direction late. Force the defense to throw the ball as many times as possible: each throw risks an error, and staying alive lets the runner on third (and the trail runner) advance. Achieve it by sprinting hard at the fielder holding the ball to force an early throw, changing direction late, and avoiding the tag.
During a rundown with no force play, the trail runner advances and ends up on the same base as the lead runner. The defense tags both. Who's out? — explanation
The trail runner: the lead runner owns the base; advance only as far as is safe. The trail runner is out (the lead runner is entitled to that base; this isn't a force). The lesson: the trail runner should advance only as far as is safe and must know which base the lead runner owns: over-advancing onto an occupied base turns one out into a giveaway.
d: Feet balanced, pivot foot touching the rubber (on top of it or against its front edge), glove relaxed at the chest. Find the catcher’s target before you move.
t: Windup / gather
d: A small, controlled step back or to the side. Stay quiet and centered; momentum comes later, not here.
t: Leg lift & balance
d: Lift the front knee to a balanced position over the back leg. Pause an instant; everything starts from balance.
t: Stride & separation
d: Drive toward the plate, landing with a firm front leg. Let the hips open before the shoulders (hip-to-shoulder separation).
t: Arm cocking
d: Throwing arm reaches a high, loaded position as the front foot lands. Elbow at roughly shoulder height, not below.
t: Release
d: Stay tall and out front; release the ball over a stable front leg with the fingers behind and through the ball.
t: Follow-through
d: Decelerate fully: the throwing arm finishes across the body and the back leg comes around. Land fielding-ready. Never short-arm the finish.
Section 01
The Grips
Three pitches form this Majors practice plan: the four-seam fastball,
two-seam fastball and changeup. Tap a pitch to load it into the Grip Explorer.
Grip Explorer
Fastball
Expected Movement
Velocity Difference
Velocity figures are general, approximate ranges relative to your own four-seam
fastball, not fixed numbers. Actual differences vary by pitcher, age, and arm strength.
Section 02
Mechanics
Work the delivery in order, windup to follow-through. Check each step as you groove it.
Saving follows the selected profile. This module saves one thing: which of the seven mechanics steps you have checked. Signed-in, it saves privately to the selected profile; signed-out, it stays in this browser. The account controls confirm server saves. The grips, strategy, and Q&A sections save nothing. To clear it, use Reset
checklist below or clear this browser's site data; a private window starts with an empty
checklist.
0 / 7
Section 03
Strategy
Common questions pitchers ask. Tap a question to open the answer.
Section 04
Arm Care
The outing that matters most is the next one. Protect the arm before and after.
The two rules to carry off this page: a pitcher may never pitch on three
consecutive days, and daily pitch counts are capped by league age, not
division. That means 75 pitches at league age 10 and
85 at league age 11–12, with required rest days that scale with the count.
Stop throwing and seek evaluation for any arm pain rather than pitching through it.
Arm care is its own module
Warm-up and long-toss progressions, post-outing recovery, the full pitch-count and rest
table, the kinetic chain, and workload red flags all live in
Arm Strengthening &
Injury Prevention, the single source of truth for keeping the arm healthy.
blurb: J-Band routine, shoulder-blade control, keeping the joint safe.
scap
lead: The small muscles that hold the shoulder together (the rotator cuff) and the muscles that control the shoulder blade (the scapula) are what keep the arm safe when you throw. They don't make you throw hard, they keep the joint stable so the big muscles can do their job without the shoulder slipping forward.
systemHead: What the routine is for
system: A light resistance-band routine (often called J-Bands or 'arm care bands') wakes these muscles up before throwing and helps them recover after. The whole point is high reps with LIGHT tension and clean form, not heavy resistance. You should feel the muscles working, never strain.
External rotation (band): elbow tucked at the side, rotate the hand away from your belly. ~2×15, light.
Watch the elbow stays pinned to the side; no shrugging the shoulder up toward the ear.
Band row: pull the band toward you and squeeze the shoulder blades together.
Shoulder blades should glide together; no hunching or rounding forward.
Backward-facing (internal rotation): controlled and light, balance the front and back of the shoulder.
Give equal time to external and internal rotation so the back of the shoulder isn't overpowered.
Stop a set the moment your form breaks down.
Track sets completed and consistency (3–4×/week), not how much resistance was used.
Keep band tension LIGHT, quality of movement beats load every time.
Do the routine both before throwing (to prime) and after (to recover).
Give the back of the shoulder equal attention; don't only train the 'feel-good' front muscles.
Use a coach-approved routine consistently, including throwing days.
Using a band so heavy the shoulder shrugs up or slides forward (anterior tracking).
Only doing the front-of-shoulder movements and skipping the cuff/back work.
Skipping arm care on game days, when it matters most.
Chasing 'the burn' instead of clean, controlled reps.
alt: Some programs use light dumbbells instead of bands, and both work, the principle is the same: light load, high quality, done consistently. There is no single 'correct' set-and-rep scheme for this age; match it to the player and keep every rep pain-free.
q: During band external rotations, the player's shoulder keeps shrugging up toward the ear. What does that usually mean?
The shoulder shrug is an expected sign that the cuff is working hard, so keep the same band tension and finish the set
He should switch to throwing instead
He should immediately add more sets
The band is too heavy or he's fatigued; lighten the tension and reset clean form
a: A shrug means the big upper-trap muscle is taking over because the cuff can't handle the load, that's exactly the forward shoulder tracking we're trying to prevent. Lighten the band until the elbow can stay pinned and the movement is clean. With arm care, light and correct always beats heavy.
q: What is the rotator cuff's main job when a player throws?
To create most ball speed by pulling the upper arm forward after the legs and trunk have moved
To stabilize the shoulder joint so the bigger muscles can work safely
To keep the shoulder blade pinned back throughout the throw so the arm stays in one fixed slot
To straighten the elbow and flick the wrist at release
a: The cuff is a stabilizer, not a power source. It holds the ball of the shoulder centered in the socket so the large muscles can generate and deliver force without the joint slipping. Train it for control and endurance, not for strength numbers.
title: Long Toss Progression
blurb: Building distance safely, on a line vs. high arc, and volume.
scap
elbow
core
lead: Long toss extends the arm's range and builds throwing endurance, but it's a tool, not a contest. Done right, it's part of a controlled warm-up and conditioning ladder. Done as a 'how far can I chuck it' game, it just piles stress onto a young arm without much benefit.
systemHead: How a long-toss ladder works
system: A long-toss ladder means stepping the distance OUT gradually with good mechanics, then often coming back IN with 'pull-down' throws on a line at controlled effort. Be honest about the uncertainty here: there is no single medically endorsed maximum distance for 10–12 year olds, and reputable programs disagree. The reliable rule is to build distance gradually, keep throws within comfortable effort, and stop at the first sign of fatigue or breaking mechanics.
Start close and easy; only stretch the distance out once fully warm.
No max-effort throws until the arm is genuinely warm.
Add distance in stages, and only if throws stay accurate and pain-free.
Watch the arc: if it creeps up and accuracy drops, that's the stop sign.
Finish with 'pull-down' throws on a line at controlled effort back toward normal distance.
Count long-toss throws as part of the day's workload, they aren't 'free.'
Stop the session if velocity or accuracy noticeably fades.
Cap long-toss volume and fold it into the weekly throwing total.
Mechanics come first; long toss should reinforce good throwing, not reward sloppy max-effort heaves.
Long-toss throws count toward the week's total arm workload.
On-a-line pull-down throws teach an efficient, lower-stress release.
Keep the whole session comfortable and pain-free.
Turning long toss into a distance contest between teammates.
Throwing max-effort high-arc balls when the arm is already tired.
Forgetting to count long-toss throws toward the week's total.
Adding distance by pushing through soreness.
alt: Coaches genuinely disagree about long toss for this age, some build toward long distances, others cap it tightly and prioritize controlled flat-ground throwing. Because there's no consensus number, the conservative path is safer for 10–12s: moderate distance, clean mechanics, and stopping early. If a player has a specific program, individualize it with a knowledgeable coach.
q: There is no universal 'safe maximum distance' for 10–12 long toss. So what's the most reliable rule to follow?
Set one distance target for everyone of this age, then ask each player to reach it before ending the session
Throw as far as possible every session to build the arm
Build distance gradually and stop at the first sign of fatigue or sloppy mechanics
Skip the warm-up to save the arm for the long throws
a: Since the research doesn't give one safe number for this age, the dependable principle is to progress gradually within comfortable effort and let fatigue and mechanics (not a tape measure) set the limit. The moment accuracy fades or the arc balloons, the session is done.
q: Why do many programs finish long toss with 'pull-down' throws on a line?
To groove an efficient, lower-stress release as the player comes back toward pitching distance
To show off arm strength
Because high-arc throws are always harmful
To make the last few throws the hardest part of the session, because pulling down on a line is a chance to test maximum arm speed
a: Pull-downs bring the throw back to a flatter, on-a-line path that mirrors a real pitch, reinforcing an efficient release. Ending the session this way is about quality of movement, not squeezing out extra max-effort throws on a tired arm.
title: The Kinetic Chain
blurb: Legs, hips and core as the real power source, not the arm.
legs
core
scap
elbow
lead: A throw doesn't start in the arm. It starts in the legs, travels up through the hips and core, and the arm is the last link that delivers energy already created below it. That's why training the legs, hips, and trunk is arm care, a strong lower half protects the shoulder and elbow.
systemHead: The sequence
system: Legs push → hips rotate → trunk rotates → the arm follows. When the lower half is weak or skipped, the arm has to create the power the body should have made for it. That 'all-arm' pattern is exactly what wears down young elbows and shoulders.
Movement quality over load; no heavy maxing out at this age.
Hip and thoracic (mid-back) mobility drills as part of warm-up.
Check stride direction and that the hips fire before the shoulders.
Light med-ball rotational throws to feel the body sequence.
It's a full-body drill with a light ball, never an arm exercise.
Cue: 'push with the back leg, lead with the hip.'
Flag an upright trunk or an all-arm finish for correction.
Build the engine (legs and core) and the arm is asked to do less.
Throwing power is a chain; a weak link forces the others to overwork.
Light med-ball work teaches sequencing safely.
Coach the lower half as seriously as the arm.
Believing arm strength alone equals throwing hard.
Skipping leg and core work entirely.
Standing too tall with no leg drive.
Rotating the shoulders before the hips ('flying open').
alt: How much off-field strength work a 10–12 year old needs is debated. Many experts argue that varied athletic play and bodyweight movement beat formal lifting at this age. Heavy barbell training is not appropriate for this group, keep strength work athletic, light, and movement-focused.
q: Where does the power in a good throw actually start?
The legs and hips, then up through the core
The wrist and fingers
The shoulder and throwing arm, with the legs mostly keeping the player balanced through the finish
The elbow snapping forward
a: Power is generated from the ground up: the legs drive, the hips and trunk rotate in sequence, and the arm delivers energy that was created below. Treating the arm as the source of power is what overloads it.
q: A pitcher throws 'all arm' with little leg drive. Why is that an arm-care problem, not just a mechanics one?
It isn't, arm-only throwing is actually safer
The arm has to create the energy the lower half should have produced, adding stress to the shoulder and elbow
It only makes the ball slower, nothing more
It affects accuracy but never the arm itself
a: When the legs and core don't contribute, the shoulder and elbow absorb forces they were never meant to generate. Over many throws, that extra stress is a leading path to overuse injury, so fixing leg drive is protecting the arm.
title: Plyometric & Weighted-Ball Constraints
blurb: Why velocity programs don't belong with 10–12s.
scap
elbow
lead: Weighted-ball and plyo 'velocity programs' are everywhere online, and for 10–12 year olds they are not recommended for chasing velocity. The research links structured weighted-ball programs to higher injury rates, and young, growing arms are the most vulnerable of all.
systemHead: Overload, underload, and what's actually safe here
system: 'Overload' (heavier balls) and 'underload' (lighter balls) programs are designed to add velocity in older, closely monitored athletes, and even there the evidence shows elevated injury risk. For this age group, the only defensible role for very light plyo work is teaching the body to DECELERATE, to slow the arm down safely after release, using very light implements and low volume, never max-effort throwing for speed.
warn: The evidence on this is one-directional for young arms: structured weighted-ball programs have been associated with higher injury rates, including injuries that show up the FOLLOWING season. For 10–12s, the velocity gains are not worth the risk. When in doubt, leave weighted balls out and ask a sports-medicine professional.
If light plyo balls are used at all: very light, low volume, deceleration focus only.
It is not a velocity program, supervised, capped volume, no radar-gun chasing.
No heavy overload throwing for this age group.
Default to bodyweight, mobility, and band work instead.
Stop immediately at any arm discomfort.
Pain means done for the day and an evaluation, not 'one more.'
Prioritize clean mechanics and rest over 'adding mph.'
Make sure velocity-chasing isn't quietly creeping into practice.
At this age, skip weighted-ball velocity programs entirely.
If any plyo work is used, keep it light and focused on deceleration, not speed.
Growing arms can't safely absorb overload training the way older athletes might.
The fastest way to lose a season is to chase velocity too early.
Copying a high-school or pro overload program for a 10–12 year old.
Using heavy balls to 'build arm strength.'
Chasing radar-gun numbers at practice.
Ignoring that velocity work raises injury risk even when it adds speed.
alt: Some trainers do use very light plyo balls with youth to teach mechanics and deceleration, and argue it's safe in small, supervised doses. Even most of them agree that heavy overload velocity programs don't belong with 10–12 year olds. Reasonable people disagree on the light end of this, but the safe default for a league is to leave it out unless a sports-medicine professional has individualized it.
q: Should a 10–12 year old follow a weighted-ball overload program to add velocity?
Yes, if a coach watches the motion and the player stays under the normal game pitch limit, since that already caps arm workload
Only if he uses the very heaviest balls
No, research links these programs to higher injury risk, especially for growing arms
Yes, as long as he skips the warm-up to save throws
a: Studies of weighted-ball velocity programs show meaningfully higher injury rates (sometimes appearing the next season) and young, developing arms are the most at risk. The small velocity gains do not justify that risk at this age. Build mechanics, strength, and rest instead.
q: If light plyo work is used with this age group at all, what should it focus on?
Maximum-effort overload throws for speed
Beating last week's radar reading
Teaching the arm to decelerate safely, with light implements and low volume
Throwing until the arm gets tired
a: For 10–12s, the only safe role for light plyo work is deceleration, helping the arm slow down under control after release. That means very light implements, low volume, and supervision, with zero focus on chasing velocity.
title: Post-Throwing Recovery & Flush
blurb: Cooling the arm down the right way after an outing.
scap
elbow
lead: What a pitcher does in the 20 minutes after an outing matters. The goal is to bring the arm down gently and get blood moving, not to ice it solid and forget about it.
systemHead: What a 'flush' is
system: A flush is easy, low-intensity activity that promotes blood flow to start the recovery process: a light jog or poles, easy catch, gentle band work, and dynamic movement. Be honest about one debate here: the old advice to ice aggressively has been challenged, and a lot of current thinking favors gentle movement and blood flow, with ice reserved for specific situations. This isn't settled, follow your athletic trainer or doctor.
Easy post-outing flush: light jog or poles, then gentle band work.
Make sure pitchers actually do it instead of just sitting down.
Light, gentle stretching, never aggressive yanking on a tired arm.
Keep static stretching easy; don't force range right after throwing.
Hydrate and refuel soon after the outing.
Recovery starts the same day, not the next morning.
Note where and how much the arm is sore.
Log it, soreness that climbs across outings is a warning sign.
Keep the cooldown light and blood-flow focused.
Gentle dynamic movement beats slumping in the dugout.
Hydration and food are part of recovery.
Track soreness honestly so trends are visible.
Doing nothing, sitting down after the outing and heading straight home.
Aggressively static-stretching a fatigued arm.
Assuming ice alone fixes everything.
Hiding soreness to stay in the rotation.
alt: The 'ice vs. blood flow' question is genuinely unsettled science. Some trainers still ice after heavy outings; others favor active recovery and blood flow. Reasonable, qualified people disagree, defer to your team's medical staff and to how the individual player responds.
q: What's the main goal of a post-throwing 'flush'?
Gentle activity that promotes blood flow and starts the recovery process
Hard running after the outing to keep the arm working and find out how much conditioning the pitcher still needs
Heavy lifting to fatigue the arm further
Nothing, recovery just means sitting still
a: A flush uses easy, low-intensity movement (light jogging, easy catch, gentle band work) to get blood circulating and kick off recovery. It should feel easy and restorative, never like more training.
q: The 'ice vs. blood flow' debate means a coach should…
Make ice mandatory after every outing, regardless of symptoms or clinician advice
Use ice whenever the arm feels sore and return to throwing as soon as the soreness fades
Ban ice and use easy movement for every player, even when a clinician recommends something else
Recognize the science is mixed and follow the athletic trainer or doctor
a: Because the evidence is mixed, there's no one-size answer. The responsible move is to lean on qualified medical guidance and the individual athlete's response, rather than treating any single recovery method as a guaranteed fix.
title: In-Season Workload & Fatigue Tracking
blurb: Counting every pitch across every team, and spotting fatigue.
scap
elbow
lead: The single biggest arm-injury risk factor isn't curveballs or mechanics, it's overuse. Tracking total workload, across EVERY team a player throws for, is the most important arm-care habit there is.
systemHead: The limits and the red flags
system: Little League Regulation VI governs game pitching eligibility and required rest by league age. In Majors, league age 10 is capped at 75 pitches in a day and ages 11-12 at 85, subject to the rule's batter-threshold provisions; a player may pitch in only one game per day and never on three consecutive days. A player who caught four or more innings cannot pitch that day. A pitcher who delivered 41 or more pitches cannot catch that day unless the rule's 40-pitch batter-threshold exception applies. A player who caught three or fewer innings and then pitched 21 or more cannot return to catcher that day unless the 20-pitch batter-threshold exception applies. Pitch Smart also recommends at least four months off throwing each year (two to three continuous) and no more than 80 combined innings pitched in any 12 months at ages 9-12. Count throwing across teams and watch for fatigue: fading accuracy, changed movement, slower pace or pain. Stop for symptoms even below the legal maximum.
Log every pitch, every team, every day.
Keep one combined count across rec + travel ball.
Honor the required rest days fully before pitching again.
Build the schedule around rest, not the other way around.
Speak up the moment the arm feels tired.
Pull a pitcher at fatigue signs, not only when the count maxes out.
Never pitch three days in a row.
Avoid using a pitcher as a catcher; it stacks even more throws on the arm.
Treat the pitch-count limit as a ceiling, not a goal.
Track the combined total across all of a player's teams.
Fatigue signs override the pitch count, pull the pitcher.
Required rest is non-negotiable, even in tournaments.
Counting only one team's pitches and ignoring the others.
Pitching through fatigue or pain because the count is 'still legal.'
Using a tired pitcher just because he's under the limit.
Catching on off days and then pitching, far too many throws.
alt: Some leagues and softball use innings rather than pitches, and tournament formats tempt coaches to stretch limits. When numbers from different systems conflict, the safe default is always the more conservative one, and the reminder that the limit is a maximum, not a target.
q: A 12-year-old throws 45 pitches for his rec team on Saturday. His travel coach wants him to pitch Sunday. What's right?
He's fine: 45 is well under the 85 max
45 pitches requires rest days, and his arm doesn't reset between teams, so he needs the required rest before pitching again
Only if he says he doesn't feel tired
Ignore Saturday's 45 pitches because a different coach is asking him to pitch
a: Under the 11–12 guidelines, 45 pitches in a day requires multiple days of rest before pitching again, and that rest applies no matter which team is asking. The arm has no idea which jersey he's wearing; the combined workload is what counts.
q: Which is a red flag that a pitcher is fatigued and should come out, even if he's under the pitch limit?
He's smiling and chatting between innings
He just struck out the last batter
He asked the dugout for water
Dropping velocity, fading accuracy, a dropped elbow, and longer time between pitches
a: Falling velocity and accuracy, a dropped or 'tired' elbow, an upright trunk, and slower tempo between pitches are classic fatigue signs. These override the count entirely, a fatigued arm is an at-risk arm, so the pitcher comes out regardless of how many pitches are left on the card.
During band external rotations, the player's shoulder keeps shrugging up toward the ear. What does that usually mean? — explanation
The band is too heavy or he's fatigued; lighten the tension and reset clean form. A shrug means the big upper-trap muscle is taking over because the cuff can't handle the load, that's exactly the forward shoulder tracking we're trying to prevent. Lighten the band until the elbow can stay pinned and the movement is clean. With arm care, light and correct always beats heavy.
What is the rotator cuff's main job when a player throws? — explanation
To stabilize the shoulder joint so the bigger muscles can work safely. The cuff is a stabilizer, not a power source. It holds the ball of the shoulder centered in the socket so the large muscles can generate and deliver force without the joint slipping. Train it for control and endurance, not for strength numbers.
There is no universal 'safe maximum distance' for 10–12 long toss. So what's the most reliable rule to follow? — explanation
Build distance gradually and stop at the first sign of fatigue or sloppy mechanics. Since the research doesn't give one safe number for this age, the dependable principle is to progress gradually within comfortable effort and let fatigue and mechanics (not a tape measure) set the limit. The moment accuracy fades or the arc balloons, the session is done.
Why do many programs finish long toss with 'pull-down' throws on a line? — explanation
To groove an efficient, lower-stress release as the player comes back toward pitching distance. Pull-downs bring the throw back to a flatter, on-a-line path that mirrors a real pitch, reinforcing an efficient release. Ending the session this way is about quality of movement, not squeezing out extra max-effort throws on a tired arm.
Where does the power in a good throw actually start? — explanation
The legs and hips, then up through the core. Power is generated from the ground up: the legs drive, the hips and trunk rotate in sequence, and the arm delivers energy that was created below. Treating the arm as the source of power is what overloads it.
A pitcher throws 'all arm' with little leg drive. Why is that an arm-care problem, not just a mechanics one? — explanation
The arm has to create the energy the lower half should have produced, adding stress to the shoulder and elbow. When the legs and core don't contribute, the shoulder and elbow absorb forces they were never meant to generate. Over many throws, that extra stress is a leading path to overuse injury, so fixing leg drive is protecting the arm.
Should a 10–12 year old follow a weighted-ball overload program to add velocity? — explanation
No, research links these programs to higher injury risk, especially for growing arms. Studies of weighted-ball velocity programs show meaningfully higher injury rates (sometimes appearing the next season) and young, developing arms are the most at risk. The small velocity gains do not justify that risk at this age. Build mechanics, strength, and rest instead.
If light plyo work is used with this age group at all, what should it focus on? — explanation
Teaching the arm to decelerate safely, with light implements and low volume. For 10–12s, the only safe role for light plyo work is deceleration, helping the arm slow down under control after release. That means very light implements, low volume, and supervision, with zero focus on chasing velocity.
What's the main goal of a post-throwing 'flush'? — explanation
Gentle activity that promotes blood flow and starts the recovery process. A flush uses easy, low-intensity movement (light jogging, easy catch, gentle band work) to get blood circulating and kick off recovery. It should feel easy and restorative, never like more training.
The 'ice vs. blood flow' debate means a coach should… — explanation
Recognize the science is mixed and follow the athletic trainer or doctor. Because the evidence is mixed, there's no one-size answer. The responsible move is to lean on qualified medical guidance and the individual athlete's response, rather than treating any single recovery method as a guaranteed fix.
A 12-year-old throws 45 pitches for his rec team on Saturday. His travel coach wants him to pitch Sunday. What's right? — explanation
45 pitches requires rest days, and his arm doesn't reset between teams, so he needs the required rest before pitching again. Under the 11–12 guidelines, 45 pitches in a day requires multiple days of rest before pitching again, and that rest applies no matter which team is asking. The arm has no idea which jersey he's wearing; the combined workload is what counts.
Which is a red flag that a pitcher is fatigued and should come out, even if he's under the pitch limit? — explanation
Dropping velocity, fading accuracy, a dropped elbow, and longer time between pitches. Falling velocity and accuracy, a dropped or 'tired' elbow, an upright trunk, and slower tempo between pitches are classic fatigue signs. These override the count entirely, a fatigued arm is an at-risk arm, so the pitcher comes out regardless of how many pitches are left on the card.
Warm-up · About 8 minutes · 1-30 players per group · 1 approved adult · Space: Small safe space (no field)
Goal: Raise body temperature and move every joint before anyone throws or swings.
Setup: Two cones about 20 steps apart. Players in lines of three or four, all facing the same way.
Equipment: 4 cones
Easy-jog phase of the warm-up: spread players out between the cones and keep each trip in one direction. Finish the movement sequence in the steps before throwing. Generated setup illustration; check your field and equipment. Open image for a larger view.
Steps:
Easy jog down and back.
Walking knee hugs and lunges down; jog back.
Side shuffles both directions; carioca if the group is ready.
Arm circles small to big, forward and back.
Two short build-up sprints at about three-quarter speed.
Coaching cues: Tall body, quiet feet. Smooth before fast.
Safety: No throwing until the warm-up is finished. Players with pain sit out and tell an adult.
Easier: Walk the movements and cut the sprints. Harder: Add a reaction start: players sprint on a clap from a ready stance.
Limited space or staff: Indoors: march, knee lifts, gentle in-place side steps and arm circles. No running lanes, sprints or moving lunges; leave room for full arm reach and use a dry, clear floor.
For this division: Add a second sprint and a short skip for height.
Throwing and catching · About 10 minutes · 2-30 players per group · 1 approved adult · Space: Half field or infield
Goal: Warm the arm gradually and throw to a target with a repeatable motion.
Setup: Partners on two parallel lines, every throw going the same direction. Leave a wide gap between pairs.
Equipment: 1 ball per pair, cones or chalk for the two lines
Start with easy, accurate throws to a ready partner. Keep pairs in separate lanes; step back only while throws remain relaxed, then finish closer in. Generated setup illustration; check your field and equipment. Open image for a larger view.
Steps:
Start close with short, easy throws aimed at the partner's chest.
After several easy throws, take a step back and repeat.
Keep backing up only while throws stay accurate and relaxed.
Finish by stepping back in for a few quick, accurate throws.
Coaching cues: Point the glove at the target, then throw. Step toward your partner.
Safety: Everyone throws in the same direction, and nobody walks between lines. Any arm pain stops throwing for that player that day and an adult is told. This is a warm-up, not a distance contest.
Easier: Stay at the first distance and use a softer ball for new catchers. Harder: Add a quick catch-and-release for the last few throws, still at an easy effort.
Limited space or staff: Short of space or adults: one line of pairs along a fence, with one adult watching the whole line.
For this division: Distance can grow toward infield-throw length when accuracy holds; effort stays easy.
Throwing and catching · About 8 minutes · 2-10 players per group · 1 approved adult · Space: Small safe space (no field)
Goal: Catch with two hands and bring the ball to the throwing hand quickly.
Setup: Partners about two steps apart on their knees, then standing; an adult watches the group.
Equipment: 1 soft ball per pair
Left: receive a soft practice baseball toss with the throwing hand nearby. Right: secure the ball and bring it toward the belly before tossing back. Keep pairs well separated. Generated setup illustration; check your field and equipment. Open image for a larger view.
Steps:
Partner tosses underhand to the chest.
Catch with the glove open to the ball and the throwing hand close by.
Pull the ball to the belly button, then toss back.
Move tosses to the glove side and throwing side.
Coaching cue: Two hands, then belly button.
Safety: Soft balls for anyone still learning to catch. Keep pairs far enough apart that a miss cannot hit another group.
Easier: Roll the ball instead of tossing it. Harder: Add a short step and a throw to a target after each catch.
Limited space or staff: Indoors: rehearse an imaginary catch and funnel with empty hands or a glove, no ball or throw. Foam underhand partner tosses are optional only with division approval, clear separated lanes and adult supervision; never substitute hard balls or throw against a wall.
For this division: Use real balls and short-hop tosses once catches are clean.
Hitting and decisions · About 6 minutes · 2-4 players per group · 1 approved adult · Space: Small safe space (no field)
Goal: Repeat a balanced swing that finishes through the ball.
Setup: One tee and a net or fence. One batter swings; everyone else waits behind a marked line well outside the swing area.
Equipment: 1 tee per station, hitting net or safe fence, bucket of balls, batting helmets
One batter holds a bat. Keep the waiting line outside the swing area; stop before loading or collecting. Generated setup illustration; check your field and equipment. Open image for a larger view.
Steps:
Batter sets up the right distance from the tee: bat can reach the ball with a slightly bent arm.
Five swings, then the next player.
Waiting players take turns loading balls only when the adult says the batter is set down.
Rotate: batter, loader, waiting line.
Coaching cues: See the ball on the tee, then swing through it. Finish balanced.
Safety: Only the batter holds a bat. Waiting players stand behind the line. Collect balls only on the adult's call.
Easier: Bigger ball or a lighter bat; fewer swings per turn. Harder: Move the tee for inside and outside pitch locations.
Limited space or staff: No net: hit Wiffle-balls into a fence. Indoors: dry swings with a mirror or partner check.
For this division: Add a job: call the pitch location before each swing.
Hitting and decisions · About 6 minutes · 2-4 players per group · 1 approved adult · Space: Half field or infield
Goal: Time a moving ball and hit it back through the middle.
Setup: An approved adult stands behind the tall panel of an appropriate L-screen, with head and torso protected. Toss underhand through the open area above the low panel toward a helmeted batter, into a net or clear open field.
Equipment: appropriate protective L-screen, bucket of baseballs, net or clear open field, batting helmets
Screened front toss in front of the mound: align the tossing hand toward home plate. Protect the head and torso behind the tall panel and use the open area above the low panel, never the mesh. Keep the bucket behind the screen. One airborne ball is shown; both foul lines follow dirt basepaths. Stop before collecting balls. Generated setup illustration; check your field and equipment. Open image for a larger view.
Steps:
Adult shows the ball, then tosses firmly and underhand.
Batter hits the ball back up the middle.
Five swings per turn, then rotate.
Adult stops tossing while balls are being collected.
Coaching cue: Hit it back where it came from.
Safety: Only an approved adult tosses. Position the screen to protect the head and torso; inspect it before use. One batter holds a bat; waiting players stay behind marked cones outside the swing and batted-ball areas. Stop all tosses and put the bat down before collecting balls. No player stands in front of the net or in the batted-ball area.
Easier: Slow the toss and use a larger or lighter ball. Harder: Mix locations; ask the batter to take tosses that are not strikes.
Limited space or staff: No screen: choose Wiffle-ball front toss and use only its specified light balls, or switch to tee hitting. Never use baseballs for the no-screen variation.
For this division: Vary the toss speed slightly and add a take on bad tosses.
Hitting and decisions · About 6 minutes · 2-4 players per group · 1 approved adult · Space: Half field or infield
Goal: Time an easy underhand toss and make controlled contact with a Wiffle-ball.
Setup: An approved adult kneels beyond the batter's full bat reach, facing one helmeted batter. Use Wiffle-balls only, with no screen. Mark a waiting area behind and away from the swing and batted-ball path; keep the hitting area clear.
Equipment: Wiffle-balls, bat, batting helmets, waiting-area cones, clear open hitting area
Wiffle-balls only. Keep the adult beyond bat reach and waiting players outside swing and batted-ball areas; stop before collecting. Generated setup illustration; check your field and equipment. Open image for a larger view.
Steps:
Adult shows the Wiffle-ball and makes a gentle underhand toss.
Batter makes controlled contact into the clear hitting area.
Five swings per turn; the adult stops tossing before the next player comes in.
Put the bat down before anyone collects balls.
Coaching cues: Easy toss, balanced swing. Wait behind the cones until the adult calls you.
Safety: Wiffle-balls only: do not substitute baseballs or softballs in this no-screen drill. Helmets stay on; only one player holds a bat. The adult stays beyond full bat reach. Keep all waiting players outside swing and batted-ball areas. Wiffle-balls still require spacing and supervision. Stop all swings and tosses before collecting.
Easier: Use slow, predictable tosses and fewer swings. Harder: Vary easy toss locations and ask the batter to take balls outside the target area.
Limited space or staff: If Wiffle-balls or a clear hitting area are unavailable, use tee hitting with its required equipment.
For this division: Keep contact controlled and add a swing-or-take decision. Wiffle-ball hitting is a practice-only drill for every division. Use Wiffle-balls only in this no-screen drill; never substitute baseballs or softballs. This drill does not change league game-ball rules.
Hitting and decisions · About 6 minutes · 2-6 players per group · 1 approved adult · Space: Small safe space (no field)
Goal: Practice plate decisions: what to swing at with no strikes and with two strikes.
Setup: Players in a semicircle with bats set down. The adult holds cards or calls out pitch locations and a count.
Equipment: location cards or a drawn strike zone
Example discussion: call a 1–0 count and show a pitch outside the strike zone; ask each player to choose swing or take and explain why. Repeat with two strikes. Bats stay down; no balls are thrown. Generated setup illustration; check your field and equipment. Open image for a larger view.
Steps:
Adult calls the count, for example "1 and 0".
Adult shows a pitch location.
Each player says "swing" or "take" and why.
Repeat with two strikes and talk about protecting the plate.
Coaching cues: Early in the count, hunt your pitch. Two strikes: protect the plate.
Safety: No bats in hands during the talk. This station needs no thrown or batted balls.
Easier: Only three locations: middle, too high, too low. Harder: Add a game situation: runner on third with one out.
Limited space or staff: Indoors or in the dugout: call counts and pitch locations; players answer swing or take verbally. Keep bats set down and use no thrown or batted balls.
For this division: Add the situation and the runner's job for each call.
Infield · About 7 minutes · 3-6 players per group · 1 approved adult · Space: Half field or infield
Goal: Field a ground ball in front and make a controlled throw to a target.
Setup: An adult rolls or hits ground balls from a safe distance. One fielder at a time; a receiver at a base or a net as the target.
Equipment: bucket of balls, base or target net, gloves
Feed → field → throw to the receiver. Waiting players and rotation stay outside the active lane; rotate after the ball is dead. Generated setup illustration; check your field and equipment. Open image for a larger view.
Steps:
Fielder starts in a ready stance.
Adult rolls or hits a ground ball.
Fielder moves to the ball, fields it out in front and steps to throw.
Throw to the receiver; rotate fielder to receiver to line.
Coaching cues: Glove down early. Feet to the target, then throw.
Safety: One ball in play at a time. The waiting line stands to the side, out of the throwing lane.
Easier: Roll slowly straight at the fielder. Harder: Add balls to the backhand and forehand sides.
Limited space or staff: Small space: short rolls and underhand tosses to a partner instead of a base throw.
For this division: Mix hit ground balls and add a force throw to the correct base.
Infield · About 7 minutes · 4-8 players per group · 1 approved adult · Space: Half field or infield
Goal: Know which base has the force and make a firm, catchable feed to the player covering it.
Setup: Infielders at their positions with one base marked as the force. An adult calls the situation and rolls the ball.
Equipment: bases, bucket of balls, gloves
Example: runner on first, one out; the force is at second. Rehearse the shortstop’s short underhand flip and the second baseman’s cover without a runner until the feeds are controlled. Generated setup illustration; check your field and equipment. Open image for a larger view.
Steps:
Adult calls the runners and outs.
Players say where the play is before the ball moves.
Adult rolls a ground ball; the fielder feeds the covering player.
The cover player catches with a foot on the base.
Coaching cues: Know the play before the pitch. Feed to the chest.
Safety: Covering players stay on their side of the base; no runner is used until the feeds are safe and controlled.
Easier: Walk through with no ball, then use rolls. Harder: Add a runner who starts on the adult's signal.
Limited space or staff: Short on space: a single base and two players at a time.
For this division: Add a turn at second where the division's defense lesson covers it.
Outfield and relays · About 7 minutes · 3-6 players per group · 1 approved adult · Space: Full field
Goal: Call the ball early, give way by priority, and back up the catch.
Setup: Two or three players in a line of positions. An adult throws or hits high balls between them from a safe distance.
Equipment: tennis or soft balls for younger players, baseballs for older players, gloves
Name the positions and priority before each rep. One player calls for the ball; the other answers, gives way and backs up. Start with soft practice baseballs and stop if two players converge. Generated setup illustration; check your field and equipment. Open image for a larger view.
Steps:
Adult names the positions and their priority.
Adult throws a ball between two players.
The player with priority calls loudly; the other answers and moves to back up.
Rotate positions after each catch.
Coaching cues: Call it loud and early. The other player backs up.
Safety: Start with soft balls. Players never run full speed toward each other without a call; the adult stops the rep if two players converge.
Easier: Short, softly thrown balls with one player at a time. Harder: Add the sun, a wind side or a third fielder.
Limited space or staff: Limited space: short pop-ups with tennis balls in a small area, two players at a time.
For this division: Baseballs and longer throws; add the infielder going back.
Outfield and relays · About 7 minutes · 3-6 players per group · 1 approved adult · Space: Full field
Goal: Move the ball quickly and accurately through a relay player.
Setup: Lines of three players spread along a straight lane: outfielder, relay, receiver at a base. Lanes far apart.
Equipment: 1 ball per lane, cones for lanes
Outfielder → relay → receiver. Keep lanes separate and stop throws before players change positions. Generated setup illustration; check your field and equipment. Open image for a larger view.
Steps:
Outfielder throws to the relay player's glove side.
Relay turns to the glove side and throws to the receiver.
Receiver catches and tags the base.
Rotate positions every few throws.
Coaching cues: Relay: hands up, turn glove side. Hit the chest.
Safety: Lanes run parallel with nobody crossing them. Short distances first; stop for arm pain.
Easier: Shorten the lane and roll the ball in. Harder: Add a timer target the group tries to beat with accurate throws.
Limited space or staff: Tight space: shorter lanes with underhand tosses.
For this division: Full relay alignment toward the base the lesson names.
Baserunning · About 6 minutes · 3-14 players per group · 1 approved adult · Space: Half field or infield
Goal: Run hard from the batter's box through first base and look for the ball.
Setup: Home plate and first base. Players take turns from the batter's box after a dry swing.
Equipment: bases, cones
Shown: touch first while running away from home. Keep running through the bag, then slow down beyond it and return outside the running lane. One runner at a time. Generated setup illustration; check your field and equipment. Open image for a larger view.
Steps:
Dry swing, drop the bat safely (no throwing it).
Run hard, touch the front of the base and run through.
Break down after the base and look toward the infield and the coach.
Walk back along the outside of the line.
Coaching cues: Run through, not to, the base. Look for the coach.
Safety: One runner at a time. Runners return outside the base line. Helmets on for running if your rules require it.
Easier: Start from a standing position without a swing. Harder: The adult calls "round it" or "stay" as the runner approaches.
Limited space or staff: No field: straight-line sprints to a cone, practicing the run-through and look.
For this division: Add the turn toward second on a ball in the outfield.
Baserunning · About 6 minutes · 3-10 players per group · 1 approved adult · Space: Half field or infield
Goal: Leave the base at the moment this division allows, then read the ball.
Setup: Runners at first base. An adult acts as the pitcher and a second player as the batter with no bat.
Equipment: bases
Paused setup before the simulated pitch; this picture does not show when to leave. Read this division’s Base Running lesson, then practice its permitted departure timing. No ball or bat is used. Generated setup illustration; check your field and equipment. Open image for a larger view.
Steps:
Read Lesson 6 (Base Running) for this division's leaving-the-base rule first.
The adult simulates a pitch.
Runners leave only when the division rule allows.
The adult calls "ground ball", "line drive" or "fly ball"; runners react.
Coaching cues: Know when you may leave. Line drive: freeze.
Safety: No thrown ball is needed. Space runners so they do not collide on the base.
Easier: Walk-through with the adult naming each step. Harder: Add the coach's signs from the Team Offense lesson.
Limited space or staff: Any open area with a marked base works.
For this division: Add secondary movement where the division's base-running lesson allows it.
Baserunning · About 6 minutes · 3-10 players per group · 2 approved adults · Space: Full field
Goal: Decide when to tag up and when to go halfway on a fly ball.
Setup: Runners at third (or second). An adult throws a fly ball to an outfielder; another adult acts as the base coach.
Equipment: bases, soft balls for younger players
Deep-fly example with fewer than two outs: stay in contact with the base while watching the catch. Leave on the catch when the base coach says go; the shallow-fly read is different. Generated setup illustration; check your field and equipment. Open image for a larger view.
Steps:
Runner stands on the base with the outs called.
On a deep fly with fewer than two outs, tag and watch the catch.
Leave on the catch when the base coach says go.
On a shallow fly, go partway and return if it is caught.
Coaching cues: Fewer than two outs: tag on the deep fly. Leave on the catch.
Safety: Runners slide only as taught in the lesson and only where the adult has checked the base area.
Easier: The adult calls "tag" or "halfway" before the throw. Harder: Add a throw home and a decision to stop.
Limited space or staff: Limited space: runners react to called flies with no ball thrown.
For this division: Add the shallow fly and the two-out case.
Catcher footwork · About 7 minutes · 1-4 players per group · 1 approved adult · Space: Small safe space (no field)
Goal: Hold a balanced stance, catch the ball quietly, and block balls in the dirt.
Setup: Catchers in full gear, spaced apart. An adult tosses soft balls from a short distance.
Equipment: full catcher's gear, soft or foam balls for blocking
Left: balanced stance and a quiet receiving target. Right: knees down, glove low, chest over the soft ball to keep it in front. Full gear for tossed balls; use short sets and soft balls for blocking. Generated setup illustration; check your field and equipment. Open image for a larger view.
Steps:
Stance: feet wide, weight balanced, glove out front.
Adult tosses to the glove; catcher receives quietly.
Adult bounces a soft ball in front; catcher drops to the knees and keeps the ball in front.
Rotate after five reps.
Coaching cues: Quiet glove. Chest over the ball.
Safety: Full gear for any ball thrown at a catcher. Blocking reps use soft balls and short sets.
Easier: Only stance and receiving; no blocking. Harder: Add a transfer and a throwing footwork step (no long throw).
Limited space or staff: Indoors or without gear: stance, imaginary receiving and slow footwork only, no ball, throw or blocking drop. Keep players apart on a dry, clear floor. Full gear is required before any ball is thrown at a catcher.
For this division: Add the quick transfer and a throw-down footwork pattern without a full-effort throw.
Team situations · About 7 minutes · 4-8 players per group · 1 approved adult · Space: Half field or infield
Goal: Run the runner back toward the last base with as few throws as possible.
Setup: Two bases, a fielder at each, and a runner between them. Start at walking speed.
Equipment: bases, soft ball for the first reps
Home-to-third example, walking rehearsal: guide the runner back toward third, then throw only on the partner’s call. Begin with a soft ball; tags are gentle and below the shoulders. Check base distances for your division. Generated setup illustration; check your field and equipment. Open image for a larger view.
Steps:
Fielder with the ball runs at the runner with the ball held up.
Throw only when the partner calls "now".
Tag the runner with the ball in the glove.
Rotate runner to fielder.
Coaching cues: Ball up, run hard at the runner. Throw on "now".
Safety: Tags are gentle, below the shoulders. Start walking; build speed only when throws are controlled.
Easier: Walk-through with no ball. Harder: Add a second runner and a backup fielder.
Limited space or staff: Small space: shorten the distance between bases.
For this division: Full speed once the walk-through is clean.
Team situations · About 15 minutes · 6-30 players per group · 1 approved adult · Space: Full field
Goal: Everyone makes the right decision for the called situation: where the ball goes and who covers.
Setup: A defense in the field and a group of runners. An adult calls the runners and outs, then hits or rolls the ball.
Equipment: bases, bucket of balls, batting helmets for runners
Paused example: runner on first, one out. Name the play and who covers before the coach rolls one ball. Walk through first, then rotate positions after discussing one improvement. Generated setup illustration; check your field and equipment. Open image for a larger view.
Steps:
Adult calls the situation, for example "runner on first, one out".
Every fielder says where the play is.
Adult puts the ball in play; players make the play.
Short talk: what went right, one fix. Rotate positions.
Coaching cues: Know the play before the pitch. Talk to each other.
Safety: One ball in play at a time. Runners wear helmets. The adult hits from a spot where no fielder is in front of a batted ball they cannot see.
Easier: Walk-through first, then rolled balls. Harder: Add the base coaches and a second runner.
Limited space or staff: Short on space or adults: walk-through the same situations with no ball.
For this division: Hit balls and full base-running reads.
Throwing and catching · About 6 minutes · 1-6 players per group · 1 approved adult · Space: Small safe space (no field)
Goal: Practice balance and direction toward the target with no throwing load.
Setup: Players on a line facing a target, a towel or no object in hand.
Equipment: small towel per player (optional)
Right-handed example, no ball: left frame holds balance on the right leg; right frame strides onto the left leg toward the target and finishes over it. Left-handed players reverse the sides. Move slowly with adult feedback. Generated setup illustration; check your field and equipment. Open image for a larger view.
Steps:
Balance position, hold for a count of two.
Stride toward the target and finish over the front leg.
Repeat slowly; the adult checks direction.
Talk about one change for next time.
Coaching cue: Balance, then go to the target.
Safety: No ball is thrown, so no pitch count starts. Live pitching practice needs an adult tracking throws and the player's recent game pitches; game limits are not practice targets.
Easier: Balance only. Harder: Add the arm path slowly with the towel.
Limited space or staff: Indoors: balance and step slowly with empty hands, no ball or towel. Keep enough space for full arm reach, use a dry, clear floor and stop for pain.
For this division: Add the full motion slowly with the towel.
Team situations · About 5 minutes · 1-30 players per group · 1 approved adult · Space: Small safe space (no field)
Goal: Name one thing each player improved and one thing to practice at home.
Setup: Players seated in a circle with water.
One win and one next step: let each player name an improvement, then agree on the team’s next goal. Remind players to report pain or injury and confirm approved pickup before dismissing them. Generated setup illustration; check your field and equipment. Open image for a larger view.
Steps:
Each player names one thing that went well.
Coach names one team goal for next time.
Remind players to tell an adult about any pain or injury.
Collect equipment together.
Coaching cue: One win, one next step.
Safety: Confirm every player is picked up by an approved adult per league policy.
Easier: Coach asks yes-or-no questions. Harder: Players ask each other the question.
Limited space or staff: Indoors: sit or stand in a clear circle, share one win and one next step, and confirm approved pickup. Keep bats and balls set down.
For this division: Link the goal to the next lesson in the dugout.
Complete Rules and sources
01
Pitching and rest
Limits, recovery and pitcher eligibility.+
Regulation VI
Pitch Count Compliance & Rest Thresholds
In Majors, the manager (not the scorekeeper, not the umpire) is responsible for removing a pitcher who is no longer eligible.
Little League pitch limits and rest are governed by Regulation VI and are tied to a pitcher’s league age, not the division. A league-age-10 pitcher in Majors uses the 75-pitch cap; league age 11–12 uses 85. Required calendar days of rest scale with pitches thrown that day: 51–65 pitches requires three full calendar days, so a Saturday 52-pitch outing means Sunday through Tuesday off and Wednesday is the earliest next pitching day. No pitcher may ever pitch on three consecutive days. The figures below are quoted from the 2026 rule: confirm them against your current rulebook before relying on them.
Actionable Management Takeaways
Oversight Checklists
Track every pitcher’s count yourself; cross-check the official recorder each half-inning.
You can state every pitcher’s exact count on request.
Plan the week backward from rest days before you set a rotation.
Each pitcher’s next eligible date is mapped on a calendar.
Know the mid-batter exception: a pitcher at the limit may finish that batter.
You know the four conditions that end the at-bat.
Check every Regulation VI catcher/pitcher crossover before either role change: 4+ caught innings bars pitching; 41+ pitches bars catching unless the 40-pitch batter-threshold exception applies; after 3 or fewer caught innings, 21+ pitches bars a return to catcher unless the 20-pitch exception applies. A Majors player pitches in only one game per day.
The adult logs both catcher innings and pitch counts, including applicable batter-threshold exceptions.
In Majors, no pitcher appears in more than one game per day.
Doubleheader plans respect the one-game rule.
Coaching points
Daily maximums by league age: 9–10 = 75; 11–12 = 85 pitches per day (Regulation VI(c)).
Rest is measured in calendar days, not games: map it on a real calendar.
The count for the rest threshold is set by the first pitch to a batter; you may not start a new batter once the daily limit is reached.
Common mistakes
Letting the scorekeeper ‘own’ the count: the rule places responsibility on the manager.
Confusing league age with calendar age and using the wrong cap.
Forgetting the 3-consecutive-days ban even when each day’s count was tiny.
Ignoring outside workload (travel/showcase) that stacks on the same young arm.
Other ways to see it
Limits are ceilings, not targets: a 12-year-old throwing 85 every outing is at higher cumulative risk than one averaging 50, even though both are ‘legal.’ USA Baseball Pitch Smart treats these as maximums; many coaches set stricter internal caps.
Local leagues may go stricter, never more lenient: your league or district can adopt lower limits or extra rest. Check your local rules: the number you must obey may be tighter than the national figure.
Pain trumps the chart: a pitcher under the limit who reports arm pain or velocity loss should still come out. The count is a floor of protection, not proof an arm is fine.
02
Lineups and participation
Roster placement, batting order and defensive rotation.+
Playing Time
Inning-by-Inning Defensive Rotations
Mandatory play isn’t a hurdle to clear at the end of the game: it’s a plan you bring with you, written before the first pitch.
For a regular-season SLVLL Majors game, use the local continuous batting order: every present eligible player bats in a fixed spot even while off the field. SLVLL and Regulation IV(i) require at least six defensive outs; plan them for every player. Rule 3.03 traditional-order re-entry conditions matter when a different event uses that format, not as the explanation for SLVLL’s batting order. The International Tournament also uses continuous batting order but does not carry the regular-season defensive minimum. Rotate players for development as well as compliance.
Actionable Management Takeaways
Oversight Checklists
Pre-write a defensive chart for all 6 innings before the game.
Every present player is slotted to meet minimum play.
Get bench players their 6 defensive outs early, not in a frantic 6th inning.
No player is ‘discovered’ short in the last inning.
Balance development: rotate kids through infield and outfield over the season.
No player is parked in right field every game.
Never create a safety mismatch (e.g., an unready player at a hot corner).
Each defensive slot matches the player’s readiness.
Put every present eligible player in SLVLL’s continuous batting order.
No player off the field is omitted from the batting order.
Coaching points
Chart it first. Compliance is trivial when planned and stressful when improvised.
Get reserves in early: a kid who plays innings 1–2 has met defensive minimums with margin to spare.
Develop the whole roster; today’s right-fielder is next year’s shortstop if you give reps.
Match position to readiness for safety, then stretch players in lower-leverage moments.
Common mistakes
Putting the 12th player in for only the last half-inning: that’s often just 3 outs, short of the six-out minimum.
Hiding weaker fielders and over-playing your best: legal exposure and bad development.
Assuming a shortened game has the same compliance remedy as a completed game: consult Regulation IV(i) and the applicable game format.
Assuming the umpire tracks playing time: that responsibility sits with the manager.
Other ways to see it
Different rules, different scope: SLVLL regular-season Majors uses continuous batting order and six defensive outs. If another regular-season event uses a traditional order, Rule 3.03 starter re-entry requires the substitute’s six consecutive defensive outs and defined at-bat. Consult Regulation IV(i) for mandatory-play exceptions.
Development beyond compliance: spread safe opportunities across the roster rather than treating the minimum as a development target.
International Tournament, Major Division: Tournament Rule 9 requires continuous batting order, with defensive entry/re-entry allowed; this replaces Regulation IV(i) and Rule 3.03. A Majors pitcher removed from the mound may not return as pitcher. Do not apply the regular-season defensive minimum described above to this tournament format.
03
Game and event rules
Check which rules govern your game.+
Game Day
Game Day Dugout Management & Lineup Cards
A calm, organized dugout is a competitive advantage: the team that knows who bats next and where the helmets are plays faster and cleaner.
Game-day management is logistics plus discipline: SLVLL’s continuous batting order, legal defensive changes, an honest scorebook, and a dugout where players are engaged but safe. Bring two copies of the lineup, declare substitutions properly, and assign safe dugout jobs (next-hitter preparation, helmets, equipment) so the bench runs itself.
Actionable Management Takeaways
Oversight Checklists
Bring two legible lineup copies; exchange with the opponent and scorekeeper.
Official scorekeeper and umpire have your card pre-game.
Know SLVLL defensive changes and the event’s lineup rules before you need them.
You can explain the applicable lineup format and defensive changes.
Keep (or assign) an accurate scorebook including pitch counts.
Book matches the official record each half-inning.
Assign safe dugout jobs: next-hitter mental preparation, helmets, and gate. There is no on-deck position in Majors.
Every player has a role; bench stays orderly.
Brief players on dugout safety (helmets to retrieve bats, stay behind the fence).
No loose bats; no one in the field of play.
Coaching points
Two lineup cards: one for you, one to hand in. A lost-card scramble is avoidable.
Pre-load your substitution knowledge: mid-game is the worst time to learn re-entry rules.
A clean scorebook is your defense if a pitch-count or batting-order question arises.
Give every benched player a job; engaged kids stay safe and stay in the game mentally.
Common mistakes
Illegible or single-copy lineup cards that trigger confusion at the plate meeting.
Improvising substitutions and accidentally making a re-entry illegal.
An incomplete scorebook that can’t answer a pitch-count challenge.
A rowdy dugout with loose bats: a safety hazard and a discipline signal to the umpire.
Other ways to see it
Regular season versus International Tournament: SLVLL regular-season Majors uses continuous batting order and six defensive outs. In the Major Division International Tournament, Rule 9 also requires continuous batting order and permits defensive entry/re-entry without a defensive-out minimum, but a pitcher removed from the mound may not return as pitcher. Do not substitute a generic tournament assumption for this national rule.
Bench preparation: under Rule 1.08, the next batter stays in the dugout, ready with a helmet, without picking up a bat until their turn at bat; fenced-in areas are not on-deck areas. Only the first batter of a half-inning may be outside the dugout between half-innings.
Who keeps the book: managers may delegate scorekeeping while retaining responsibility for accurate pitch counts and legal substitutions.
Adversity
Managing In-Game Chaos & Broken Scenarios
Players take their emotional temperature from the manager: in a rain delay, a blown call, or an injury, your calm is the plan.
Things break: weather rolls in, a call goes against you, a player gets hurt, or your defense needs an emergency shuffle. Each has a sane protocol. Keep players safe and occupied during delays, address umpires through process rather than emotion, follow injury steps deliberately, and have a pre-thought plan for losing a pitcher or fielder mid-game. The throughline is composure.
Actionable Management Takeaways
Oversight Checklists
Lightning: stop play and move everyone into a substantial building with wiring and plumbing, or a hard-topped metal vehicle with closed windows. Dugouts are not safe. Wait at least 30 minutes after the last thunder before resuming, following the site plan.
Account for every player in safe shelter and track the last thunder before a restart.
Umpires: ask calmly for a rule/clarification through proper channels, not judgment-call arguments.
You request clarification, not a re-litigation of a judgment call.
Suspected concussion or other head injury: remove the player immediately for the rest of the day, notify the parent or guardian, and require written clearance from a licensed healthcare provider before any return. If the provider confirms a concussion or other head injury, follow the provider-supervised return-to-play protocol for at least seven days. The coach does not clear the player.
Emergency alignment: have a ‘next pitcher / next fielder’ plan ready.
A backup pitching/defense plan exists before you need it.
Model composure; one steady voice resets a rattled dugout.
Your tone stayed calm and the bench followed.
Coaching points
Lightning/weather: use a substantial building or hard-topped vehicle, never the dugout. The National Weather Service advises waiting at least 30 minutes after the last thunder.
Disagree with umpires through process: you may ask for a rule clarification, calmly and at the right moment.
For a suspected concussion or head injury, remove the player for the rest of the day; return requires written clearance from a licensed healthcare provider. Stop throwing for arm pain and arrange appropriate evaluation.
Pre-decide your next-pitcher and emergency-defense options so a mid-game loss isn’t a panic.
Common mistakes
Keeping players in any dugout, bleachers or open field during lightning to ‘wait it out.’
Arguing balls/strikes or other judgment calls: it won’t change and it models poor behavior.
Pressuring a shaken or hurt player back into the game.
No contingency, so losing your starter to the pitch limit becomes a scramble.
Other ways to see it
Clarification vs. judgment: managers can generally request that an umpire clarify or correctly apply a rule (e.g., batting out of order, an eligibility question), but judgment calls (safe/out, balls/strikes) are not reviewable and won’t be changed. The exact conferencing process varies by league: learn your local norms and stay respectful either way.
How hard to compete in adversity: there’s a real tension between teaching toughness (‘play through it’) and protecting kids (‘sit when in doubt’). For weather and injuries, default hard toward safety; the ‘compete’ lesson is never worth a hurt child.
Resumption & pitcher eligibility: in suspended games resumed another day, a pitcher’s eligibility still depends on required rest: a pitcher who threw heavily may not be eligible when play resumes. Don’t assume your starter can simply pick up where they left off; verify against Regulation VI.
04
Safety at practice
Weather, head injuries, throwing and supervision.+
Coaching practice
Before practice: the site and the plan
Know the field address and where an ambulance would enter. Carry a charged phone.
Bring a first-aid kit and know where the nearest AED is, if the site has one.
Decide who calls 911 and who meets responders before anyone gets hurt.
Keep emergency contacts where your league keeps them. This planner has no place for names, medical details or phone numbers, and none should be typed into it.
Safety guidance
Weather and heat
Thunder or lightning: stop, and move everyone into a substantial building or a hard-topped vehicle with the windows closed. A dugout is not shelter.
Wait at least 30 minutes after the last thunder before going back out (National Weather Service guidance), and follow your site plan.
Heat: plan water breaks and shade. Stop a player who looks dizzy, confused or unusually tired and get help.
California law and CDC guidance
Head injury, fainting and emergencies
California Health and Safety Code 124235 applies to youth sports organizations in California: a player suspected of a concussion or other head injury, or who passes out or faints, is removed from the activity for the rest of the day.
That player does not return until a licensed healthcare provider gives written clearance. After a concussion or head injury, return follows a graduated protocol of at least seven days under that provider. The coach never clears a player.
For a suspected head injury the organization notifies a parent or guardian of the time, the symptoms seen and any treatment given.
Call 911 for anyone who is unresponsive, not breathing normally, or having a seizure. Start CPR and use an AED if trained and one is available.
Coaching advice: stop activity for chest pain, unusual shortness of breath or a racing heartbeat during exercise, and tell the parent or guardian.
Coaching practice
Arms and throwing
Any arm pain stops throwing for that player that day. Tell a parent or guardian.
Game pitch limits are maximums for games, not targets for practice. A practice plan never counts as pitching eligibility.
Breaks between throwing blocks are part of the plan. Do not shorten warm-up or throw more to fill time.
Coaching practice
Lanes, bats and loose balls
Every throwing line throws the same direction; nobody walks between lines.
Only the batter holds a bat. Waiting players stand behind a marked line.
Balls are collected on an adult's call, never while someone is swinging or throwing. Players do not chase balls into another station.
Helmets for batters and runners, and any other equipment your rules require.
League policy
Adults at practice
Drill adult counts are station minimums. Follow the organization's supervision, screening and reporting policies. California youth-service policy requires at least two mandated reporters to be present to the greatest extent possible when adults contact or supervise children (BPC 18975).
Only league-approved adults who have completed the required screening and training lead stations.
Keep adult-player interactions observable and interruptible: no one-on-one time out of sight.
If there are not enough approved adults for every station, run fewer stations. Never leave a station with bats or thrown balls unsupervised to make the numbers work.
05
Coaching situations
Practical examples for planning and managing the game.+
Practice Design
The 90-Minute Practice Machine
The enemy of player development isn’t a lack of talent: it’s a line of kids standing around waiting for a turn.
A high-efficiency Majors practice is built from short, parallel stations rather than one whole-team drill at a time. Time-block the session before you arrive, assign each league-approved, screened helper a visible station with a clear job, and rotate small groups on a timer so reps-per-player stay high. The goal is regular turns for every player, with water breaks and ball collection planned in, not constant throwing.
Actionable Management Takeaways
Oversight Checklists
Write a minute-by-minute plan and physically bring it to the field.
Plan exists in writing before warm-ups start.
Run 3–4 stations of 4–5 players; rotate every ~12 minutes on a whistle.
Each station has ≤5 players and a defined drill.
Give each league-approved helper one observable station and a brief safety script.
Required screening and training are complete; interactions stay observable and interruptible.
Give waiting players supervised jobs outside swing and batted-ball lanes, such as calling pitch locations or checking a cue. Load or collect balls only after swings and feeds have stopped, the bat is down, and the adult gives the signal.
Every station gives each player regular turns, with planned water breaks and ball collection on an adult’s call.
Close with a team conditioning game tied to one teaching point.
Practice ends on time with a clear takeaway.
Coaching points
Time-block on paper; a written plan is the single biggest driver of practice quality.
Stations beat lines: four kids hitting off tees beats twelve kids watching one live BP hitter.
Coach one cue per drill. ‘Throw to the glove side’ lands; five corrections at once do not.
Use only league-approved helpers who have completed required screening and training. Keep every station observable and interruptible by another adult.
Common mistakes
Whole-team drills where 11 kids watch 1: the classic rep-killer.
No timer, so the first station eats 35 minutes and you never reach baserunning.
Over-coaching: stopping every rep to correct erases the volume kids need.
Ending late and losing the field: respect the next team’s slot.
Other ways to see it
Stations vs. team reps: stations maximize volume, but some game situations (cutoffs, first-and-third defense) genuinely need the whole team on the field at once. Budget one team segment per practice rather than choosing one philosophy for everything.
Fewer helpers, simpler plan: if you can’t reliably staff 4 stations, 2 well-run stations beat 4 chaotic ones. Match the plan to the adults you actually have, not the ones you wish you had.
Warm-Up
The 60-Minute Pre-Game Warmup Clock
A repeatable warm-up does two jobs at once: it gets arms and bodies ready, and it settles nervous players into a familiar routine.
Treat the hour before first pitch as a countdown with named segments so nothing gets skipped and the starting pitcher peaks on time. The sequence moves from setup and dynamic stretching, through a throwing progression and long toss, into infield/outfield reps, the starter’s bullpen, and a final team huddle. Adjust the clock to your field time, but keep the order.
Starter finishes warm with time to spare, not rushed.
5–0 min: team huddle, lineup confirmed, energy and focus up.
Team takes the field on time and on the same page.
Coaching points
Build the arm gradually: warm muscles and a throwing progression before any hard throws.
Time the bullpen so the starter finishes a few minutes before first pitch, not at it.
Make the routine identical every game; familiarity calms nerves more than a pep talk.
Use the huddle to set one focus (‘first-pitch strikes’ / ‘run hard to first’), not a long speech.
Common mistakes
Skipping the dynamic warm-up and going straight to throwing: an injury setup.
A bullpen that ends right at first pitch, leaving the starter rushed or cooling off.
No I/O reps, so the first live ground ball of the day happens in the 1st inning.
A new routine every week, so players never internalize it.
Other ways to see it
Compressed field time: if you only get 30 minutes before first pitch, you can’t run the full hour. Prioritize the throwing progression and the starter’s bullpen, and move I/O reps into the previous practice rather than cramming.
Long toss for young arms: long toss is valuable but should be progressive and capped; an over-aggressive max-distance session pre-game can leave a starter’s arm taxed before the first pitch. Keep it controlled.
Static vs. dynamic stretching: current guidance favors dynamic movement pre-game over long static holds; save deeper static stretching for cool-down. Some coaches still mix in light static work: keep it brief if so.
Sources and review date+
Check the current official rules and written local options for your game. Coaching suggestions are teaching choices.